 Another happy Monday and another day of Redcat's 30 days of deals. Today only, you can get a Redcat 1964 Impala Hopping Lowrider for only $374.99
Use code DD240617 at checkout Get your Impala lowrider here >  Today only, you can get a Redcat Blackout SC Pro (red color) brushless RTR short course truck for only $202.49
Use discount code DD240616 at checkout Get your Blackout SC Pro here >  We're half way through Redcat's 30 days of deals and today's deal is the Redcat RDS Builders Kit. Today only, you can get an RDS Builders Kit for only $149.99
Use code DD240615 at checkout Get your RDS Builders Kit here >  It's Friday and day 14 of Redcat's 30 days of deals. Today only, you can get a Redcat Custom Hauler COE 1953 Chevrolet (red color) for only $412.49
Use discount code DD240614 at checkout Get your Custom Hauler here >  Lucky day 13 has arrived and that means today only you can get a Redcat Marksman for only $299.99
Use discount code DD240613 Get your Marksman here >  Day 12 of Redcat's 30 Days of Deals has arrived and today's deal is the 1959 Impala Hopping Lowrider (blue color). Today only, you can get a '59 Impala for only $419.99
Get your '59 Impala here >  Today is day 11 of Redcat's 30 days of deals and that means we have another promo code for you. Today only, you can get a Volcano EPX for only $134.95
Use coupon code DD240611 at checkout Get your Volcano EPX here >  Happy Monday! It's day 10 of Redcat's 30 days of deals and today's deal is the Redcat Gen9 Crawler (silver color) for only $269.99
Use coupon code DD240610 at checkout Get your Gen9 here >  It's day 9 of Redcat's 30 days of deals and that means there's a new promo code for you. Today's deal is the Redcat Blackout SC (Blue color) for only $134.95
Use discount code DD240609 at checkout Get your Blackout SC here >  It's the weekend and the deals keep on coming! Today only, you can get a Redcat Wendigo for only $299.99
Use coupon code DD240608 at checkout Get your Wendigo here >  Happy Friday! It's day 7 of Redcat's 30 days of deals and today only you can get yourself a green Redcat Monte Carlo for only $284.99
Use discount code DD240607 at checkout Get your Monte Carlo here >  It's June 6th and you know what that means...day 6 of Redcat's 30 days of deals. Today only, you can get a Redcat Gen7 Pro for only $217.49
Use coupon code DD240606 Get your Gen7 Pro here >  Day 5 of Redcat's 30 days of deals has arrived and that means a new one day deal! Today only, you can get a Redcat Kaiju for only $322.49
Use coupon code DD240605 Get your Kaiju here >  It's June 4th and you know what that means...day 4 of Redcat's 30 days of deals. Today only, you can get a Purple Redcat Gen8 for only $247.49
Use coupon code DD240604 Get your Gen8 here >  It's day 3 of Redcat's 30 Days of Deals and today's vehicle is the Piranha! Today only, you can grab yourself a Redcat Piranha for only $97.45!
Use discount code DD240603 Get your Piranha here >  It's day 2 of the 30 days of deals! Today only, you can pick up a Redcat RDS Competition Spec Drift Car (Orange Color Only) for only $299.99
Use coupon code DD240602 at checkout Get your RDS here >  Redcat's 30 days of deals is back! Today only, you can pick up a Blue Redcat COE Custom Hauler for only $412.49!
Use coupon code DD240601 at checkout Get your COE here > 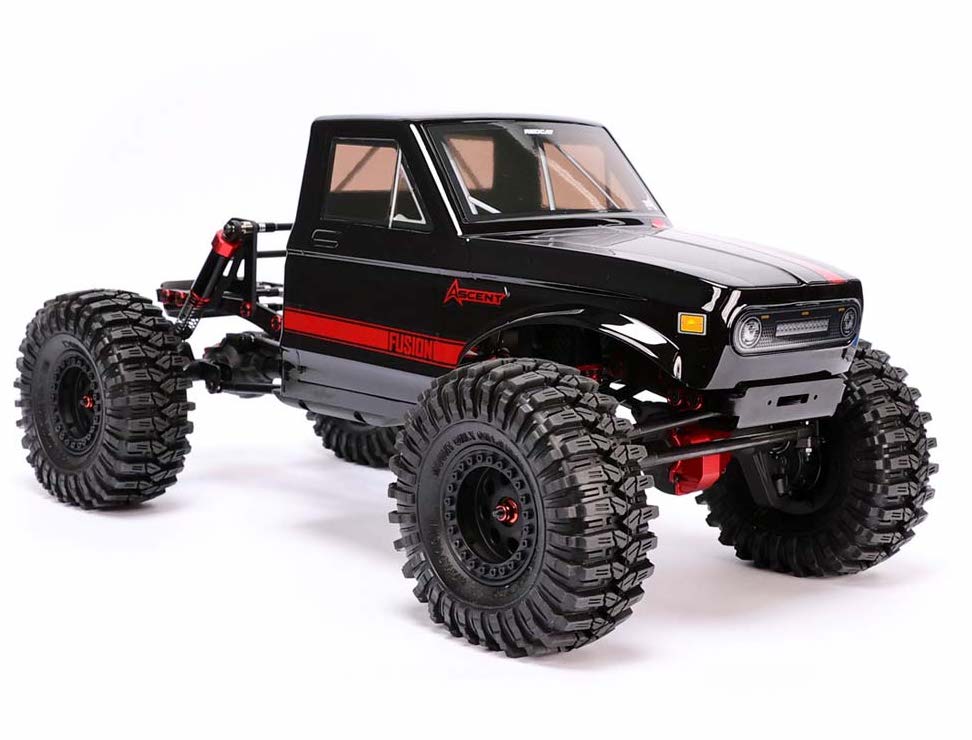 Redcat just dropped the new Ascent Fusion today and it looks amazing!
Just some of the specs include:
Check out the Ascent Fusion specs and price here 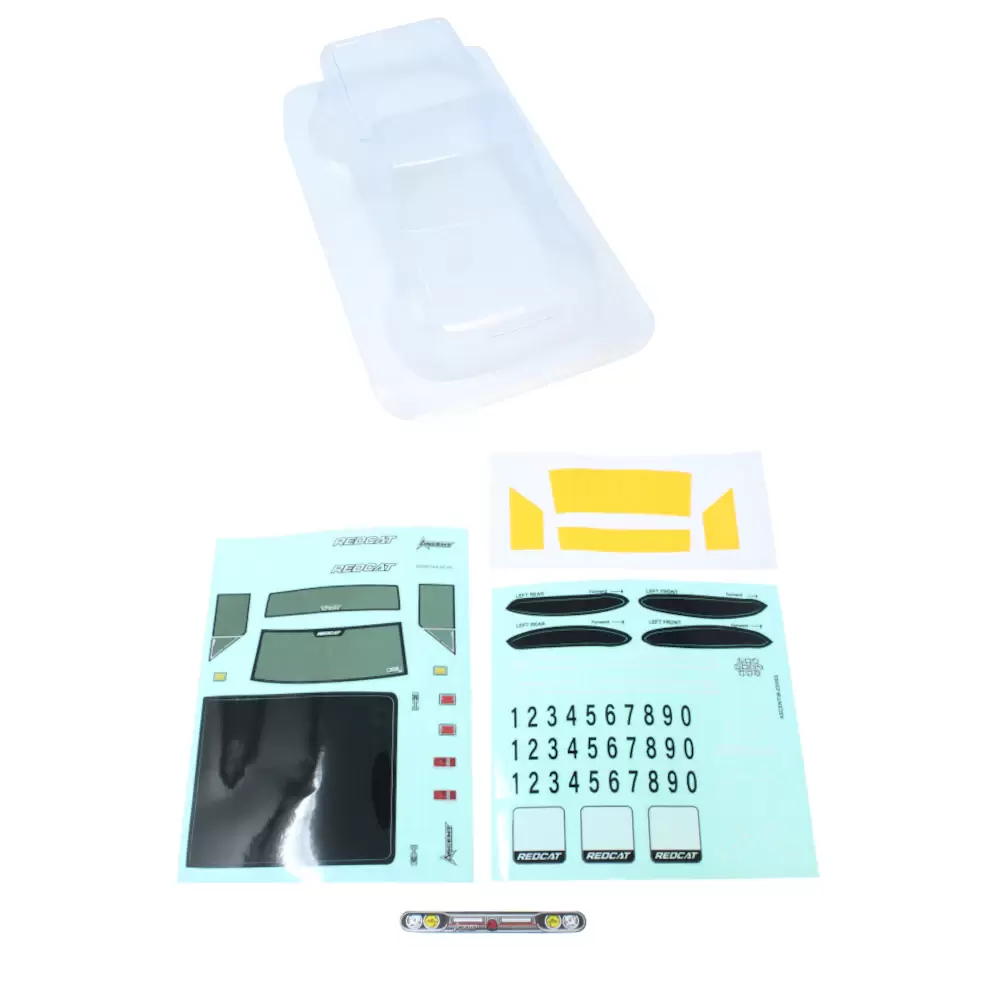 More good news! In addition to all of the upgrade parts, the new clear bodies for the Ascent-18 are also now in stock and ready to order
Check out all of the Ascent-18 parts (including clear bodies) here Or, grab yourself an Ascent-18 here 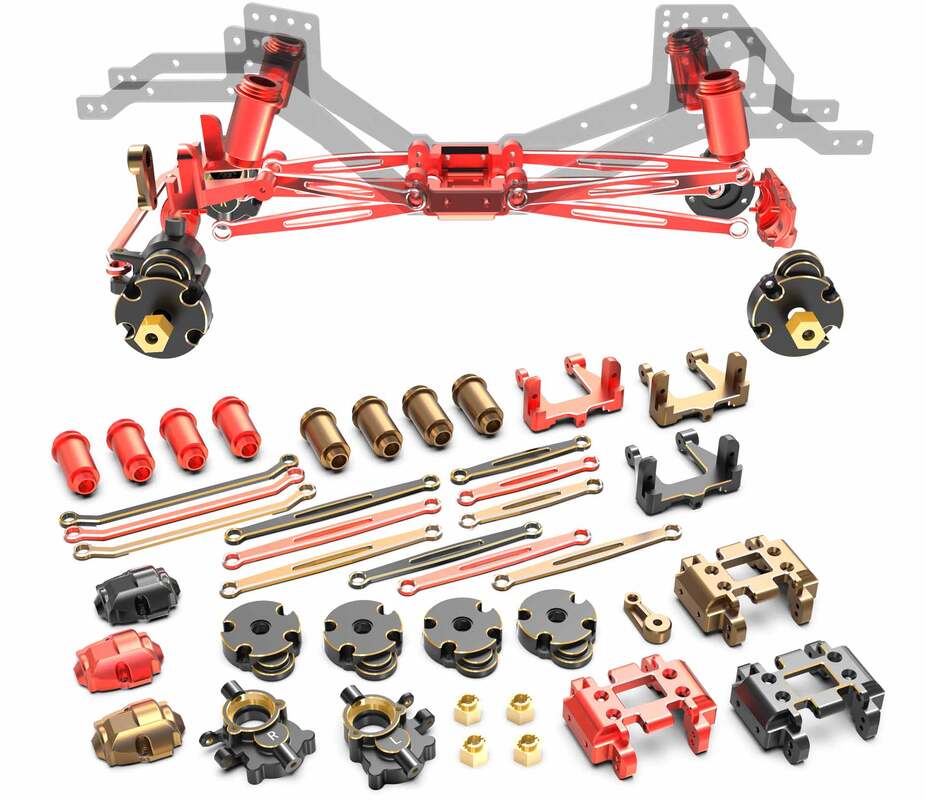 They're here! That's right, all aluminum and brass upgrade parts for the new Redcat Ascent-18 crawler are now in stock and ready to order
Check out all of the Ascent-18 parts here Or, grab yourself an Ascent-18 here Here's the first of what will surely be many Redcat Ascent-18 review videos. This one is by one of our favorite YouTubers, RCReview
Get your Ascent-18 for the introductory price here Check out all of the Ascent-18 upgrade parts here Stay tuned for more Ascent-18 info soon 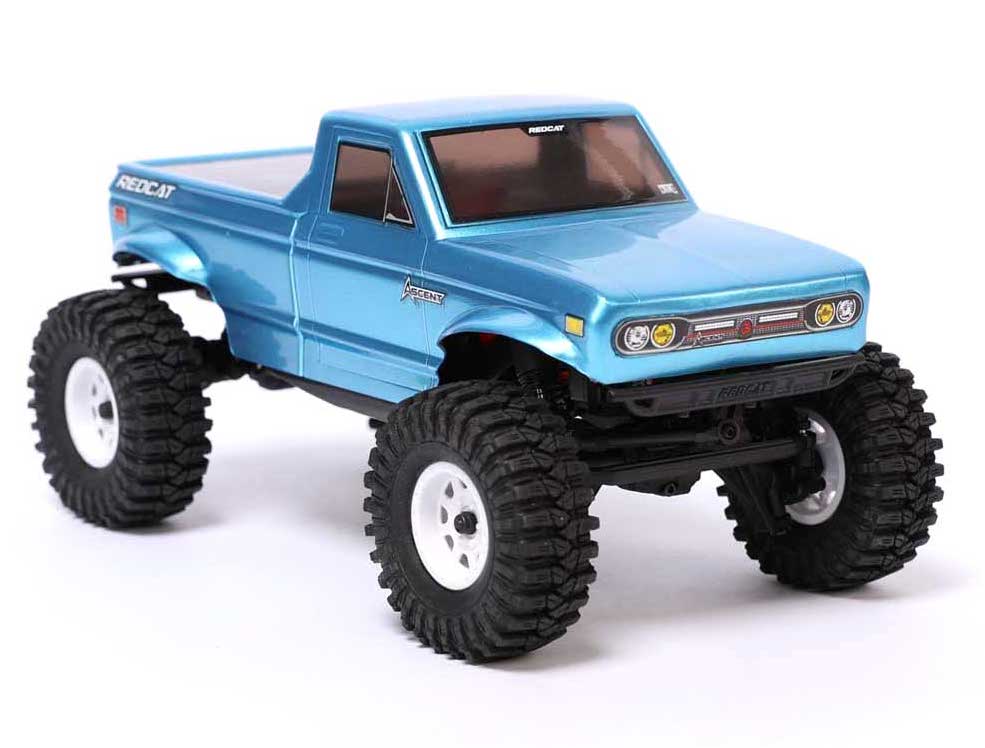 Just announced a few moments ago is the new Redcat Ascent-18 1/18 scale RC rock crawler. More info to follow but for now, you can check out the full specs and info on the Ascent-18 page linked below
View the Ascent-18 price, specs and info here 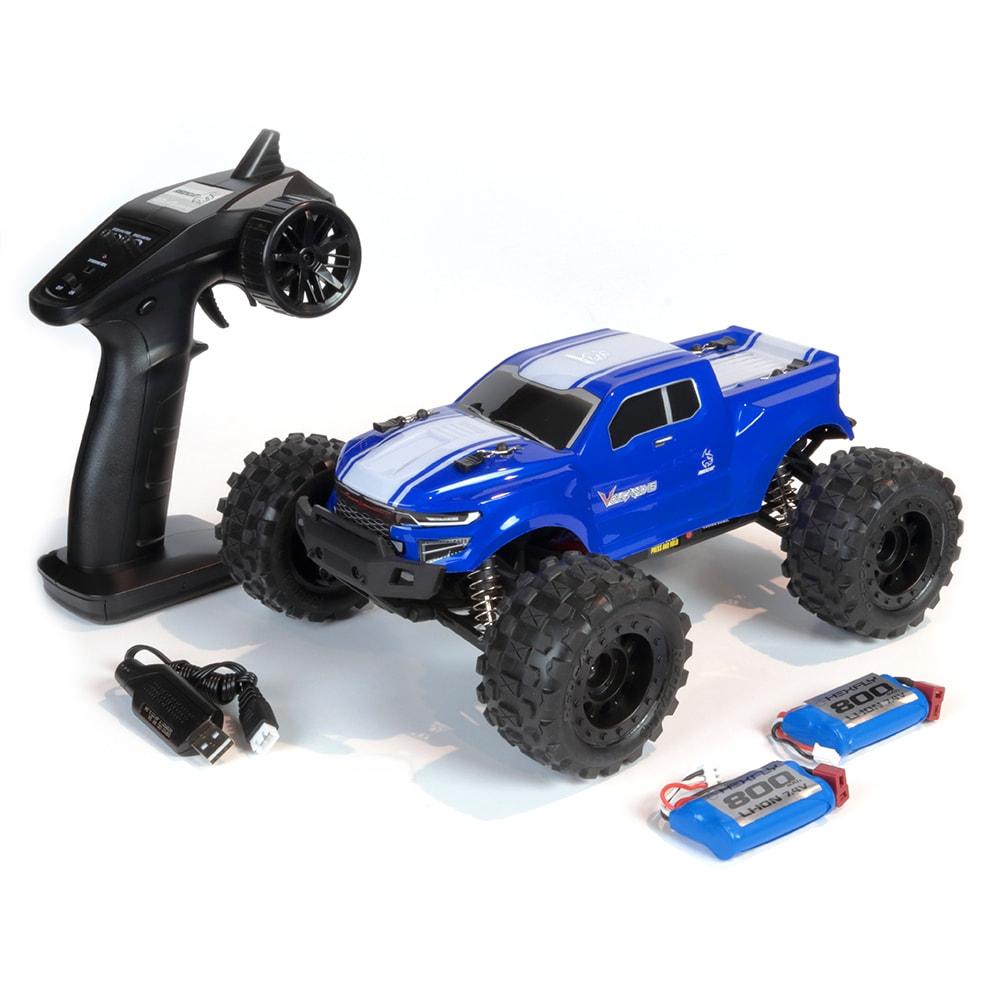 After a short time of being sold out, one of the most popular Redcat vehicles has been re-stocked. The Volcano-16 1/16th scale RTR trucks are back in-stock and ready to order now. All of the Volcano-16 upgrade parts are also back in stock.
Additionally...something new has arrived in the warehouse and will be announced very soon! We think it's going to be an exiting new vehicle so be sure to check back in a couple of days for the official release info... View Volcano-16 price and specs here 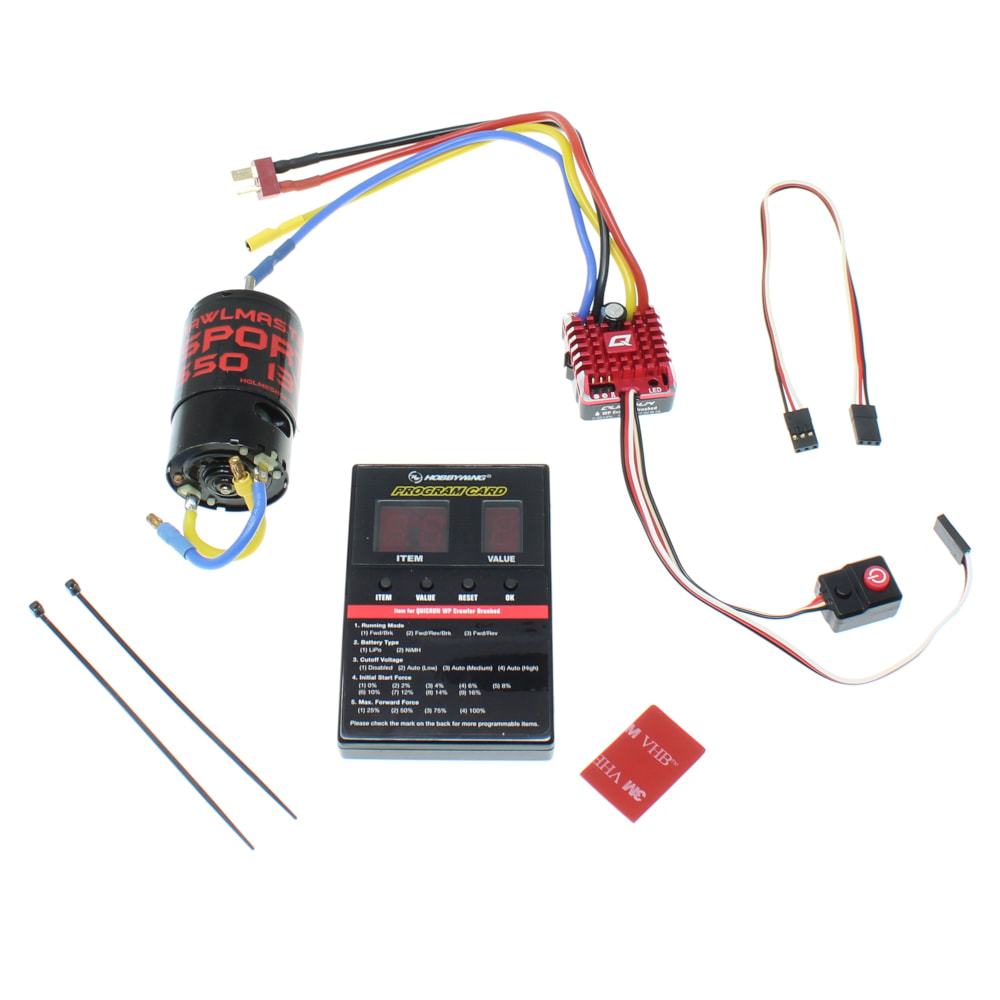 If you're looking for an affordable upgrade for your crawler or trail truck, here's your chance to get a Hobbywing 1080 ESC and a Holmes Hobbies 550 Brushed Motor for under $40! These are located on the Clearance Page here but only while supplies last and
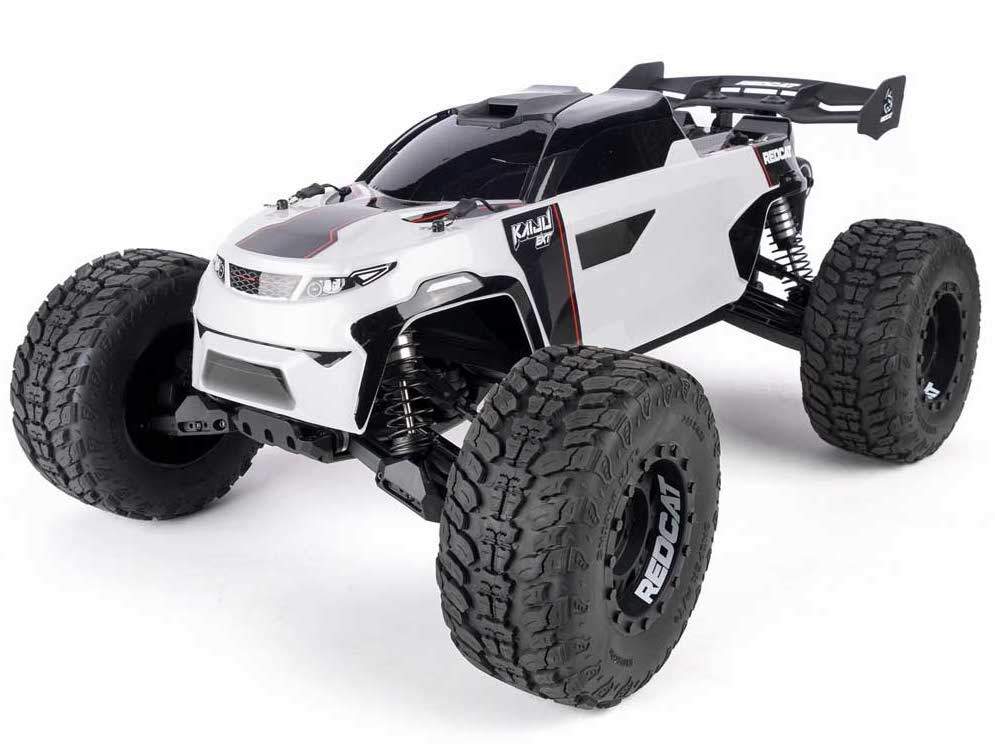 After what felt like an eternity, the Redcat Kaiju EXT 1/8 brushless trucks/truggies are finally back in stock and ready to order now
Check out the full specs, features and price of the Kaiju EXT here |