 With three new Redcat vehicles coming very soon, Redcat has once again launched the "Guess What's Next" contest. If you guess correctly, you could win one of the vehicles
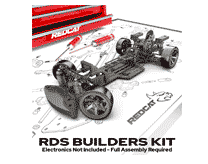
Here's a link to all of the contest details as well as the entry form Good luck!  Don't miss your chance to save 25% off on the new RDS Drift Car. Order your RDS today for $299.99 while supplies last or until 3.05.2024
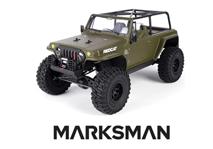
Check out all the specs and details of the RDS Drift Car here  Don't miss your chance to save 25% off on the super cool Redcat Marksman. Order your Marksman today for $284.99 while supplies last or until 3.05.2024
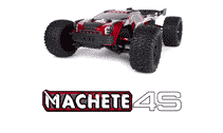
Check out all the specs and details of the Redcat Marksman here 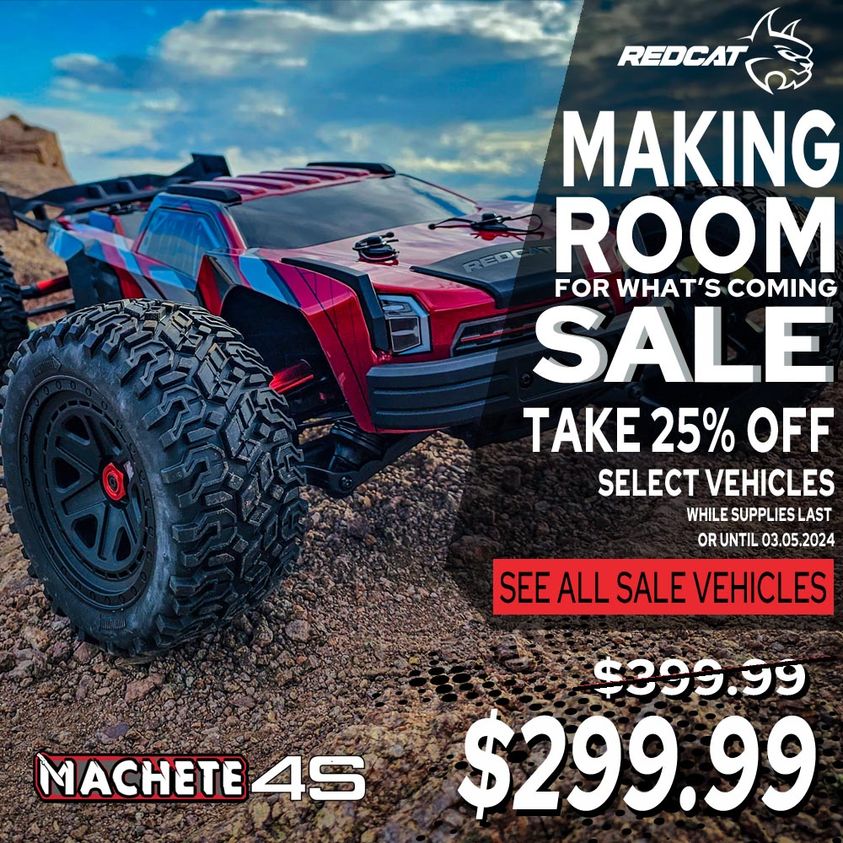 Don't miss your chance to save 25% off on the new(ish) Redcat Machete 1/6 scale trucks. Order your Machete 4S today for $299.99 while supplies last or until 3.05.2024
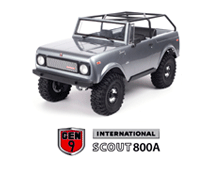
Check out all the specs and details of the Redcat Machete 4S here 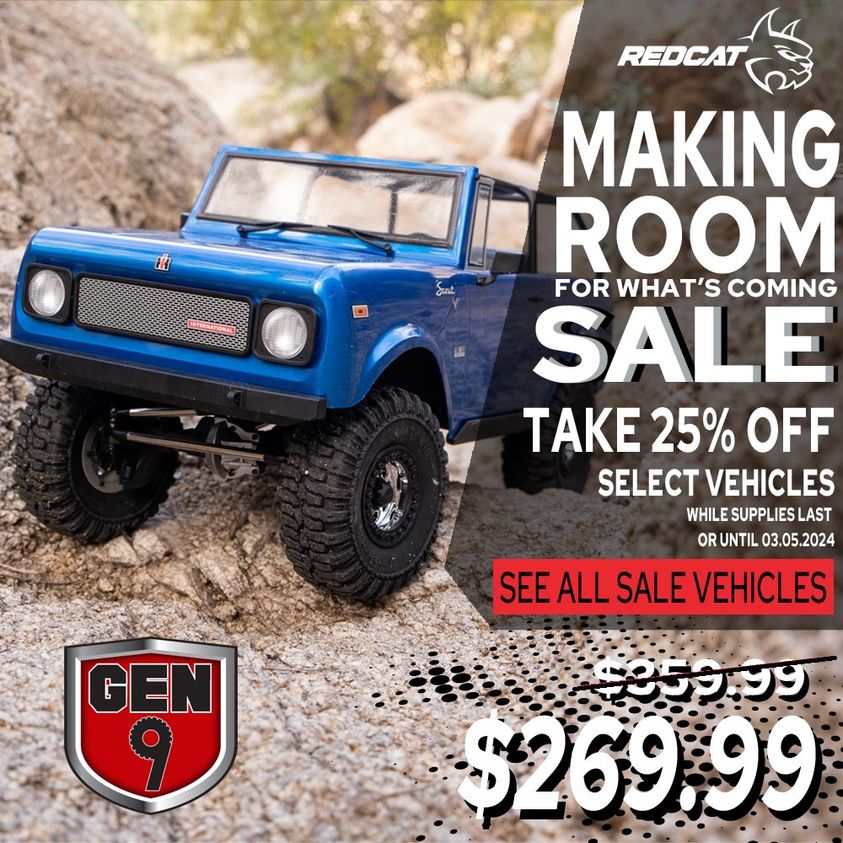 Don't miss your chance to save 25% off on the awesome Redcat Gen9 trail trucks. Order your Gen9 today for $269.99 while supplies last or until 3.05.2024
Check out all the specs and details of the Redcat Gen9 here  Don't miss your chance to save 25% off on the super popular Redcat Dukono 4x4 trucks. Order your Dukono today for $179.99 while supplies last or until 3.05.2024
Check out all the specs and details of the Dukono here  Redcat is excited to announce the Making Room For The WHAT'S COMING SALE! Take 25% OFF select Redcat vehicles We need to make room for all of the new items that are arriving next month and we are passing these savings onto you As part of this sales event, we have lowered the price on select vehicles by 25% Here are the important dates surrounding the Making Room Sales Event:
Vehicles included in this Sale - Current and Sale Pricing:
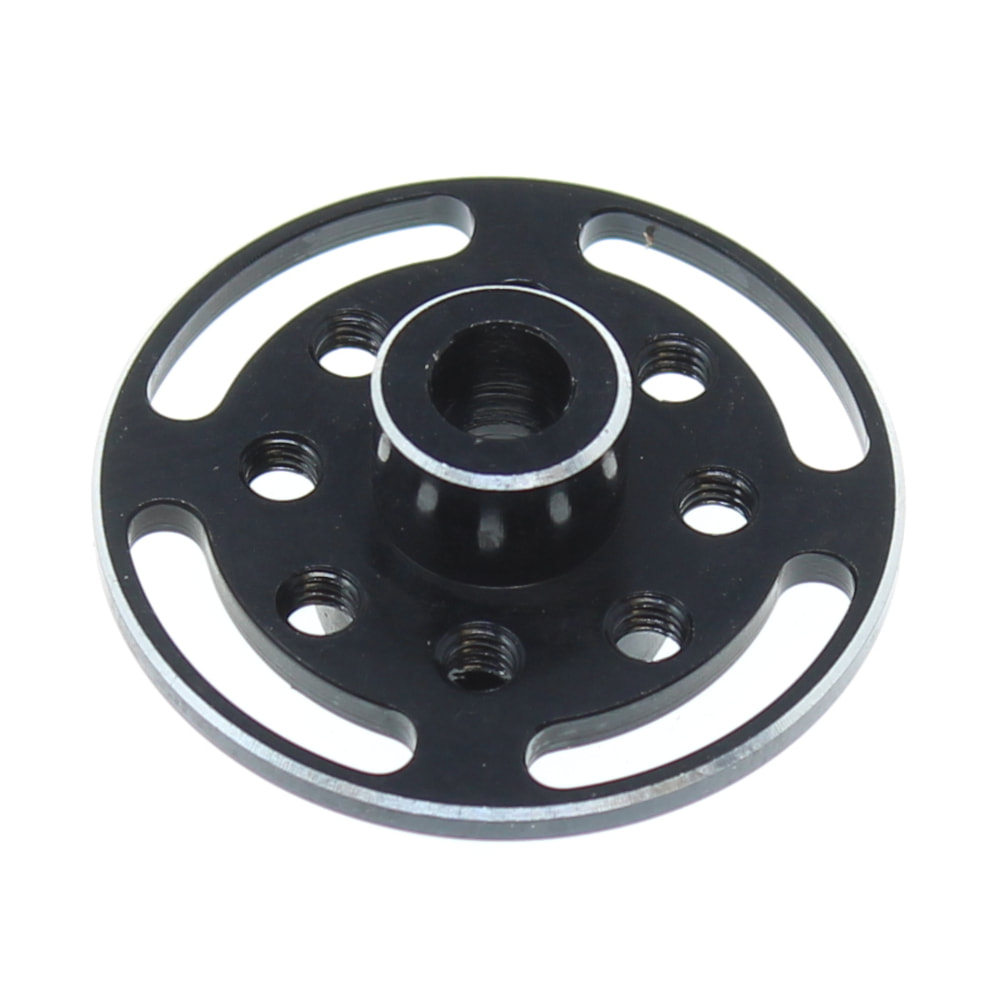
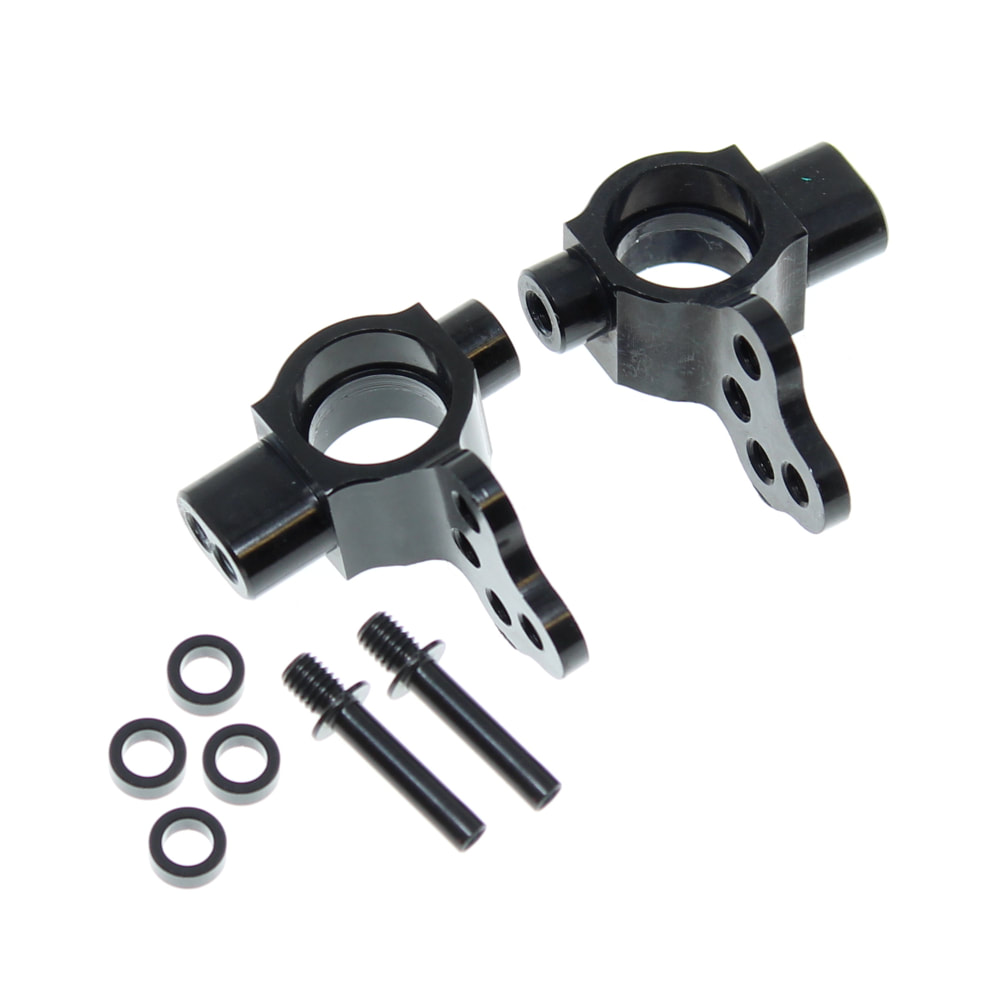
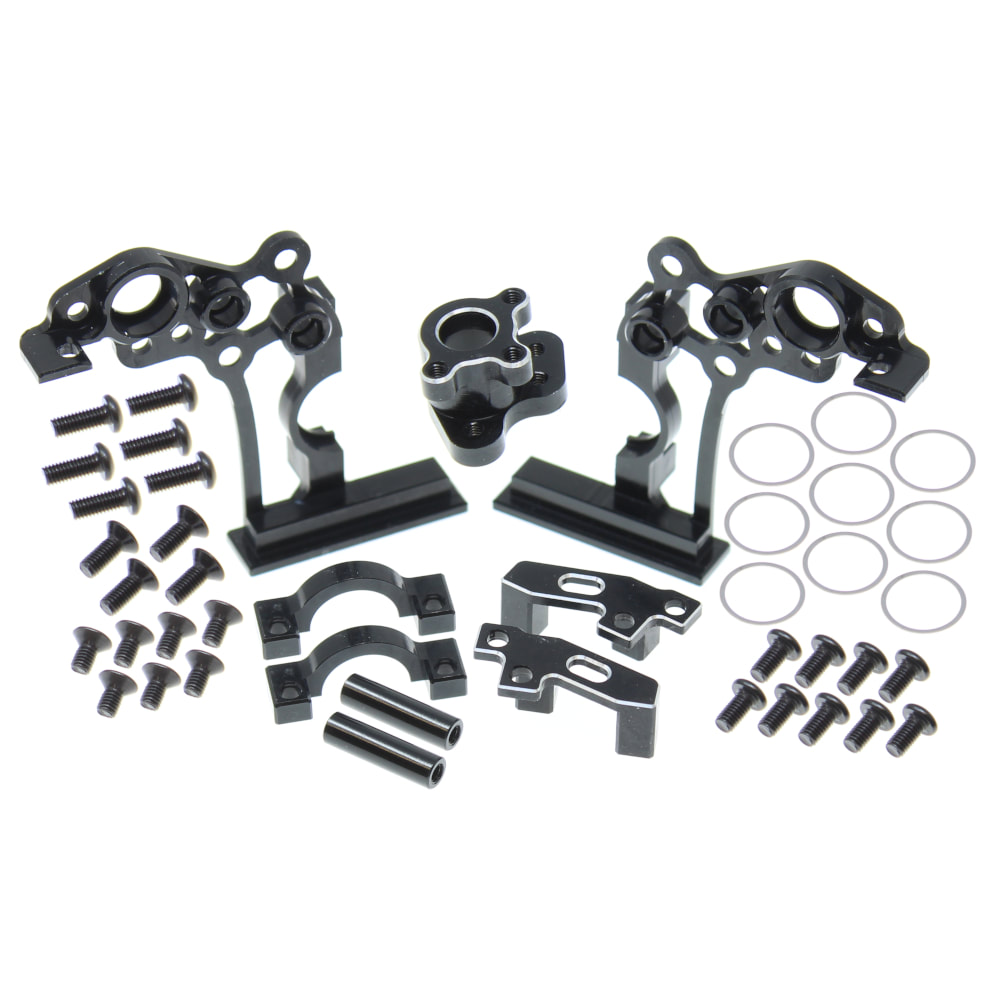
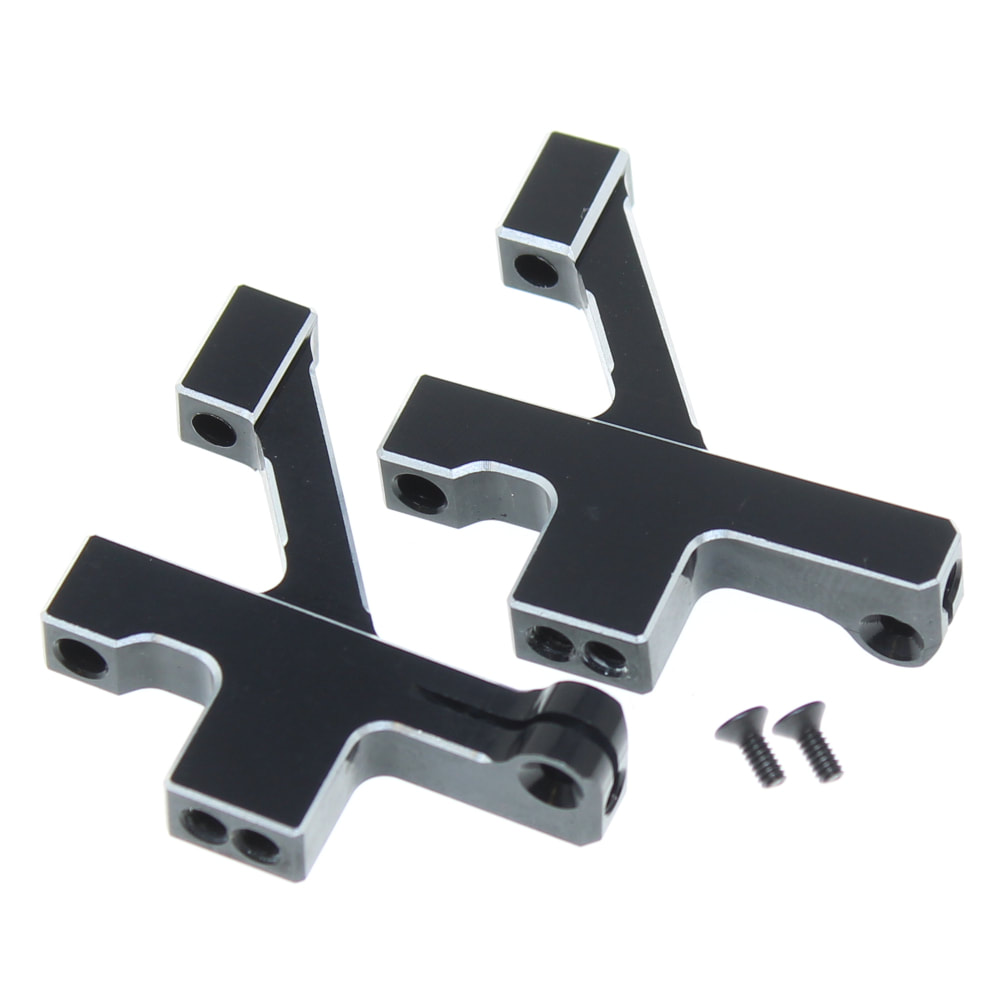
Great news RDS fans. The long awaited aluminum upgrade parts have arrived and are available for sale now. This first batch of upgrades includes the following four parts (more are on the way): 'till next time
Rob 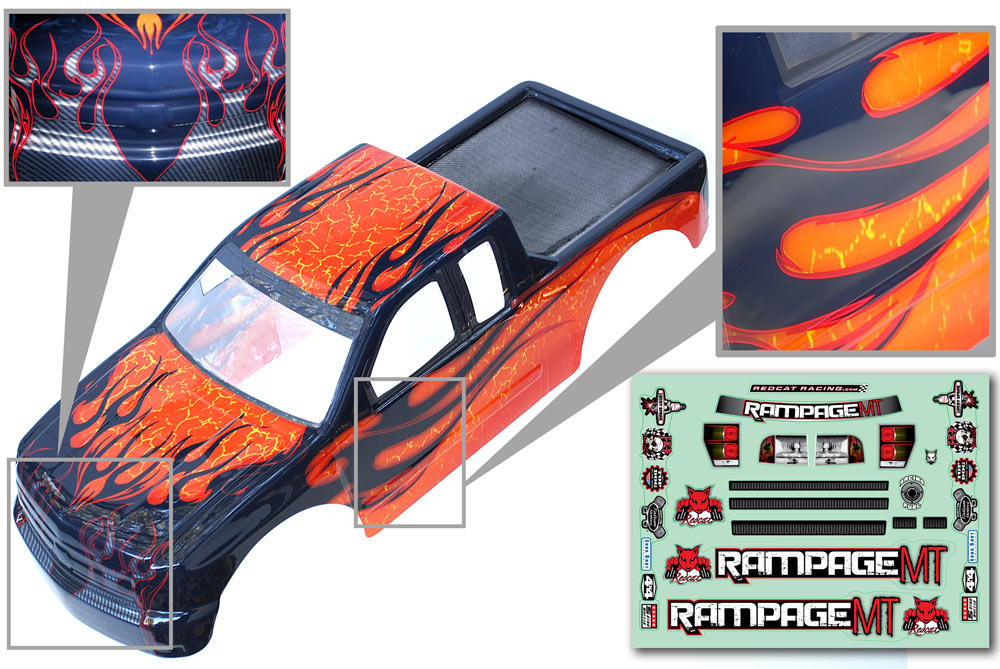 Great news if you've been waiting on a replacement body for your Rampage MT or XT. A small shipment of orange and black bodies has just arrived this morning and they are ready for sale
These are expected to sell out quickly so you'll want to order yours ASAP Check out these Rampage bodies here 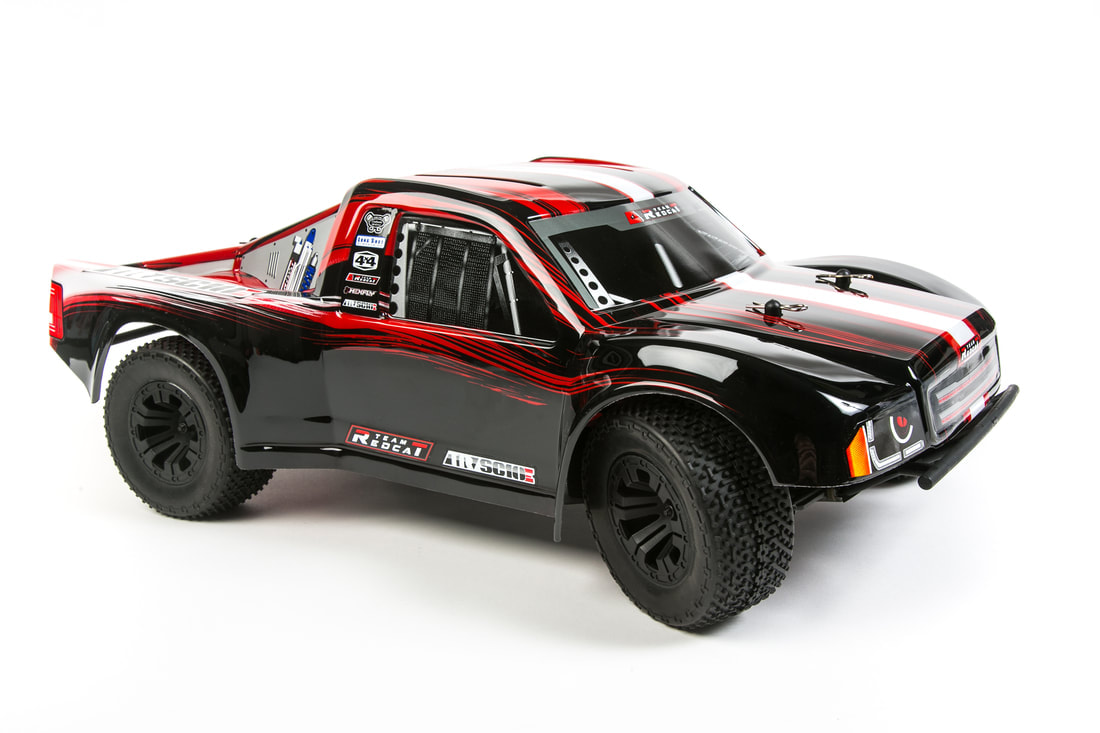 One of my favorite Redcat vehicles of all time is the Team Redcat TR-SC10E. Unfortunately, that truck was discontinued a while ago and all remaining TR-SC10E parts and upgrades are now being sold off cheap on the Clearance Page
Don't miss your chance to stock up on parts for your TR-SC10E while you can here If you're interested, here are some old blog posts I wrote a while back all about my personal TR-SC10E project Part 1 - New Body Part 2 - ESC Mount Part 3 - Front Bumper Part 4 - Wheel Nuts Part 5 - Aluminum Rear Hubs and Aluminum Steering Knuckles Part 6 - Rear End Upgrades Part 7 - Front End Upgrades Part 8 - Ball Cups Part 9 - Battery Tray Part 10 - Tires Part 11 - Savox Servo Part 12 - Transmitter Upgrade Part 13 - T-Bone Racing Front Bumper Part 14 - Aluminum Shocks 'till next time Rob 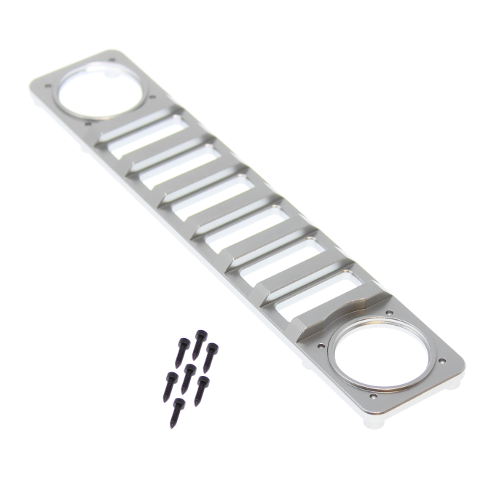 The Redcat Gen8 Aluminum Grills are on clearance price for UNDER $7.00!
Grab one (or two) while you can because once these are gone, they're gone for good Check out the Clearance Page to view these aluminum grills (while supplies last) and all of the other amazing clearance priced deals 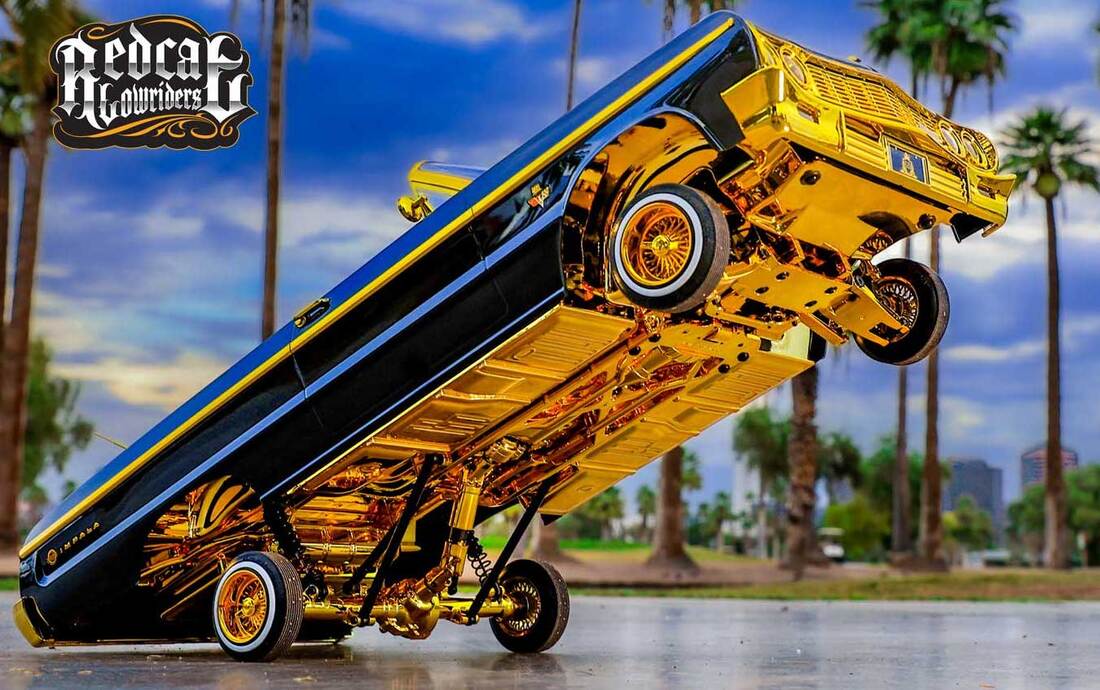 This special edition Sixtyfour is wearing every bit of gold she could find and is dressed to impress. Topless and dancing for the crowd, this Sixtyfour’s beauty is captivating. All eyes are on her as she quickly becomes the center of attention, wanted by all who gaze. She loves to show off her dazzling beauty. She is the Gold Digger, a special edition Sixtyfour Redcat special edition vehicles are produced in limited quantities and are considered by many to be collector’s items. This is because once the limited quantity of these special edition vehicles are sold out, Redcat will no longer produce any of that particular vehicle variant. While somewhat similar variants of the SixtyFour hopping lowriders may be released in the future, we will never produce another Gold Digger. Once they are gone, they are gone! 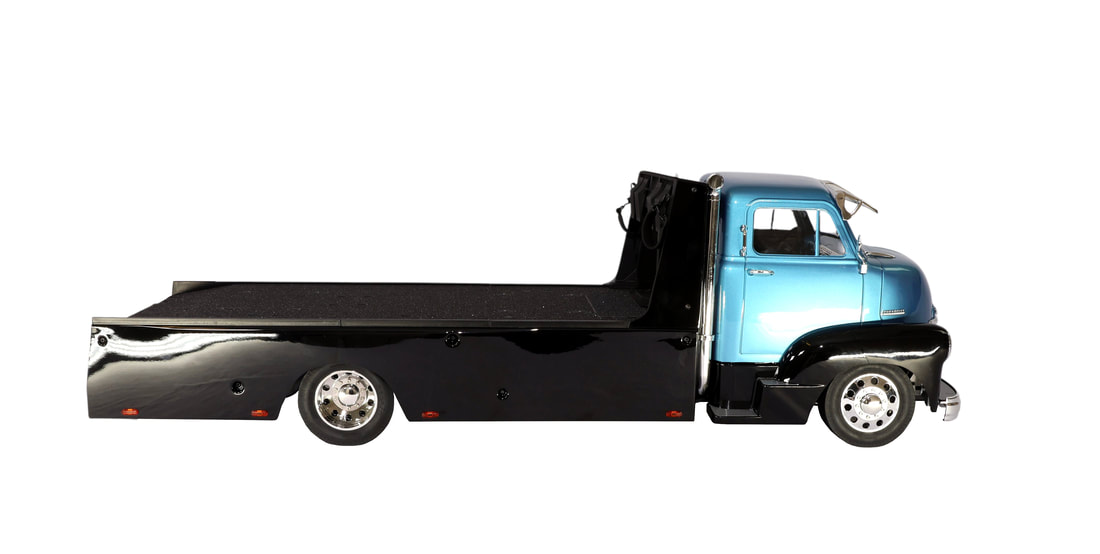 A shipment of COE parts has just arrived including the flatbed conversion kits. These kits Include all parts needed to convert your ramp bed COE to a flat bed
Check out the price and all of the details here  Starting now and ending December 31, 2023 use coupon code "FS23" at checkout to take 10% everything site wide! That's right, all Redcat vehicles, parts and upgrades are now 10% off with the coupon code
Applies to in stock items only, 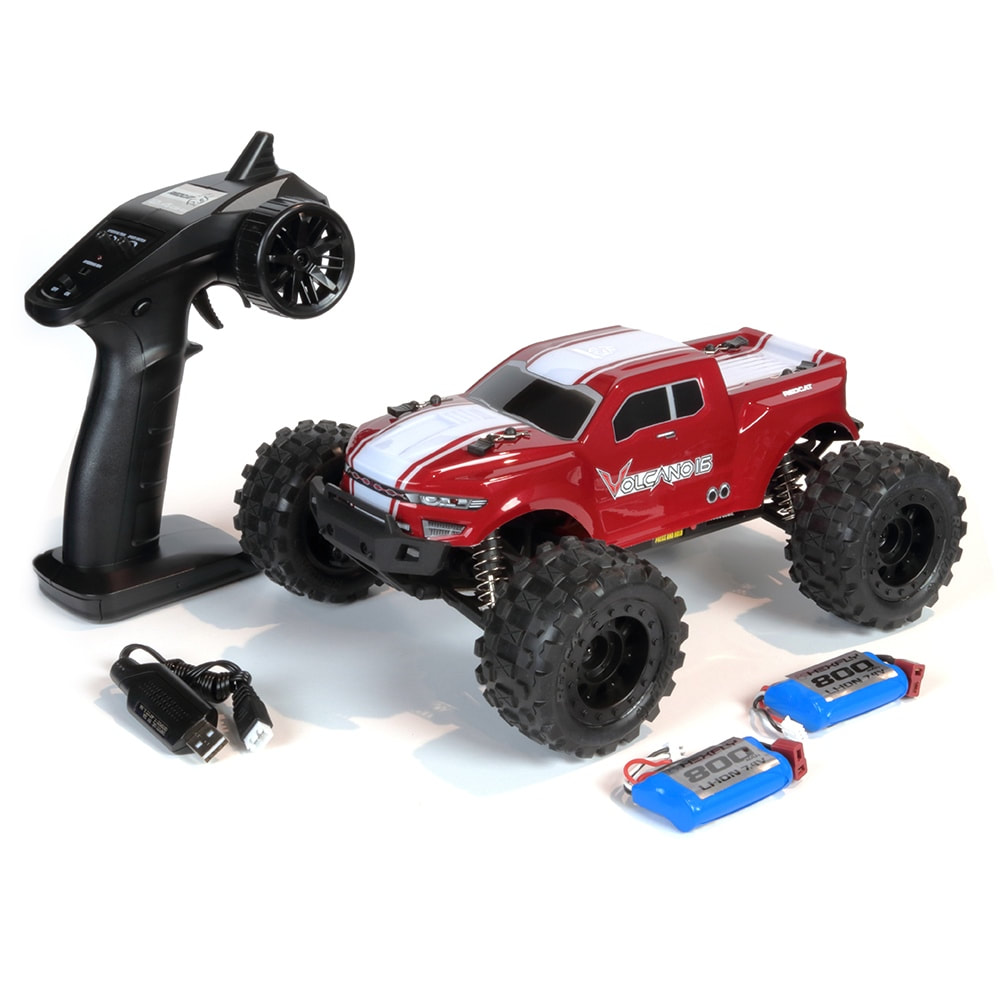 Although not quite in time to put one under the Christmas tree, the super popular Redcat Volcano-16 trucks are back in stock
Available in your choice of red or blue, these cool little trucks come completely ready-to-run and even include the battery and charger Check out the price and specs of the Volcano-16 here 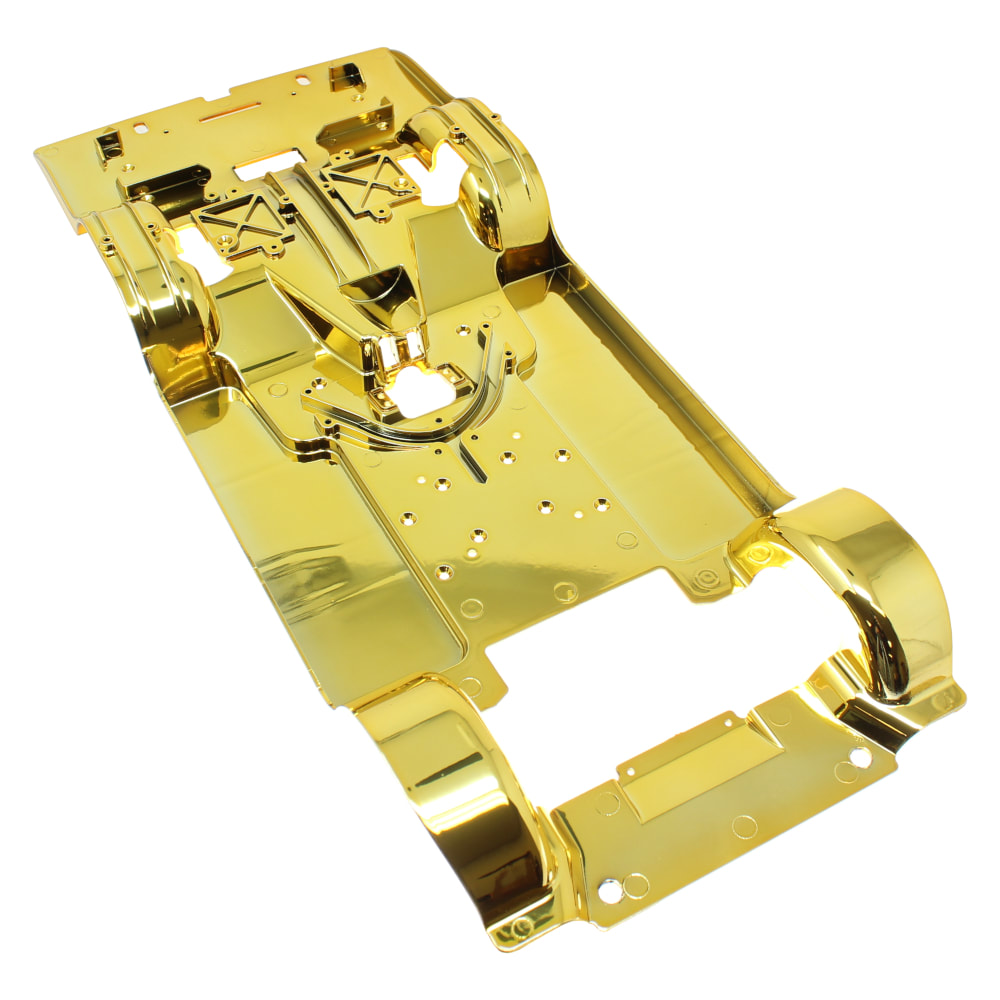 Several more gold upgrade parts for the Impala lowriders have arrived including these gold color chassis plates.
Check out these gold chassis' and all of the other gold upgrade parts for your Impala here 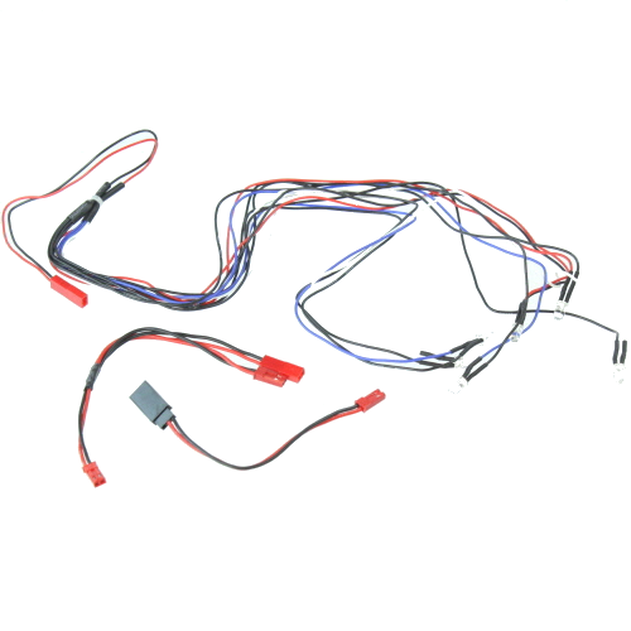 Whether you have a crawler, a lowrider, a drift car or a monster truck, nothing looks better than some LED lights. The Redcat M1 LED kit is a super easy and affordable way to add some lights to your vehicle.
These kits feature 6 LED lights (2 Red, 2 White, 2 Blue) and simply plug in to your receiver for power. Check out the price and availability here 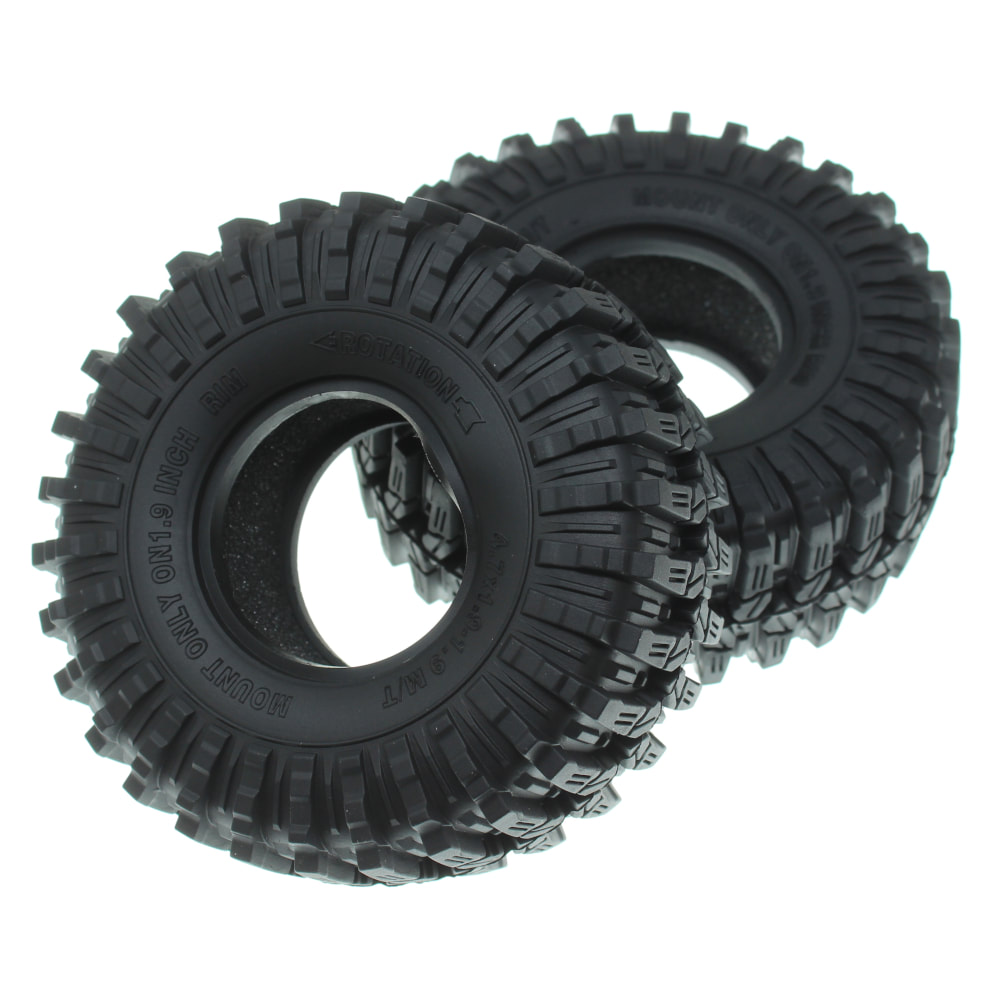 If you are looking for a great performing tire for your 1.9" crawler but don't want to break the bank, look no further than the Redcat Ascent MT-9 Mud Terrains.
These soft compound tires come in a package of two complete with foam inserts and fit 1.9" wheels Check out the price and availability here 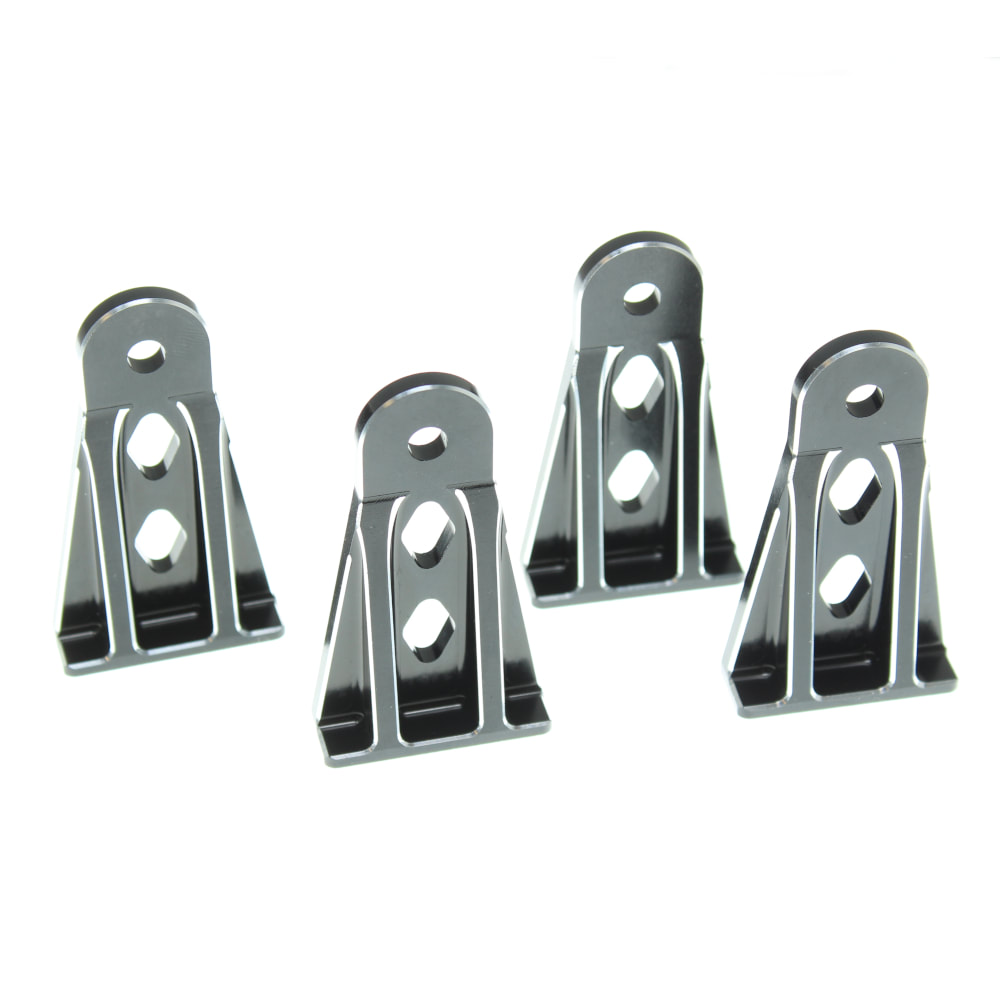 The Redcat lowrider CNC aluminum vehicle stands are now on clearance price for UNDER $10!
Grab one (or two) sets while you can because once these are gone, they're gone for good Check out the Clearance Page to view these CNC stands (while supplies last) and all of the other amazing clearance priced deals 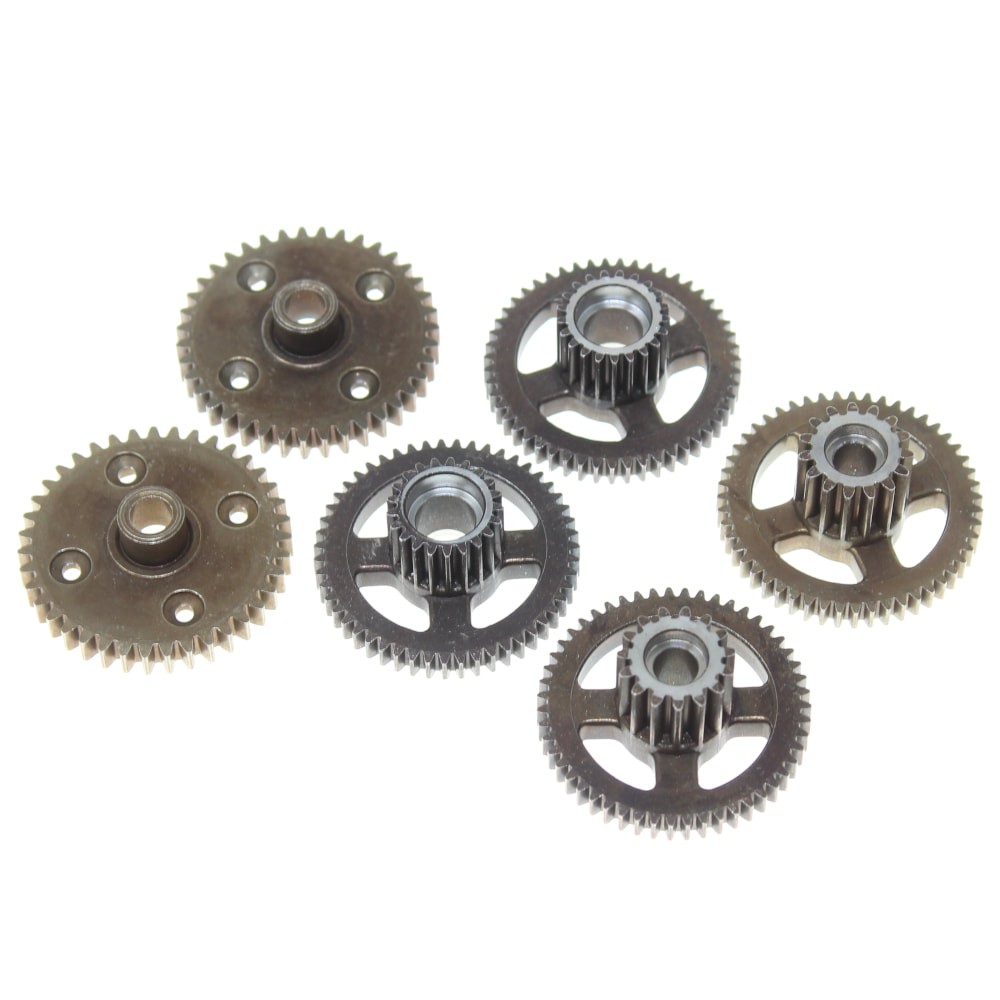 New metal gear sets are now available for the Redcat/Danchee RidgeRock and RidgeRunner crawlers. Available as a complete set to outfit your front and rear axles, they are in stock and shipping now
Check out these new metal gear sets here 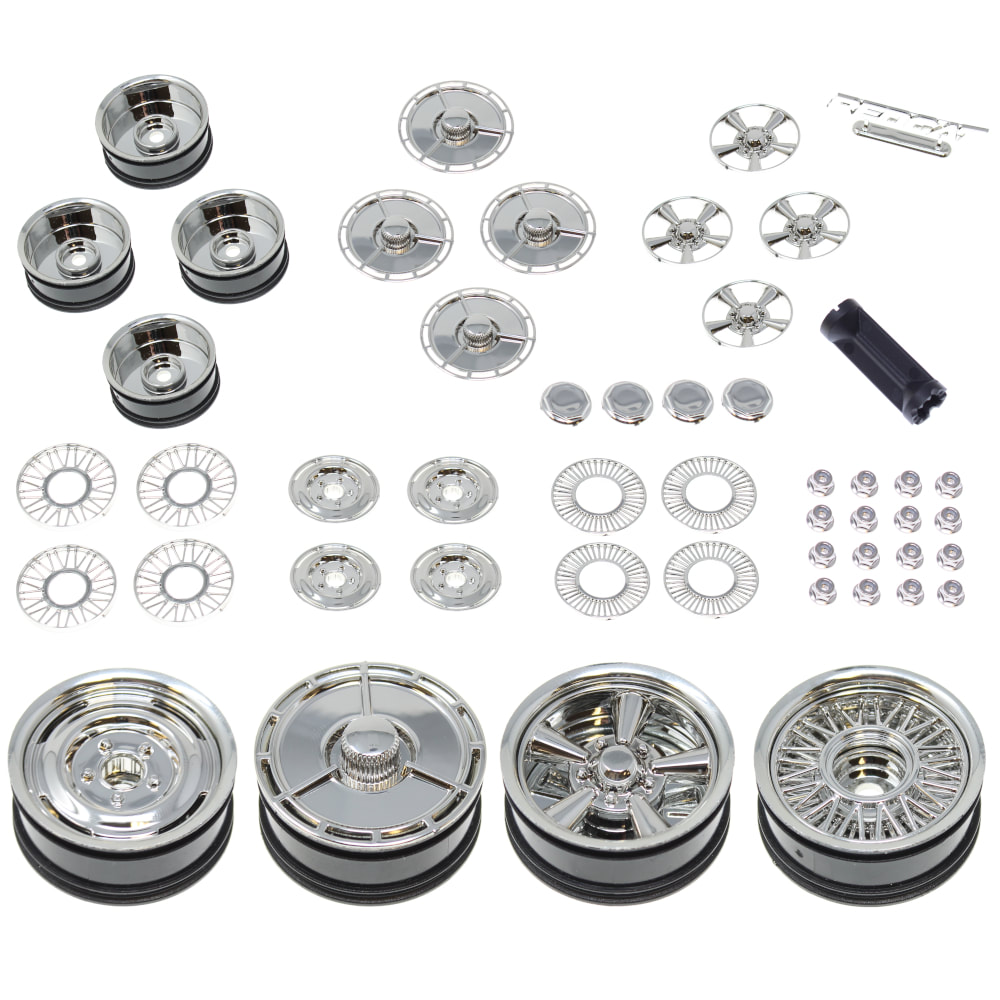 The Redcat lowrider Chrome and Gold Mod Wheel Sets are on clearance price for UNDER $20!
Grab one (or two) while you can because once these are gone, they're gone for good Check out the Clearance Page to view these wheels (while supplies last) and all of the other amazing clearance priced deals 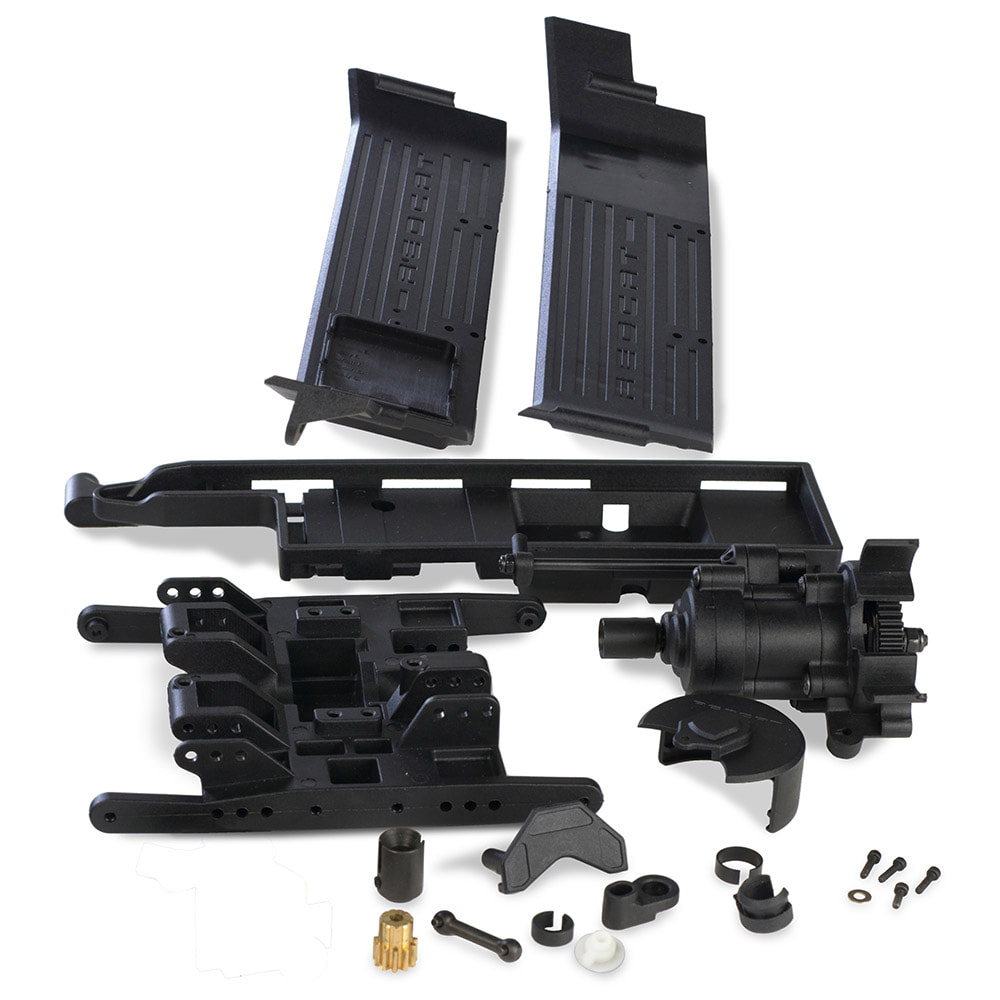 Great news, the super popular Gen8 2-Speed Conversion Kits are back in stock and available to order now
This 2-speed upgrade kit is compatible with the Gen8 V1, V2 & AXE. The kit includes the same 2 speed transmission used in the Gen9 and parts needed for assembly Check out the details, price and installation instructions here 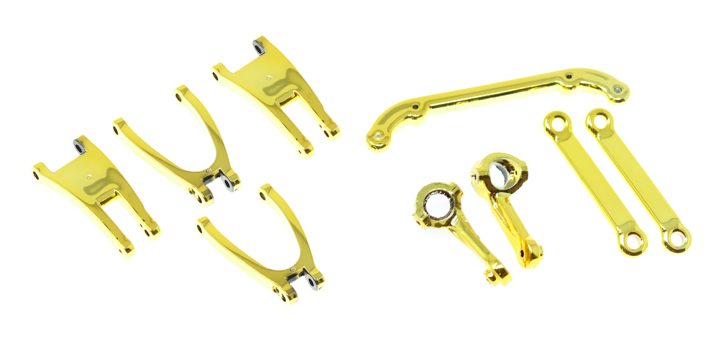 The first batch of gold upgrade parts for the Redcat lowriders has arrived. Most of this first batch are for the FiftyNine and SixtyFour but some will also fit the Monte Carlo. More gold hopup parts are coming soon but until then...
Check out the lowrider gold parts here 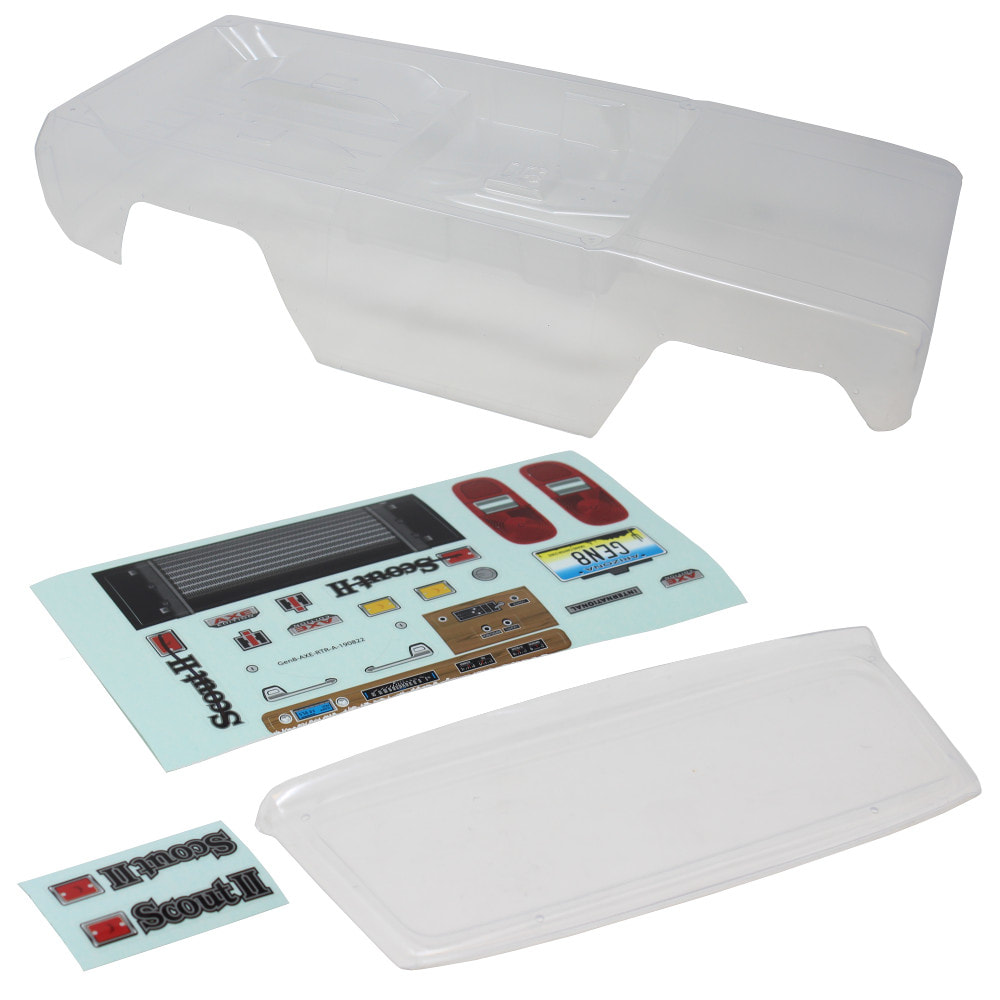 The Redcat Gen8 AXE clear bodies are on clearance price for UNDER $15 each!
Grab one (or two) while you can because once these are gone, they're gone for good Check out the Clearance Page to view these bodies (while supplies last) and all of the other amazing clearance priced deals 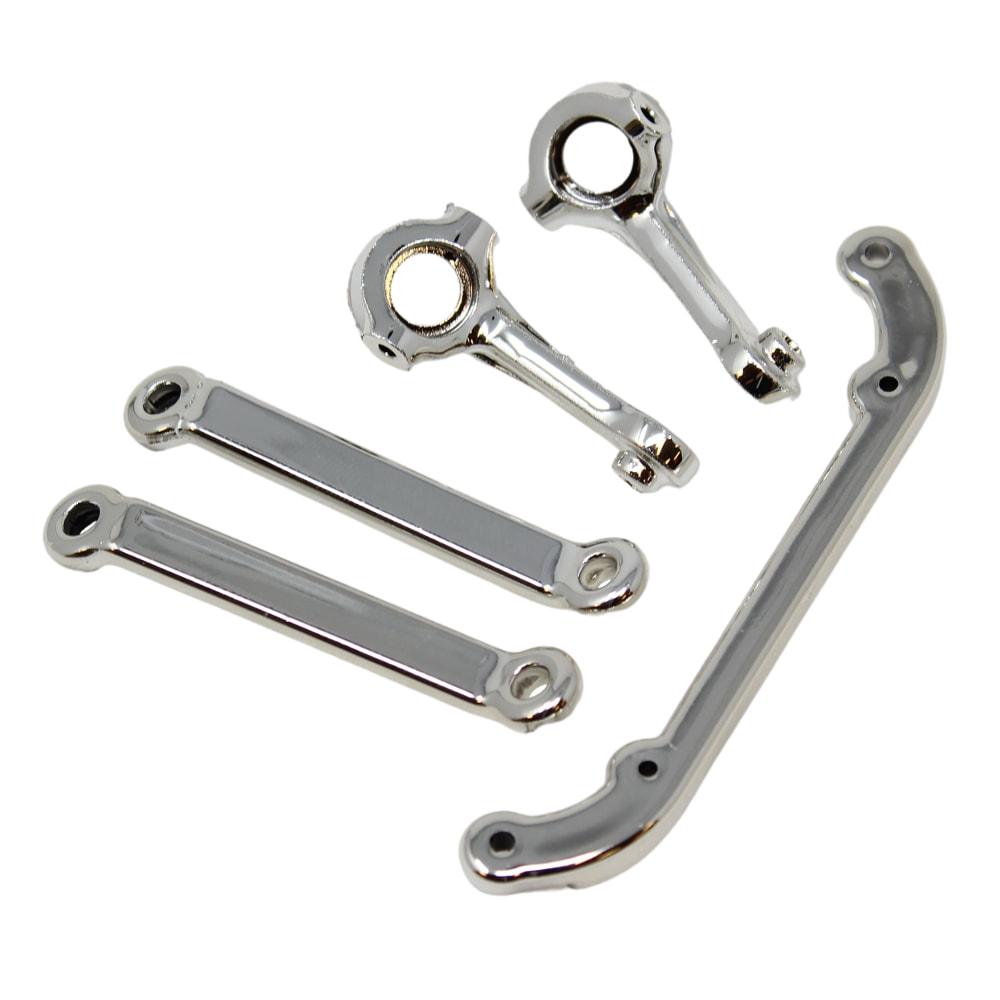 Several chrome upgrade parts for the FiftyNine, SixtyFour and Monte Carlo lowriders have been re-stocked and are available to order now. Some of the parts re-stocked include:
|