|
As a Redcat Racing Dealer, most of my time and most of my RC projects are Redcat related. I also own several Tamiya kits however and have done so since the early 80's. I've also recently started racing and was super excited to discover the Tamiya Euro Truck Class! Enter my latest Amazon purchase, a Tamiya Team Hahn Racing MAN Semi Truck! Follow along as I build the truck. I'm not sure yet but I may also talk about some of my race experiences and set-ups as I learn about them. 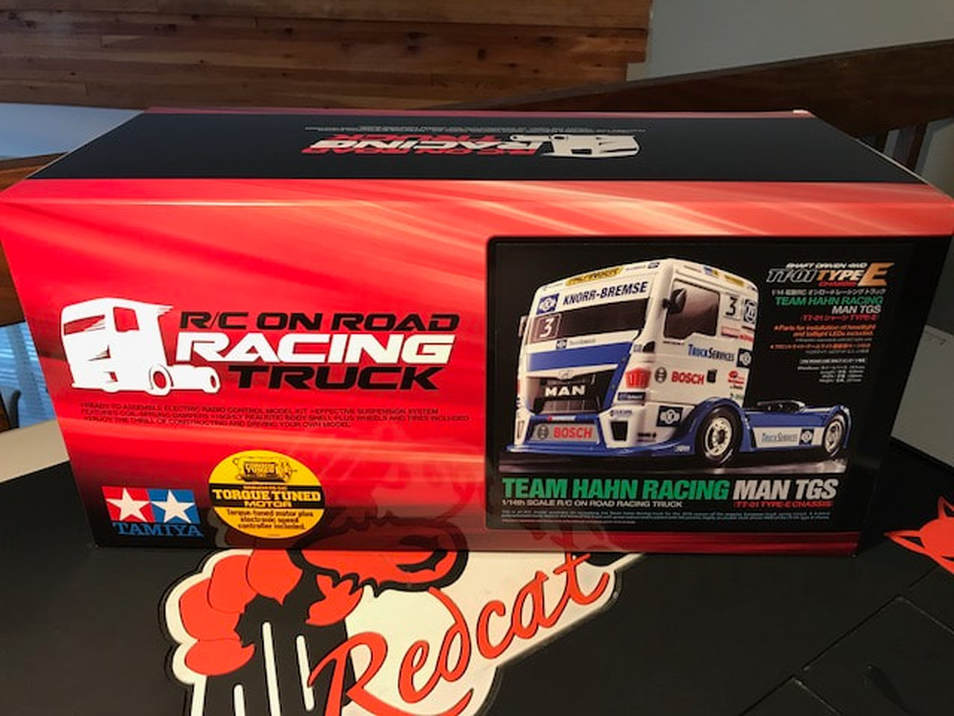 Tamiya Euro Truck Class Rules:As a new racer, one of the things that interested me the most about the Tamiya Truck Class is the simple rules. Each club is a little different but essentially the rules are that the truck has to be box stock with the exception of bearings. The ESC and motor have to be the stock units from the kit but most clubs will allow the addition of a Deans battery connector. 2s "round case" LiPo batteries are permitted but some clubs have pretty strict rules as to what pack can be run so be sure to ask around. I'll be using a Peak Racing PowerMax 4200 pack as this is what my club recommends. 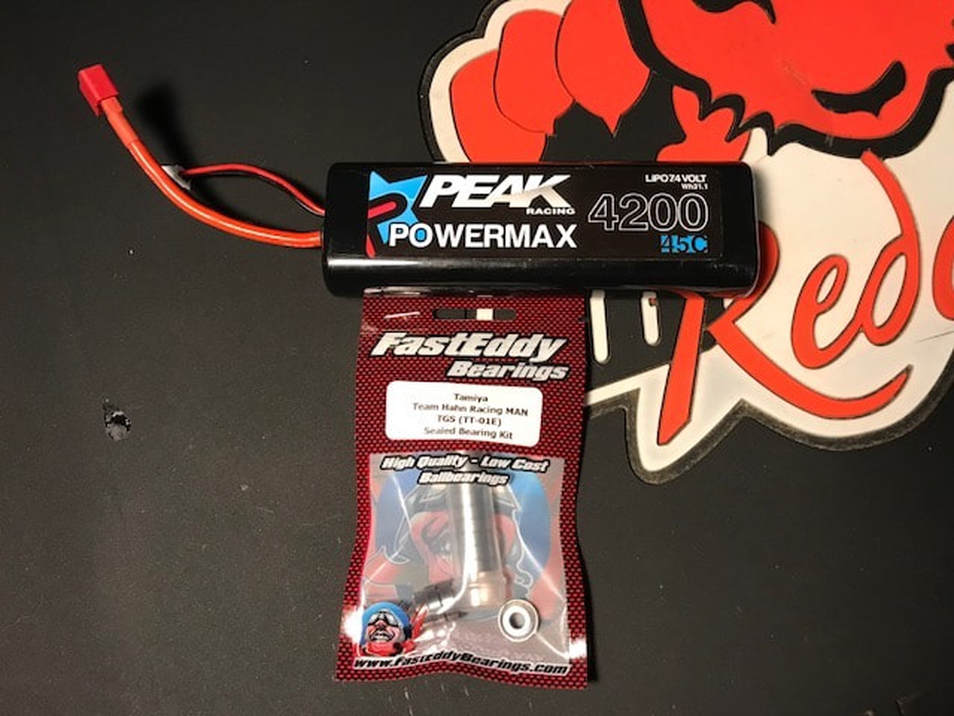 I chose to use a Peak Racing Powermax 4200 Battery and Team FastEddy Bearings Getting started I started the build by pulling everything out of the box and having a look through. It was interesting to see that the instructions were for the TT-01 touring car chassis with a second smaller instruction book for the parts specific to the Euro Truck 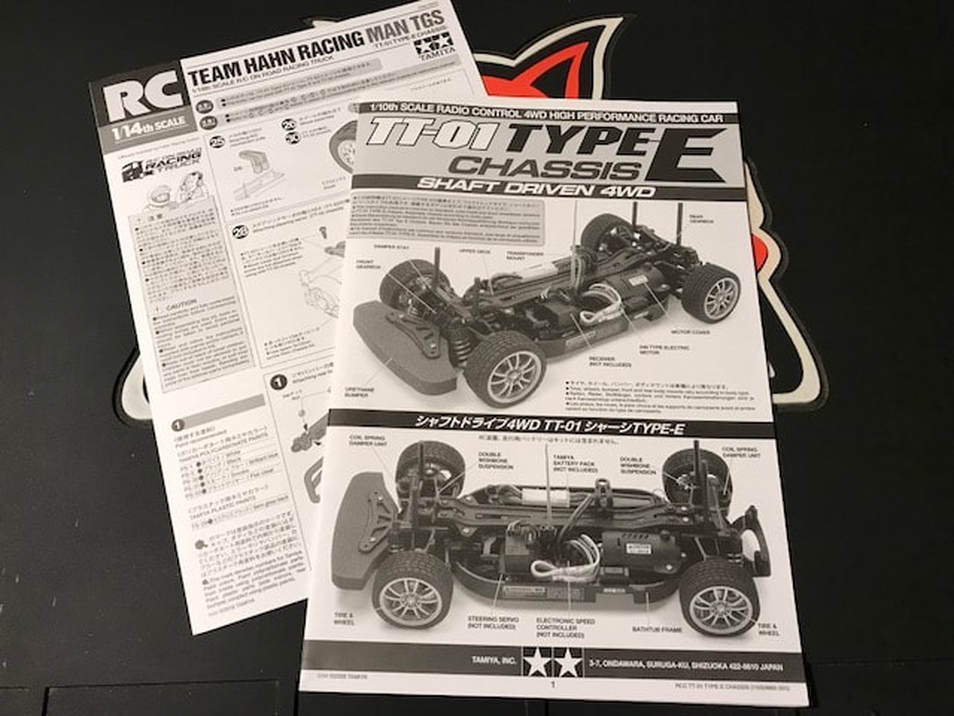 TT-01 Chassis Instructions + Added Pages for Euro Truck Steps 1 and 2 - Spur Gear and Drive Shaft It took me a moment to remember how to find everything but once it came back to me, steps one and two were a snap. I opened up Bag A as indicated in the left column of the instructions and quickly found everything needed. Step one also required that I open up my FastEddy bearings I also forgot momentarily that part numbers such as "B8" for the body posts meant plastic tree "B", part "8" but once I remembered, I quickly found and installed the two body posts.  Drive shaft and spur gear already installed Step 3 and 4 - Motor Next up was the installation of the motor. Because I'll be racing this truck, I decided to break-in the motor before installing it. There are several tutorials online talking about how to break-in a brushed motor so I won't talk about it here. After breaking-in the motor, I added a touch of oil to the motor bushings then installed the pinion gear. It wasn't called for in the instruction manual but I added some blue thread lock to the pinion grub screw and motor mount screws to help ensure they do not come loose. I finished up this step my adding a small amount of the included grease to the pinion and spur gear then covered it all up with the gear cover. The kit allows for different sized spur and pinion gears but the Euro Truck Class Rules only permit the use of the stock 19t pinion and 61t spur 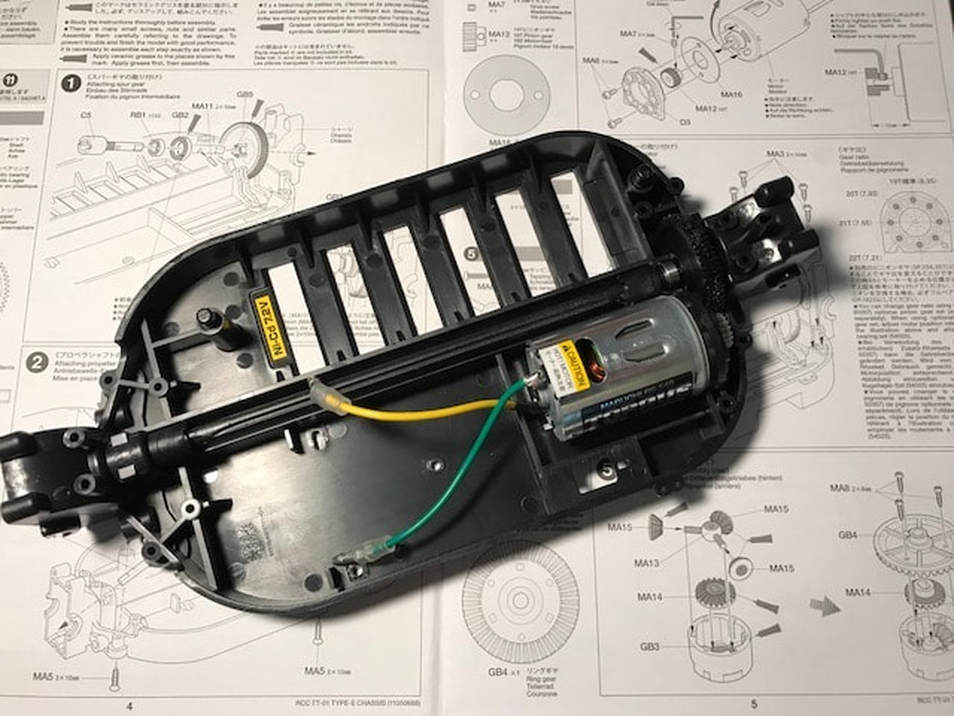 No need to set gear mesh, the motor mount holds everything perfectly in place Step 5 - Rear Diff The truck includes gear differentials. If you run the stock motor, I don't see any reason why you'd ever have a problem with these diffs. The build of the rear diff was simple, I used the included grease on the gears and a #1 Phillips bit to secure the three small screws. 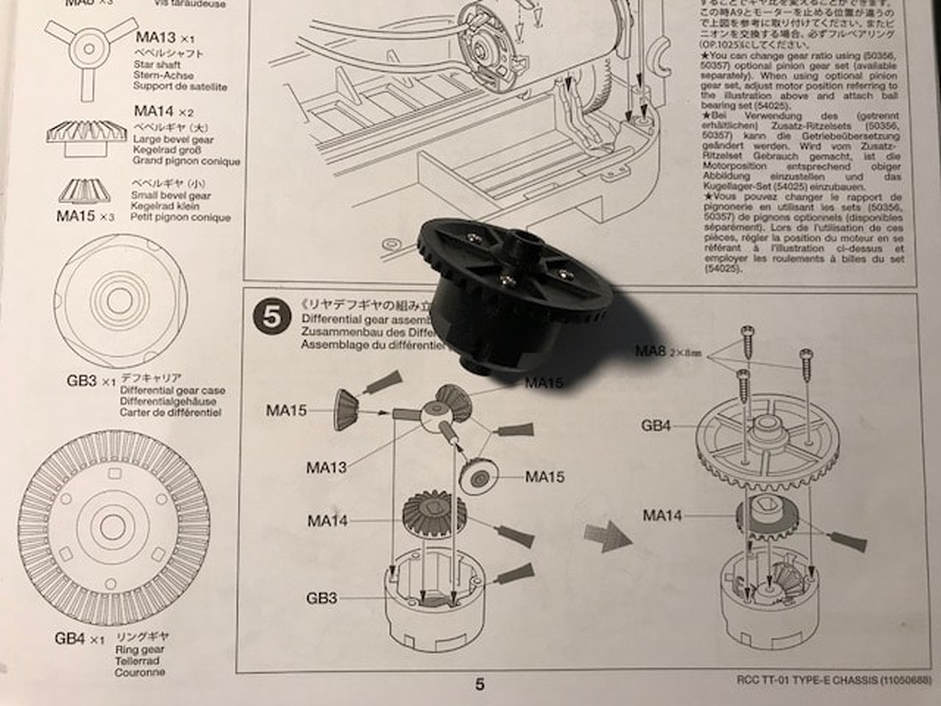 The diff gears are metal and should be durable Step 6 - Rear Diff Installation Next up was the installation of the rear diff into the chassis. This was straight forward as well but I had to add some pressure to the plastic bevel gear to get it to snap into place. Once the gear clicked into it's spot, everything dropped nicely into place. 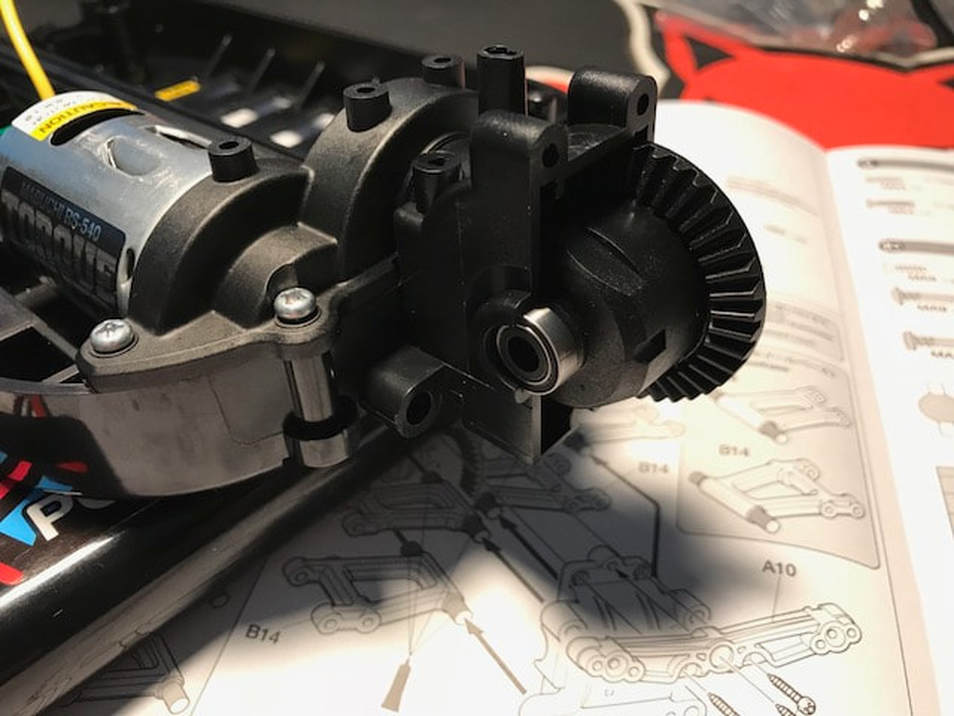 Make sure the plastic bevel gear snaps fully into place then install the rear diff Step 7 - Rear Suspension Arms This step confused me a little bit. The manual shows an option for a short wheelbase and a long wheelbase. I had to stop to do a little research to see what option the Euro Truck should use and discovered that the long wheelbase is correct. Simply ignore the grey call out boxes and follow the picture in the center of the instruction manual....like I have in the photo below ***I realized after assembly that I had the left upper arm flipped in the wrong direction - don't follow my picture - flip the upper left arm to match the right upper arm**** 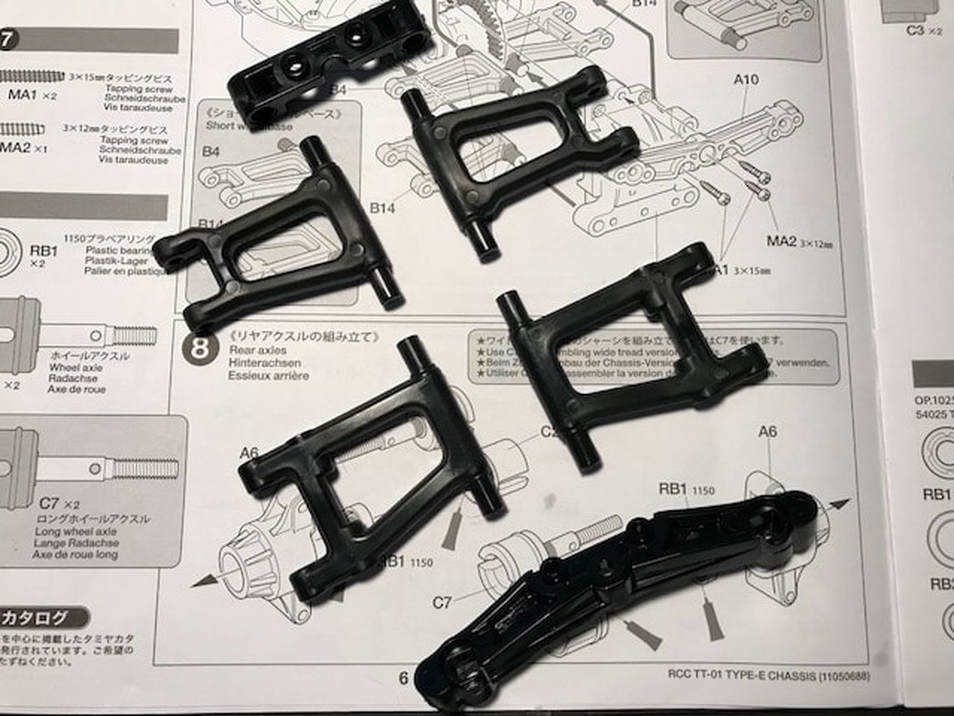 Ignore the short wheelbase option - the Euro Truck is long wheelbase Step 8 - Rear Axles The rear axles went together easily. My kit only came with the C2 axles, not the C7 so hopefully those are the correct ones. I also used ball bearings in place of the RB1 bushings so I didn't have to grease anything. Be sure to give your axles a quick test spin before moving on to the next step. One of my bearings wasn't perfectly seated into the hub so the axle had a slight wobble. A quick press on the back of the axle snapped the bearing into place and everything rotated perfectly after that. 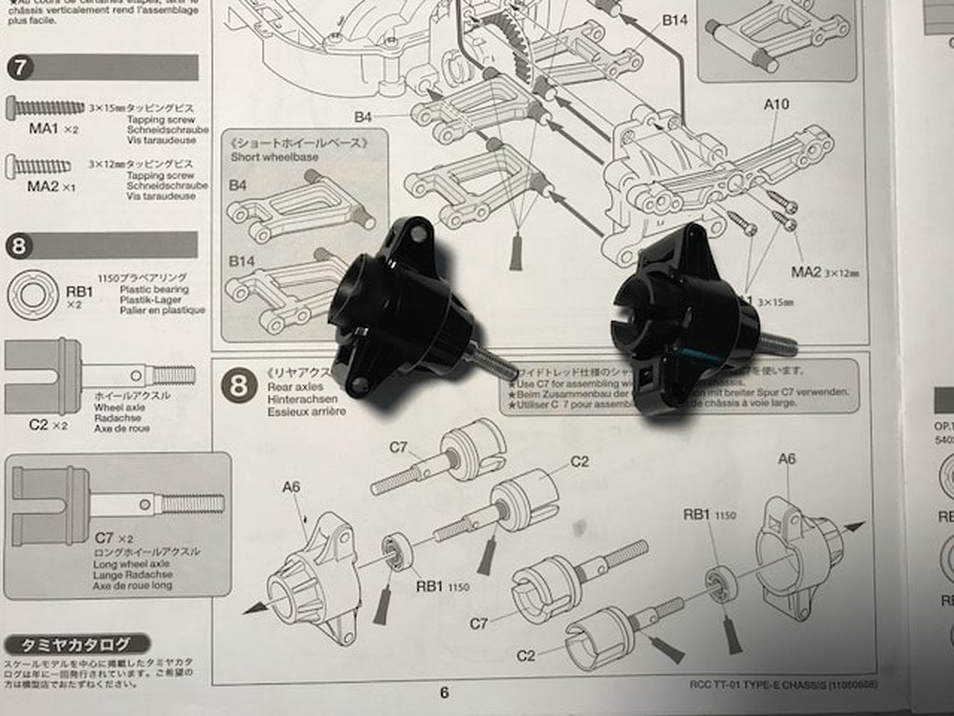 Ensure bearings are properly seated into the hubs Step 9 - Rear Skid Plate / Bumper The rear skid plate is nice and smooth. I'm sure this will help the chassis glide along the carpet without any snags 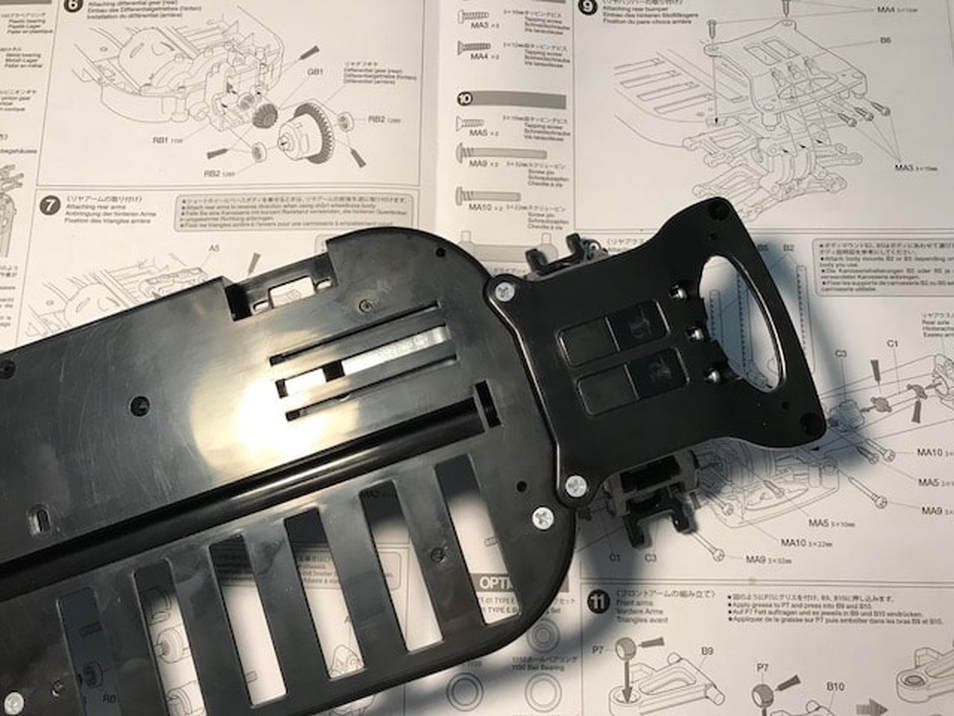 Rear skid plate is smooth and easy to install Step 10 - Rear Dogbones and Axles Next up was the installation of the rear dogbones and axles. I added a little of the included grease to each end of the dogbones then bolted everything up as directed. I snugged up the hinge pins then backed them off a very small amount to ensure the suspension moved freely. I ignored the body posts at this point as I'll be adding different posts in a later step. ***Update, I was confused by the rear body posts. Install B5 rear body posts at this point*** 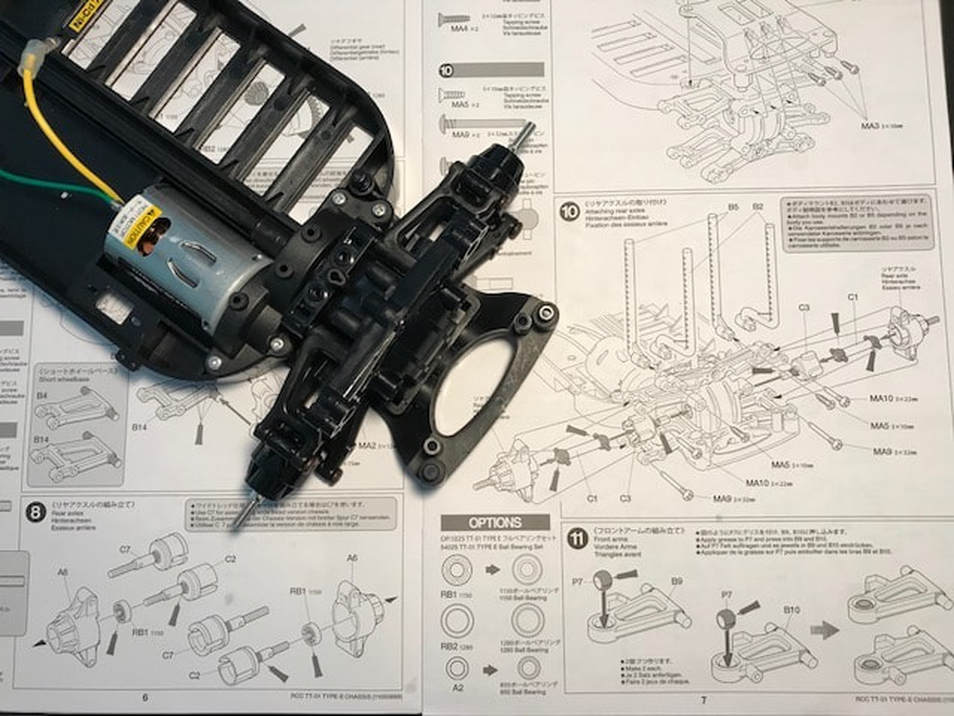 Ignore the body posts for now...you'll install the Euro Truck body posts later Step 11 - Front Arms The hardest part of step 11 was finding part P7. These pivot balls are located in the small plastic bag that also contains the servo saver. My Tamiya soft jawed pliers worked well for snapping the pivot balls into place. 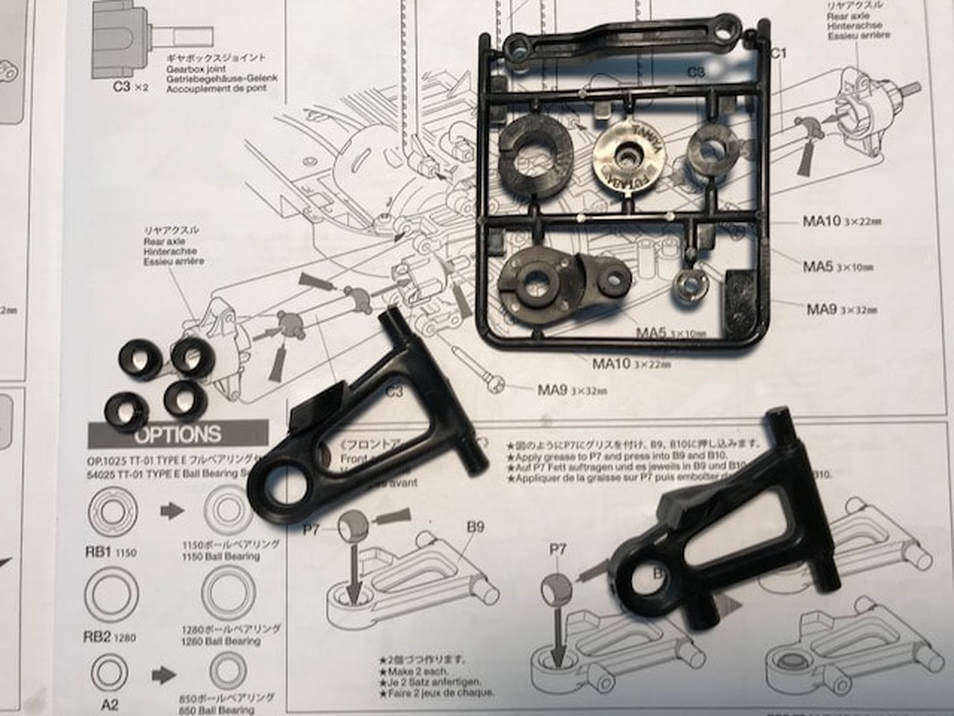 Part P7 is found in the servo saver bag Step 12 - Front Diffs Time to open Bag B and build the front diff. This one assembles exactly the same as the rear diff so no surprises here. 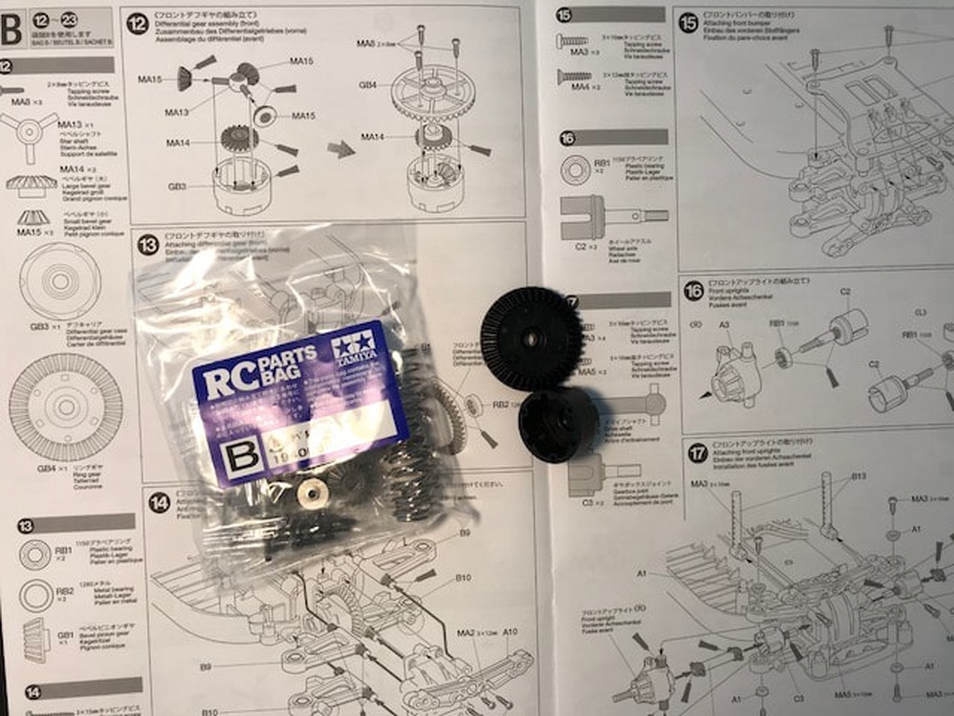 Open Bag B to start on the front diff Step 13 - Front Diff Install The front diff install was nice and easy. Once again, I used my FastEddy bearings instead of the kit's plastic bushings. I added a little grease to the differential pinion and ring gear. 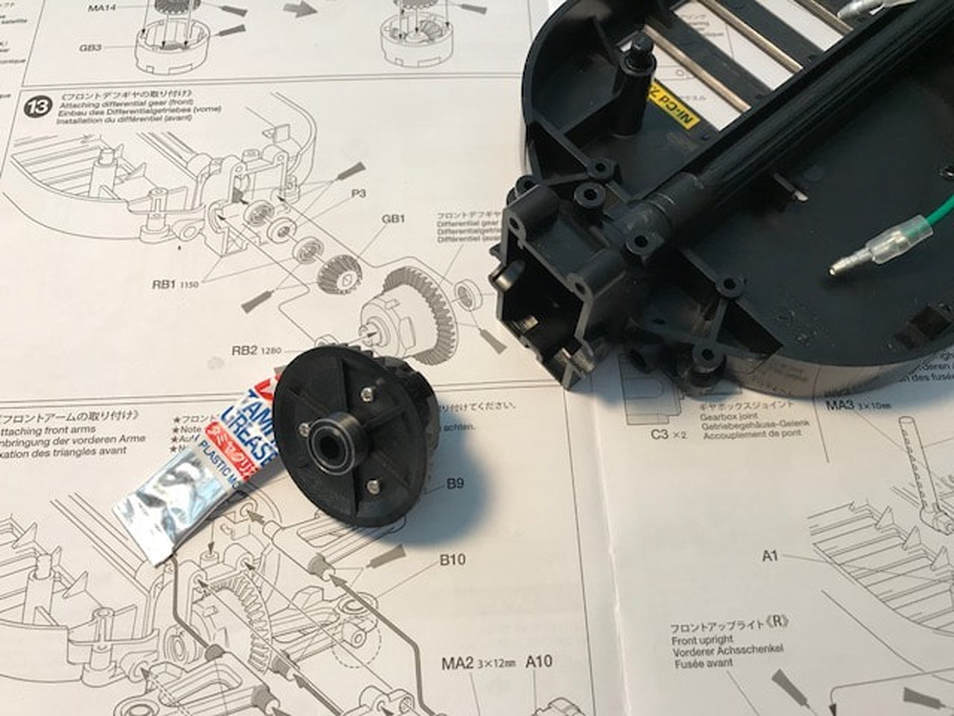 The front diff installs easily. Don't forget to add a little grease to the ring and pinion gears Step 14 - Front Arms The front suspension arms installed just like the rear. I added a little grease where indicated then moved on to the next step 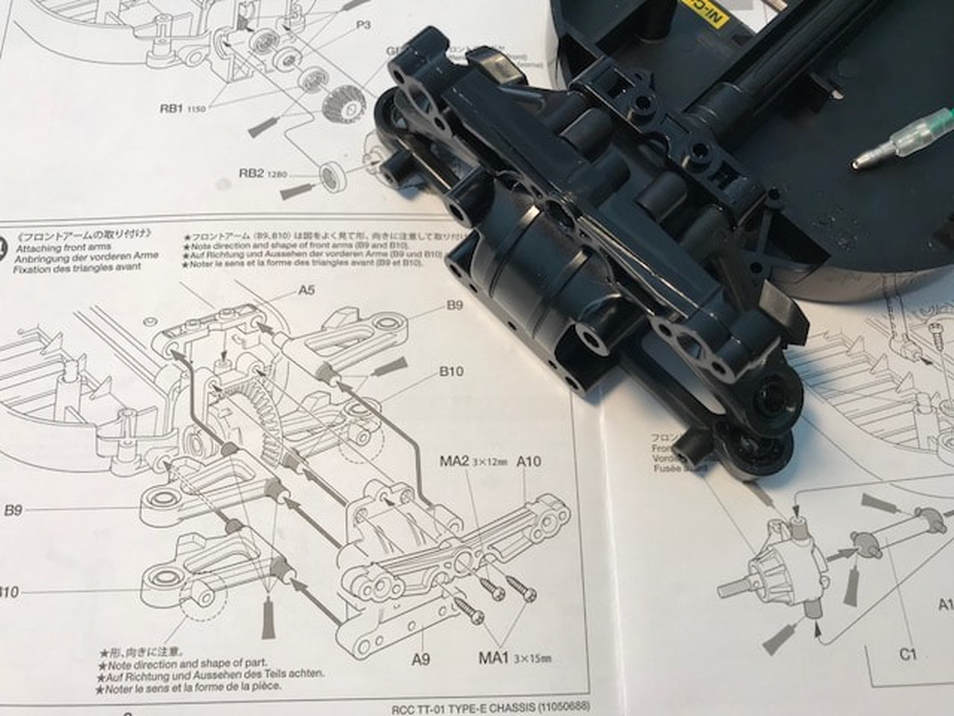 Front arm install was easy just like the rest of the build so far Steps 15 and 16 - Front Skid Plate and Axles The front skid plate drops quickly into place and the front axles are also a breeze to assemble. Just be sure to fully seat the bearings into the spindles 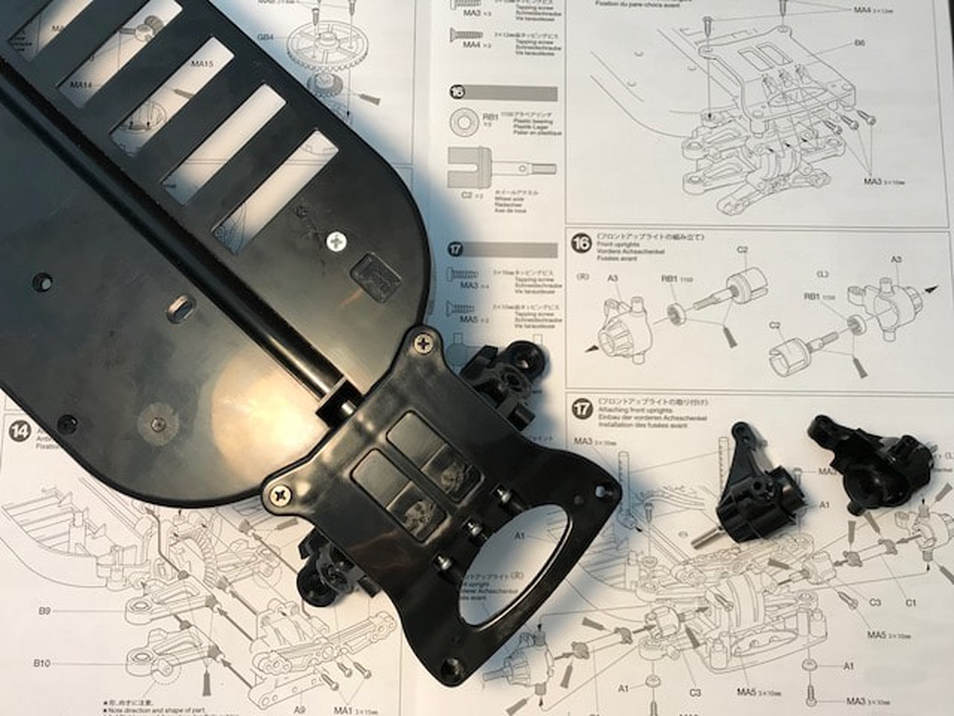 Front skid plate and spindles assembled with ease Step 17 - Front Suspension Arms The next step was to install the front suspension arms. The only challenge here was the fact that I started to run low on the Tamiya supplied grease. Thankfully I had some Associated black grease on hand so used that. ***Update - It turned out that this was the last step that required grease. I could have squeezed enough grease out of the included Tamiya grease tube but you may or may not want to have a second tube of grease on hand just in case*** 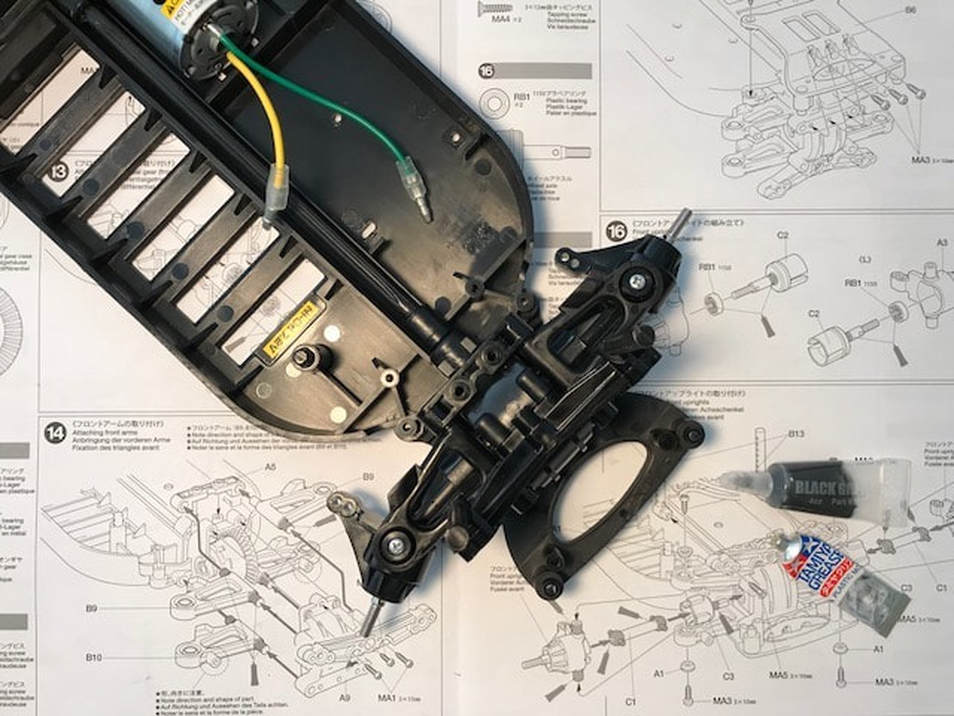 I started to run low on Tamiya Grease so started to use some Associated Black Grease Step 18 - Shocks The shocks were comically easy to assemble. These are simple friction dampers. They don't contain any oil and all four took less than two minutes to assemble! 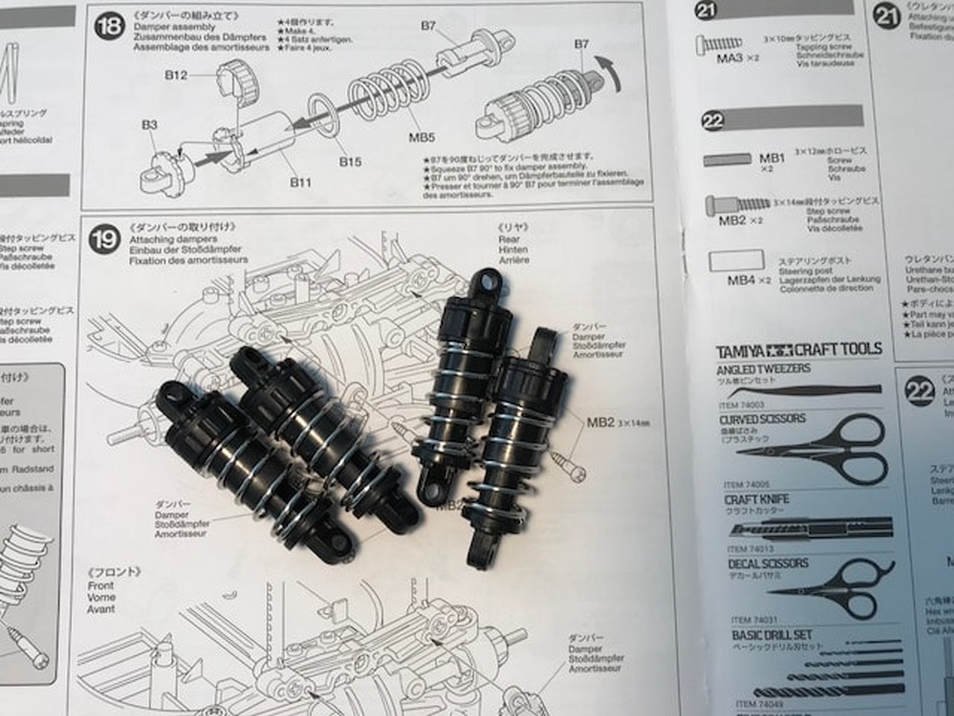 No oil here...just simple friction dampers Step 19 - Shock Installation The shocks installed quickly and easily. Ignore the grey call out box that talks about short wheelbase and just use the MB2 screws to secure the shocks 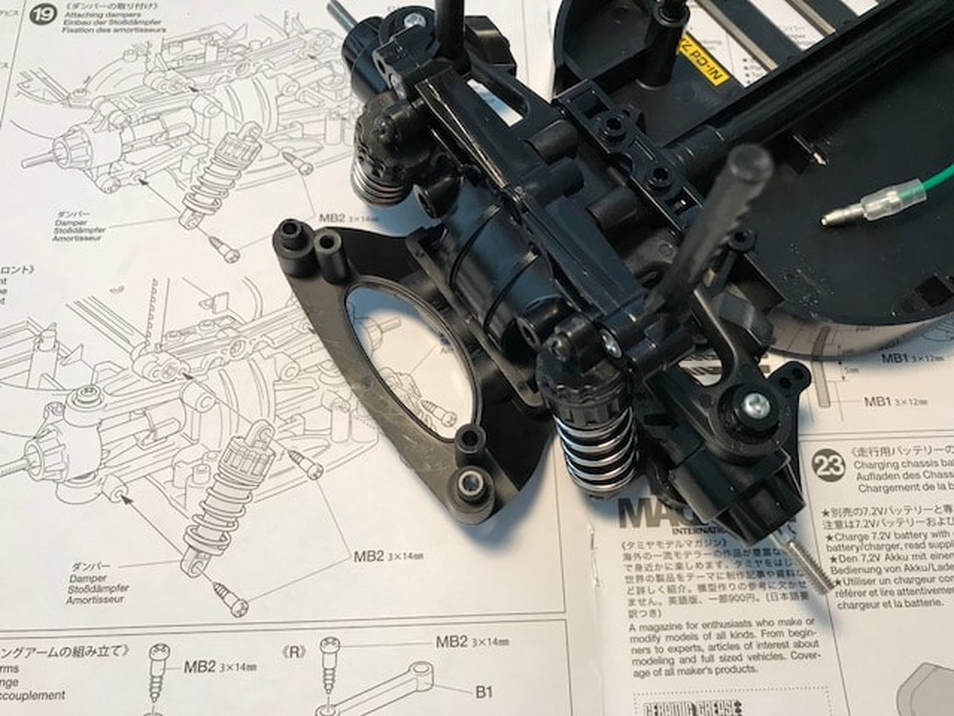 The front and rear shocks installed quickly and easily Step 20 - Steering Arms My only tip here is to "note the direction" like it says in the instructions. Each D11 part has a small dot on it to help indicate the where to mount the steering arm. I missed this initially and had to remove one of the arms and re-install it in the correct position 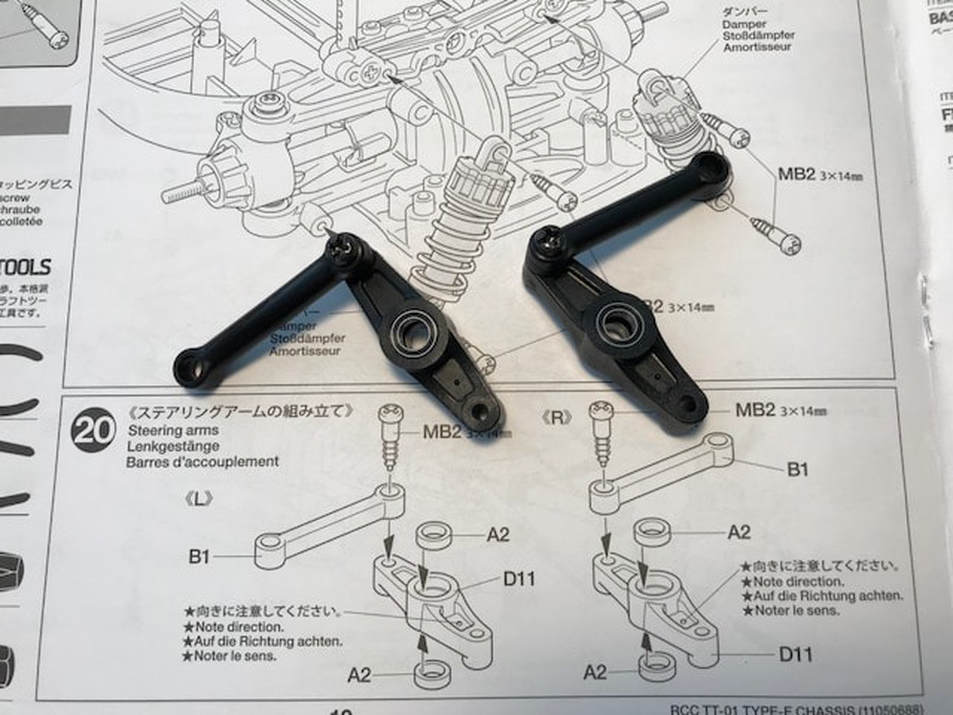 Be sure to note the direction - look for the little dots on the arms Step 21 - Front Bumper No issues here, just drop the bumper over the posts then secure it with the top plate  The large foam front bumper should help protect the front end Step 22 - Attaching Steering Arms The steering assembly dropped nicely into place. It worked well to install the grub screws into the metal steering post first, then screw the steering posts into the chassis by passing my hex wrench through the steering post. The mechanism is surprising smooth and free of slop. The use of ball bearings here likely helps. 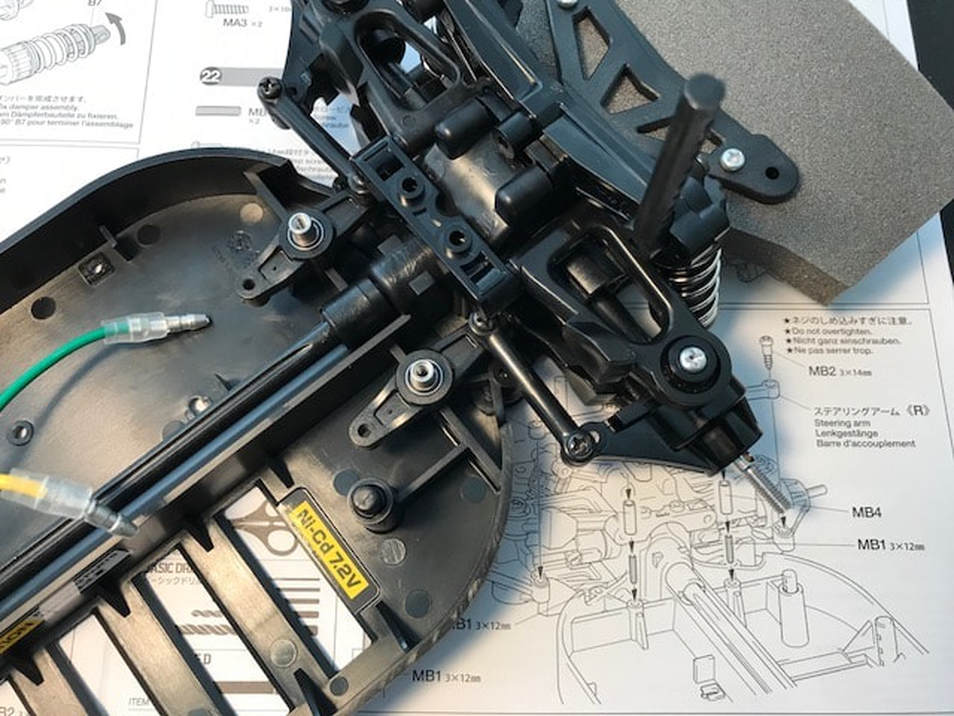 The aftermarket bearing kit helps keep things precise Step 25 - Checking Electronics In keeping with the spirit of the Tamiya Euro Truck Spec Class, I chose some affordable electronics including a HexFly HS-15CS 15kg metal gear servo and a FlySky FS-GT3C transmitter / Receiver Combo. The Futabo servo horn fits the HexFly servo perfectly. 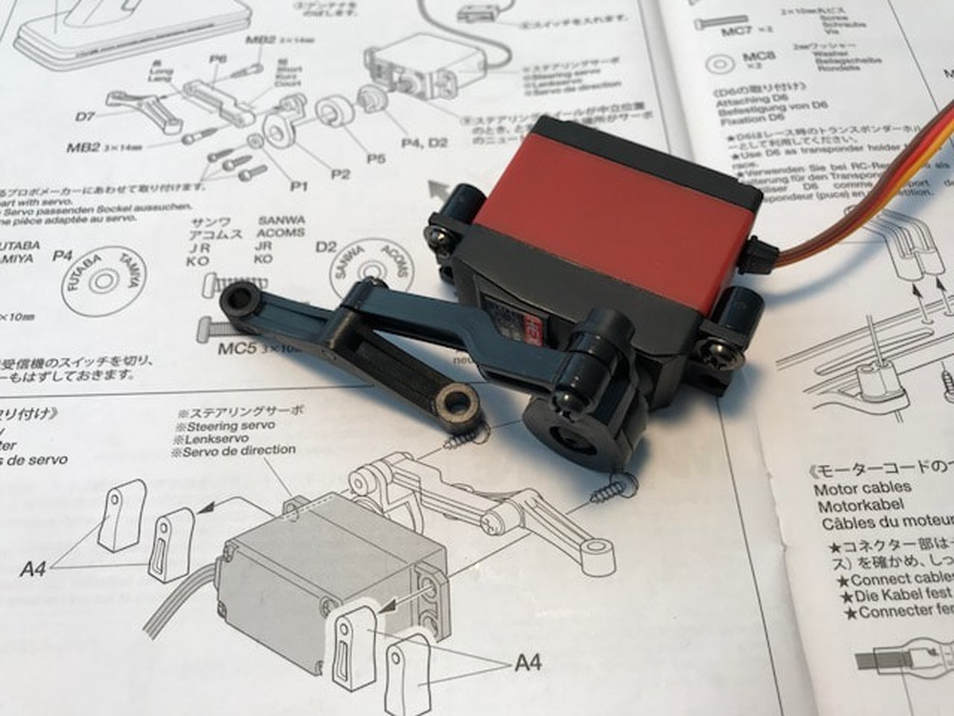 The HexFly HS-15CS should have more than enough torque for this little truck Step 25 - Install Electronics This step took a little longer than the others but it wasn't difficult. The servo bolted in without a problem, the ESC is held in place with kit supplied double sided tape and the receiver is also taped into place on top of the servo. An additional bracket is included if your transponder requires a body post / body clip to secure it but I'll be using a MyLaps RC4 transponder so didn't need the bracket. The Tamiya Euro Truck Spec rules don't allow the removal of the bullet connectors from the motor so shortening the wires is not an option. The best I could do was strap them to the upper chassis brace with the included cable ties 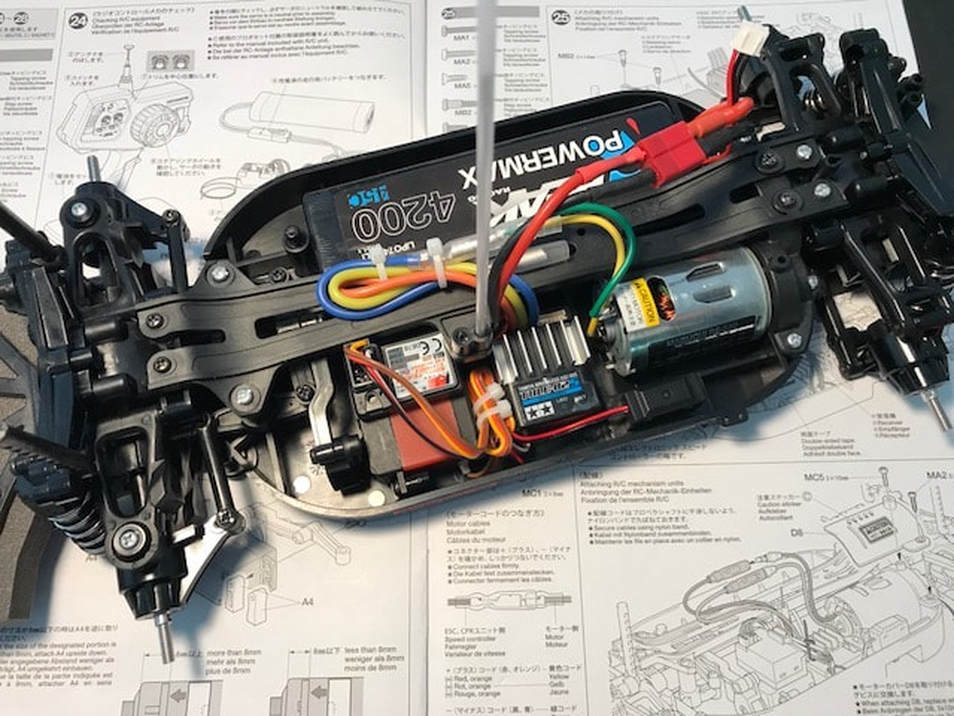 Electronics installed as neatly as possible I have heard of some people choosing to not install the motor cover but, my understanding is that the class rules require it to be installed so I've done so. 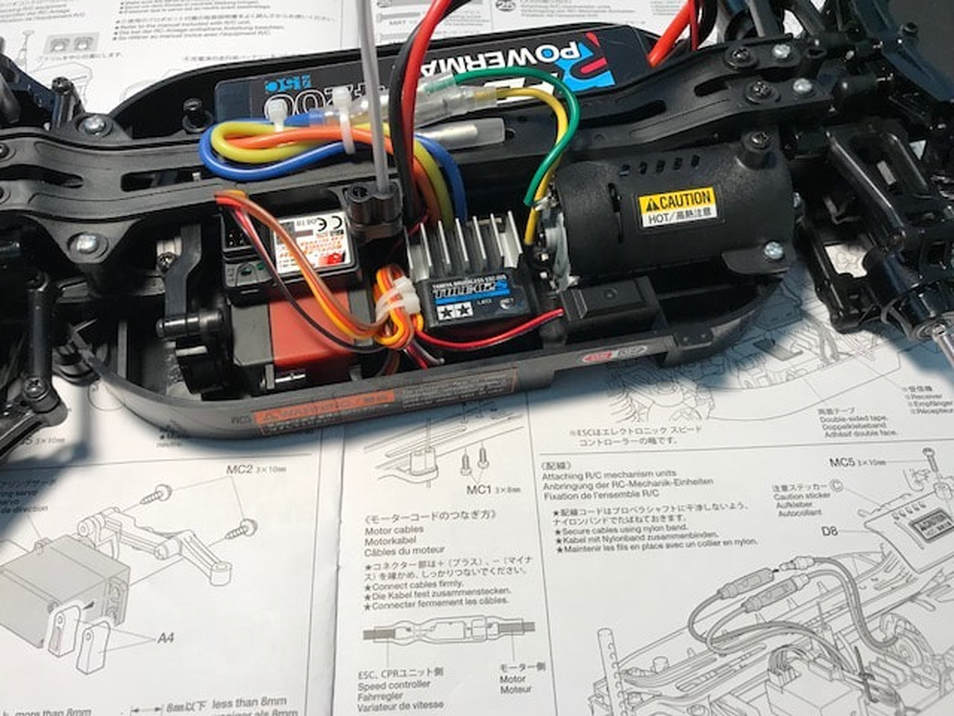 Motor cover looks good and keeps my truck legal Step 26 - Wheels and Tires Next up was to assemble the wheels and tires and install them onto the Chassis. If you intend to race in the Euro Truck Spec Class, check with your club on their stance regarding gluing the tires to the wheels. My club allows us to glue the tires so that's what I did. I understand that some clubs do not allow you to glue the tires so be sure to check before gluing yours. 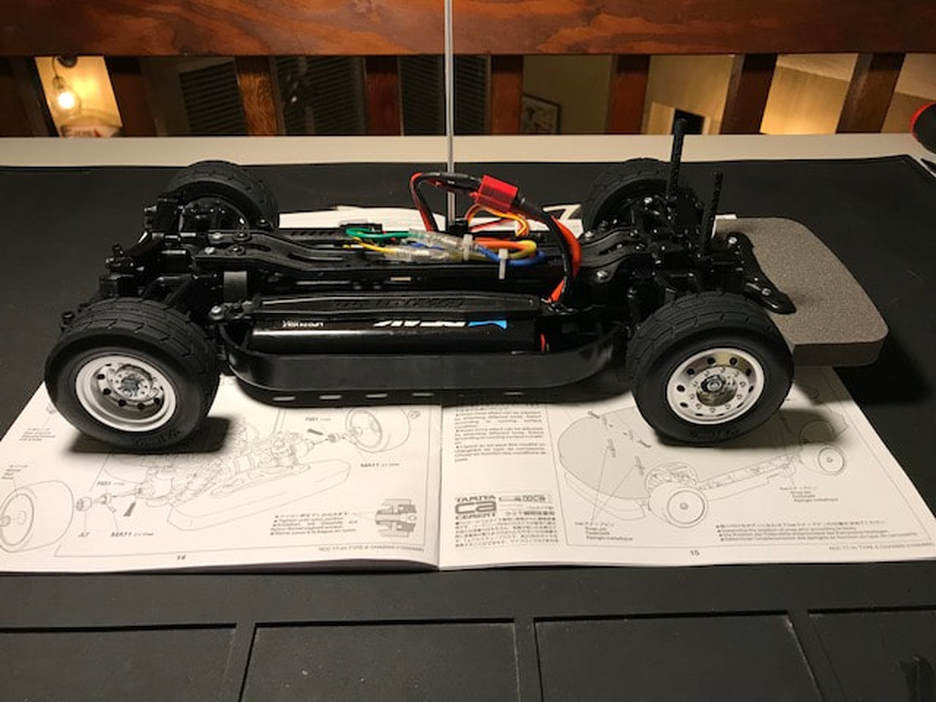 Wheels & tires installed - starting to look like a Euro Truck now Time for instruction book number 2 With the completion of book one, I reached for the Euro Truck specific booklet. All this second book talks about is the installation of the rear bumper (easy) and then cutting out and detailing the body (not so easy!) This was by far the most time consuming RC body I have ever dealt with. I think part of my challenge was that my 15 year old, worn out lexan scissors were not up to the task of cutting this much thick lexan. Be sure to get yourself some nice lexan scissors before starting this step. A good quality body reamer will also help a lot as you have to drill a total of 7 holes in the body. My reamer was as old and dull as my lexan scissors and I messed up the holes where the mirrors install because of this. By the time I was ready to finally install the body to the chassis, I was running out of energy (and interest) in the project so my final result was less than perfect but from 10 feet away it still looks pretty good.  Advice regarding the body Take your time and take a break. If I was to do this over again, I would spread the body out over a few days. Definitely do not rush through it like I did or your results may suffer. I still have a few decals I'd like to apply but I think I'll call it done for now...besides, it's race day tomorrow! 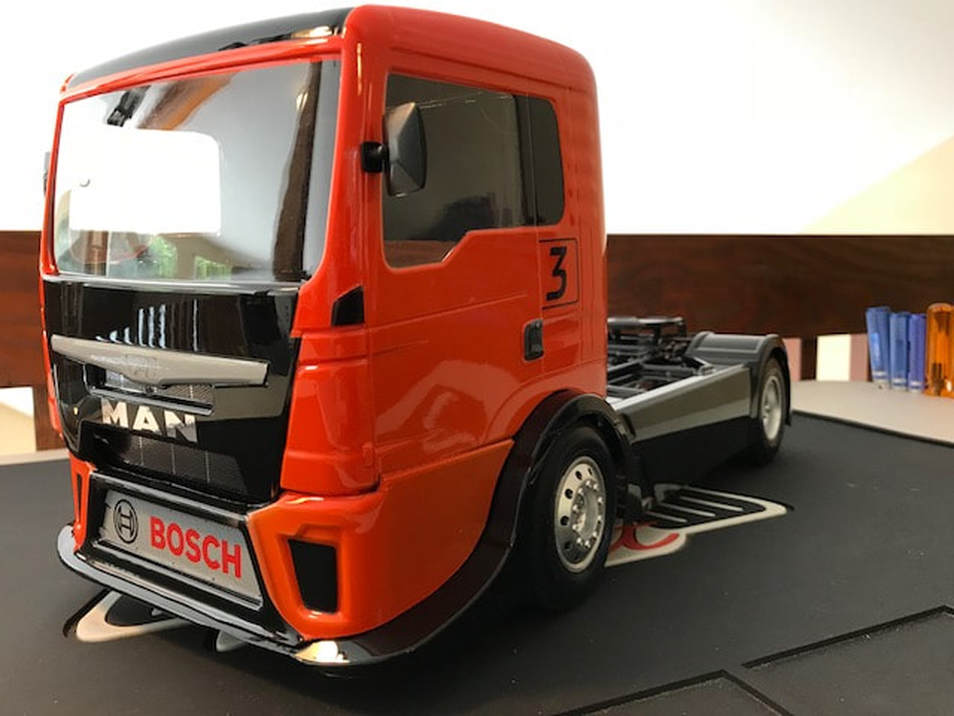 Tools I used for the build Whether you are building a Tamiya Euro Truck for spec racing or building a house, having good quality tools always helps. Here's a list of tools that you'll want to have on hand for your build - I recommend having the best quality tools you can find
UPDATE: After years of working on Tamiya vehicles, I only recently learned that they use JIS spec screws. Now that I know this, I highly recommend getting JIS screwdrivers or some Tamiya tools like these Other required items
Summary
Well, that's pretty much it for the build. For the most part, it went well. Just remember to follow the steps for the long wheelbase, take your time, use good quality tools and then go have some fun! 'till next time. Rob
Jeff Spalding
11/24/2018 07:16:58 pm
Awesome walk through of the build....ge getting ready to put 2 of these together for me & my son to race @our local club...will be a help when time for us to build our own ...thanks👍
My pleasure Jeff. Have fun with your son, that's what it's all about.
Bob Boden
10/24/2019 07:00:39 am
Excellent narrative on the build of a euro truck. Thanks for confirming which wheel base option to go with. Same goes for confirming the axle length option. It’s reassuring to know that I guessed correctly. Comments are closed.
|