 If you've been checking out the blog lately or have been getting the email newsletter, you may have noticed that I've been reducing prices on parts and upgrades over the past few weeks. This week is no different and I'm happy to report that I've just reduced the price on almost every Wendigo part and upgrade available
I'm pretty sure you'll have a hard time finding lower prices on Wendigo parts anywhere else but if you do, please let me know. Also, if you haven't already done so, be sure to sign up for the email newsletter. I'll send updates once or twice per month including coupon codes for even more savings Thanks for your support, I really appreciate it Rob 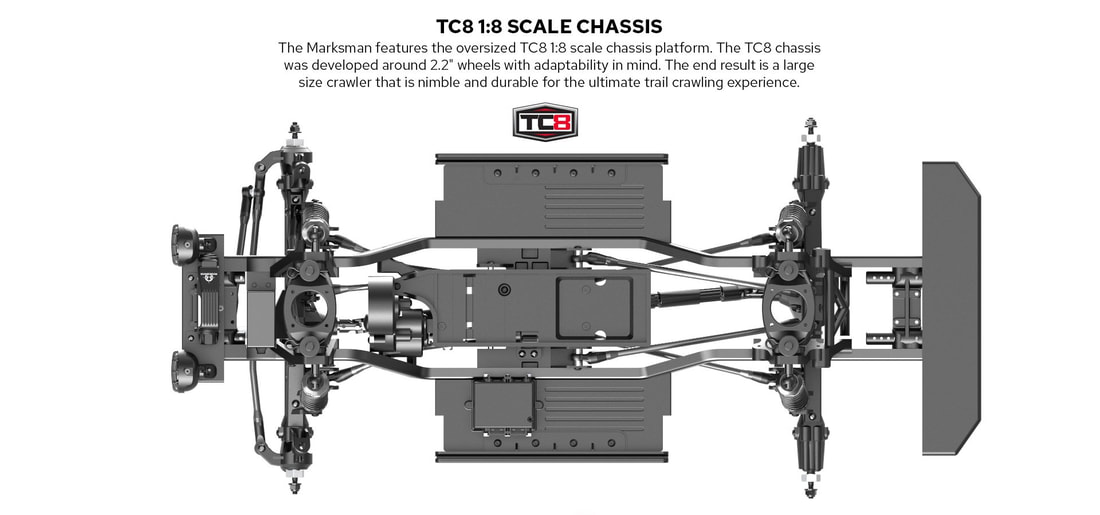 I'm still waiting on an instruction manual and parts list to be release for the upcoming Marksman but from what I can tell from this photo, the chassis, transmission, transfer case, axles, shocks battery tray, receiver box etc all seam to be Gen8 and Wendigo components
Based on this assumption, I've started to update the Marksman parts pages to include Wendigo parts and upgrades. I'll fine tune everything once I receive more information from Redcat but for now, let's assume I'm correct in that the Marksman will be compatible with the majority of Wendigo and Gen8 parts Stay tuned for more Marksman updates as they become available Rob 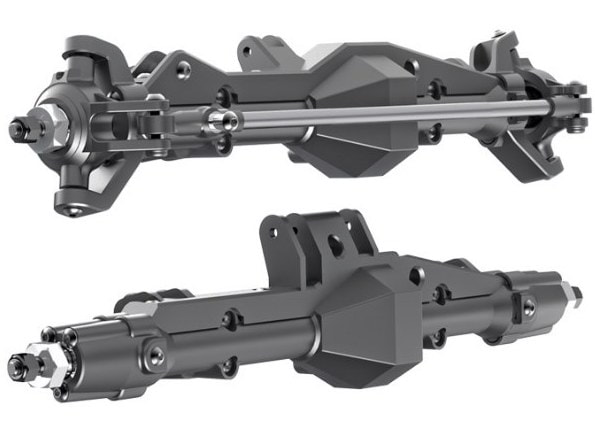 Redcat hasn't released a parts list or manual for the upcoming Marksman yet but, from the information and pictures currently available, it looks like the Marksman will utilize the XR247 axles from the Wendigo.
These axles have proven to be very durable in the Wendigo and, aluminum upgrades are already available if you want to take your Marksman to the next level. Once I have 100% confirmation of this (I'm sure I'm correct), I'll start to add the axles, parts and aluminum upgrades to the Marksman parts page if you'd like to order them in advance of the trucks arriving. Stay tuned for more Marksman details as they become available Rob While we wait to get the new Marksman in our hands, I thought you may find this size comparison information interesting. The Marksman is being advertised as 1/8 scale while the Wendigo is 1/10. When we look closely at the dimensions though, you can see the Marksman is actually slightly narrower and only a few mm taller than the Wendigo. The biggest size difference between the two vehicles is in the wheelbase and total length. The longer wheelbase of the Marksman gives it a much more realistic scale appearance than the Wendigo (in my opinion) 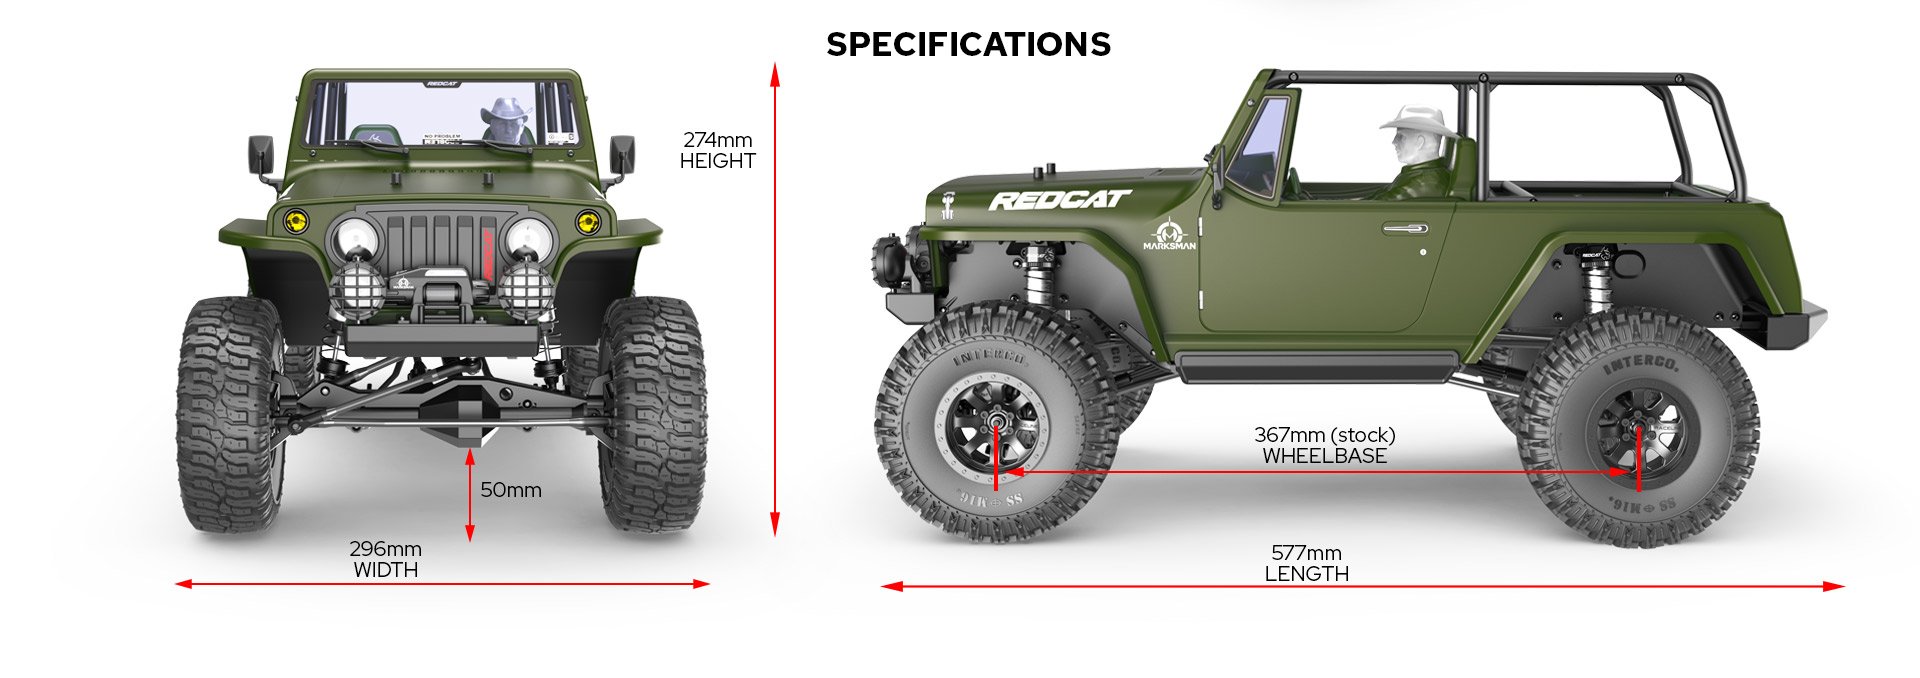 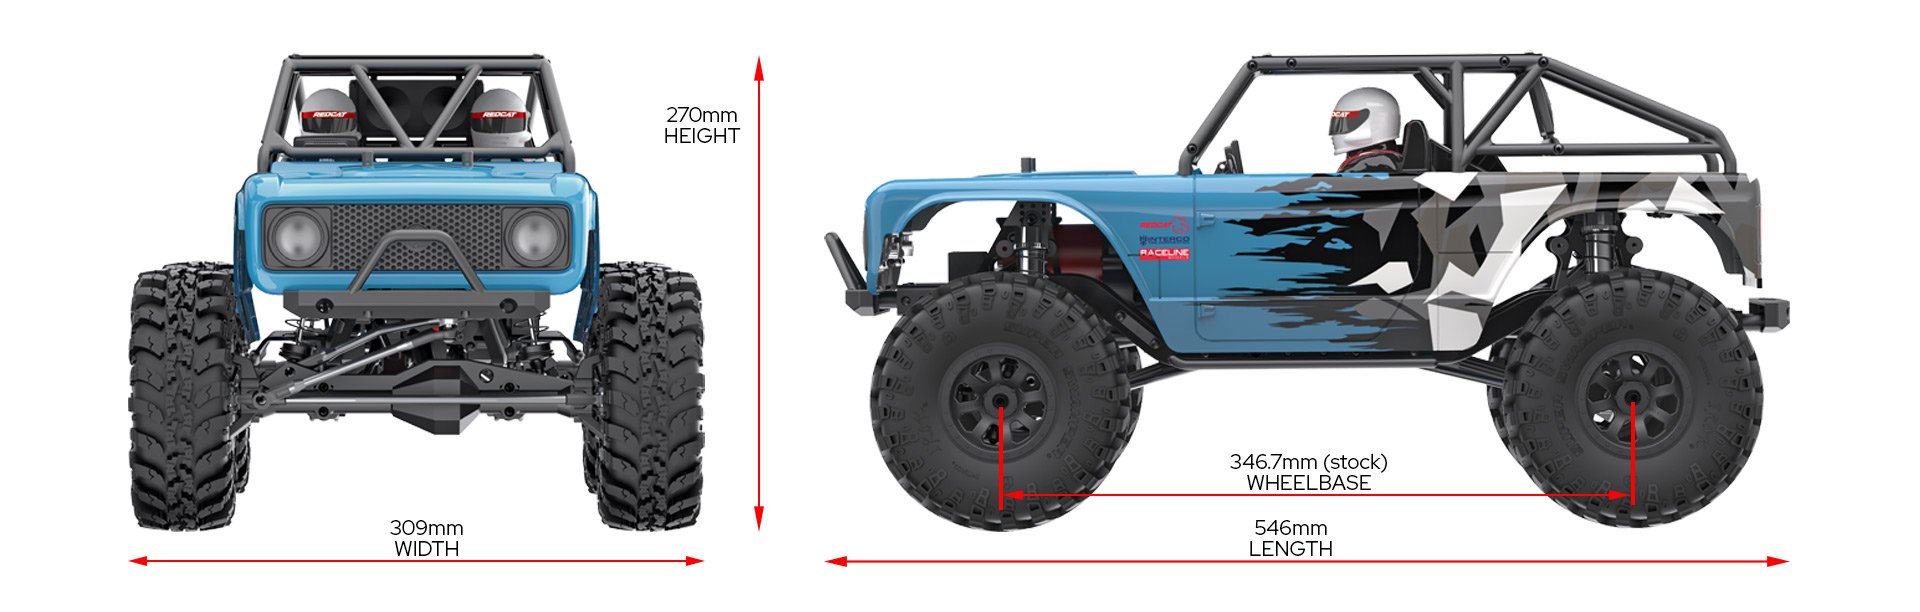 'till next time
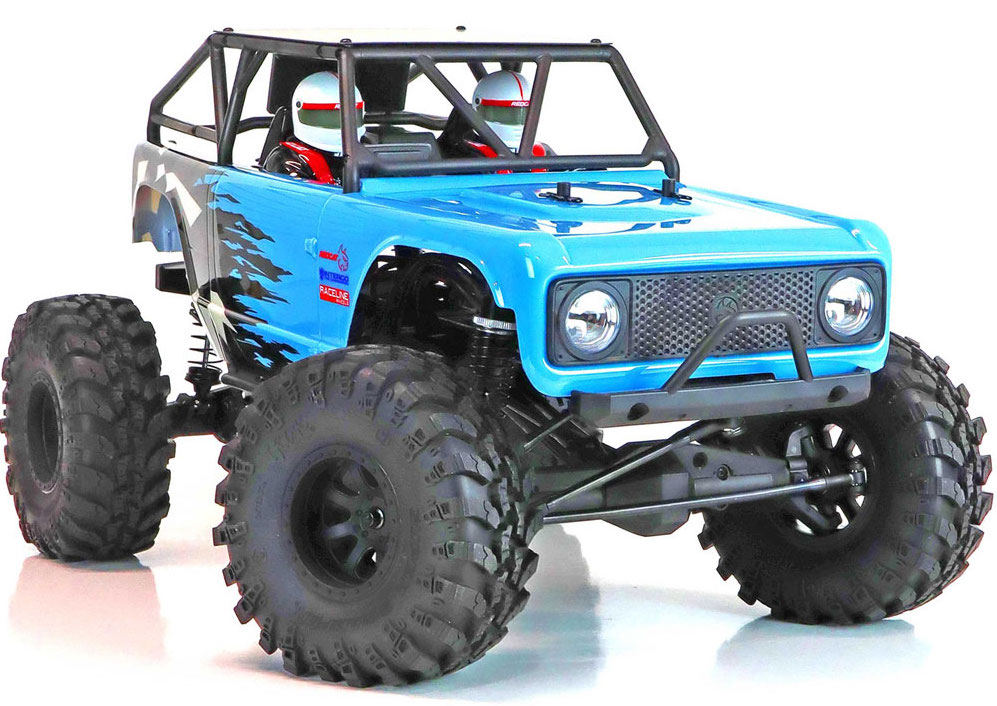
Rob 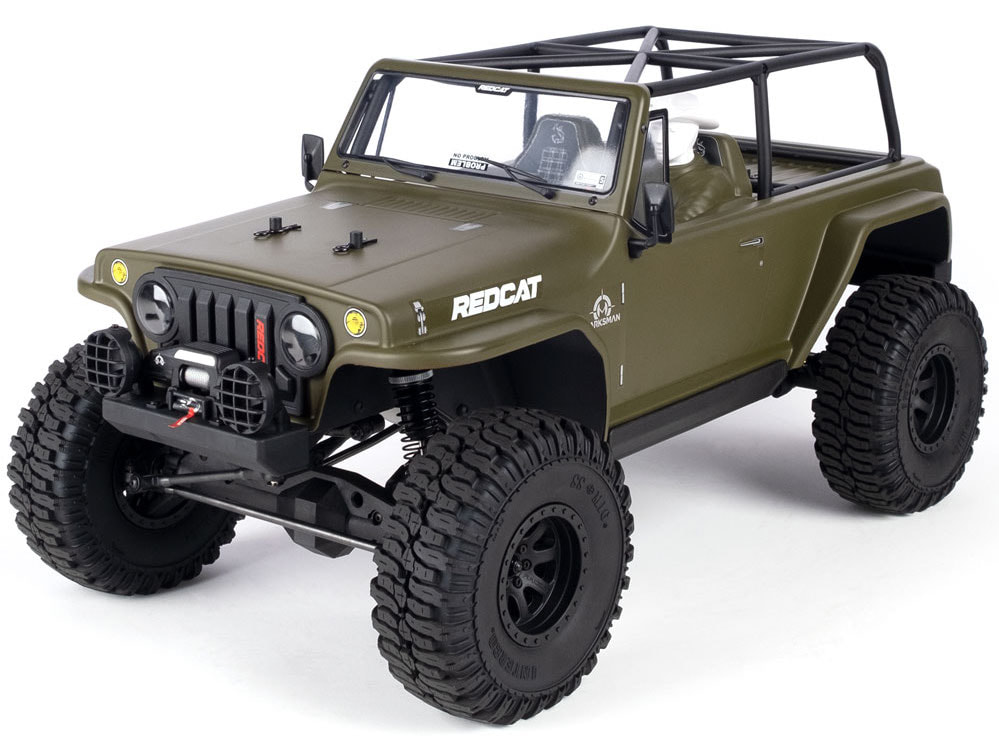 Surprise! I knew something was in the works but I didn't see this one coming!!! Redcat just announced the new 1/8 Scale Marksman TC8 Trail Crawler and it looks awesome! I'll have full information available very soon but for now, I can tell you that the Marksman will come ready-to-run and will include a Holmes Hobbies Crawlmaster 12T brushed motor and Hobbywing WP-1080 ESC, 2.2" wheels and tires, and the XR247 axles from the Wendigo
The Marksman appears to combine some of the best parts from the Gen8 and Wendigo into this new trail truck / crawler package. I'd like to say this is what the Wendigo should have been in the first place but I won't : ) Stay tuned for more info and if you haven't done so already, be sure to sign up for the email newsletter as I'll be sending out an email as soon as the Marksman is available to order Rob In the past, I had to increase prices on large items such as bodies, wheels, tires etc. to offset the high cost of UPS shipping. Now, these large/heavy items will default to UPS shipping at checkout thus allowing me to lower prices on these and other parts as well. Here are the new shipping rates:
How Much is Shipping to the Continental US?
How Much is Shipping to Canada?
Thanks for your support, stay tuned for more updates Rob 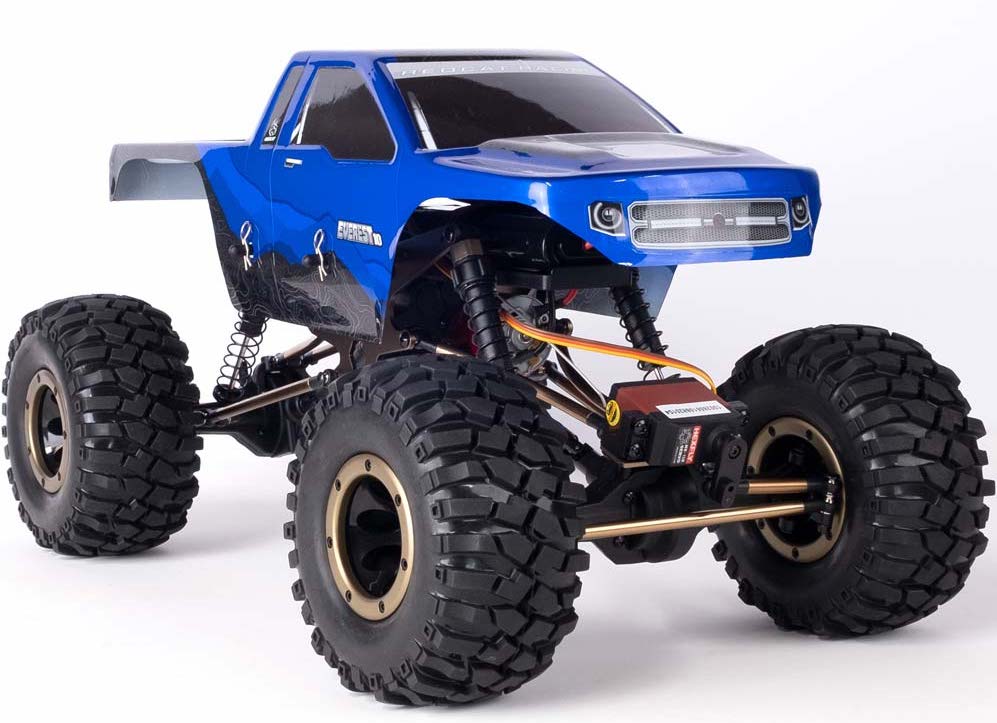 A little over a week ago, I mentioned that all of the Volcano-16 prices have been reduced. Today, I have more good news! I've just reduced the price on more than 1/2 of the Everest-10 parts and upgrades as well.
In the coming days and weeks, I'll be reviewing all of the parts prices and making reductions everywhere I can so stay tuned for more updates If you haven't already done so, be sure to sign up for the email newsletter. I'll send updates once or twice per month including coupon codes for even more savings Thanks for your support, I really appreciate it Rob 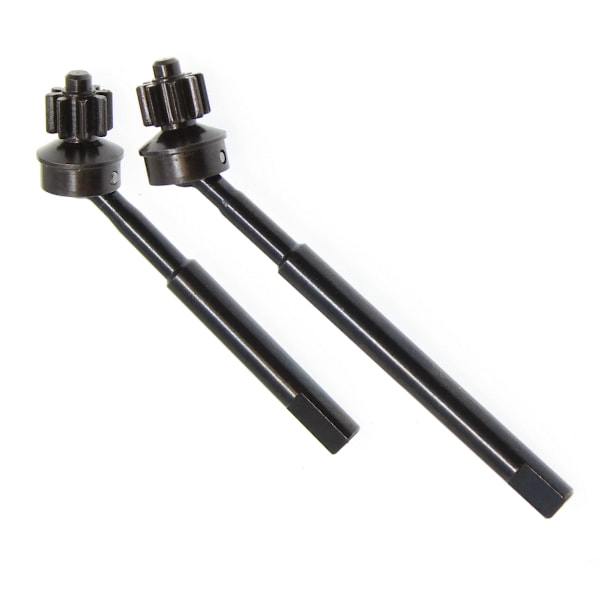 More good news today if you own a Gen8 and like to drive it hard! The chromoly axle shafts and CNC top portal gears are back and they are now available in the newer HD / V2 thicker sidewall design for even greater strength
Here's a direct link if you'd like to check them out on the Gen8 parts page 'till next time Rob 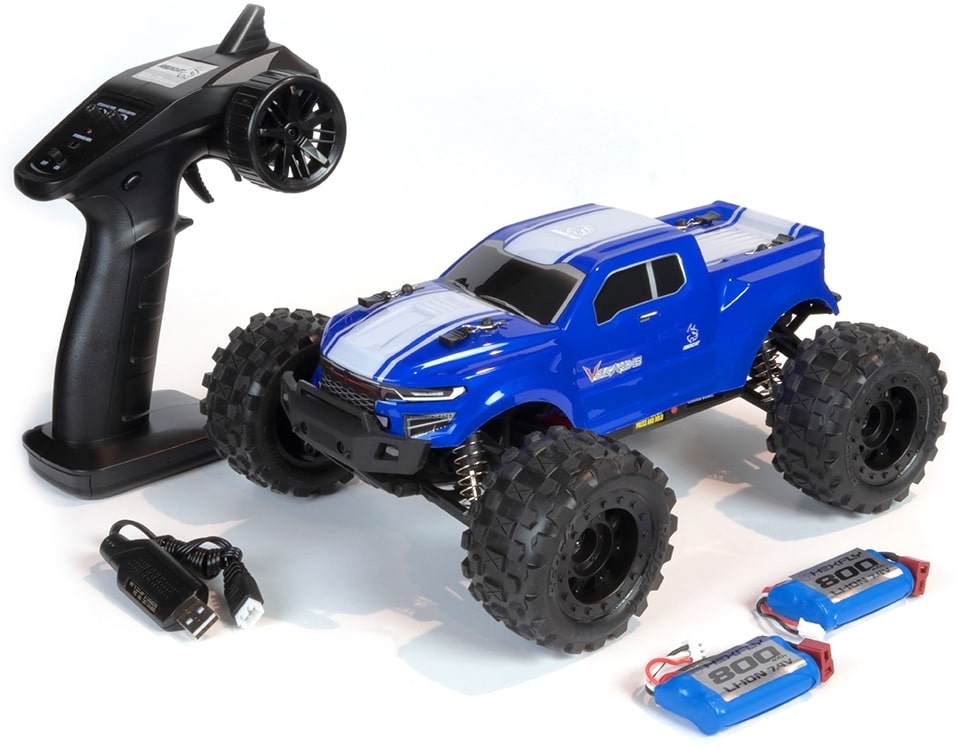 Just another quick update today to let you know about the new lower price on Volcano-16 2-Pack Trucks. These awesome little trucks come fully ready-to-run complete with two batteries and a USB charger. Click the link to see the new lower price as well as all the specs and features. As always, you'll also get free shipping and no sales tax
More good news: All Volcano-16 parts and upgrades have new lower prices as well! Click the link to view all of the in-stock Volcano-16 parts and upgrades Thanks for your support, I really appreciate it Rob PS, did you know that TeamRedcatShop.com is just a one man, small business? People often confuse me with Redcat Racing but I'm just a dealer of their products. When you buy from TeamRedcatShop.com, you are buying from a fellow hobbyist with a passion for RC cars. Not only will you be supporting a small business, you'll be getting a better deal than if you buy direct from Redcat. Please tell your friends  Good news! An order of Everest-10, Gen7 and RC-MT10E parts just arrived and are ready to ship. Just some of the parts that are back in stock include:
More good news is coming soon so be sure to check back to the blog so you don't miss it (or better yet, sign up for the email newsletter) Thanks for your support, I really appreciate it Rob PS, did you know that TeamRedcatShop.com is just a one man, small business? People often confuse me with Redcat Racing but I'm just a dealer of their products. When you buy from TeamRedcatShop.com, you are buying from a fellow hobbyist with a passion for RC cars. Not only will you be supporting a small business, you'll be getting a better deal than if you buy direct from Redcat. Please tell your friends  It's a new month so it's time for another awesome deal for you. Starting now and ending at the end of May, when you purchase two Gen8 V2 trucks, I'll email you a gift card valued at $50 to be used on future orders
This offer is valid from May 1, 2021 through May 31, 2021 Both Gen8 V2 trucks must be ordered at the same time, on the same order and ship to the same address The gift card will be emailed to you within 48 hours so be sure to check your spam folder if you do not receive the email. Gift cards can be used site-wide for any future orders of parts, upgrades or even vehicles and do not expire Thanks for your support, I really appreciate it Rob 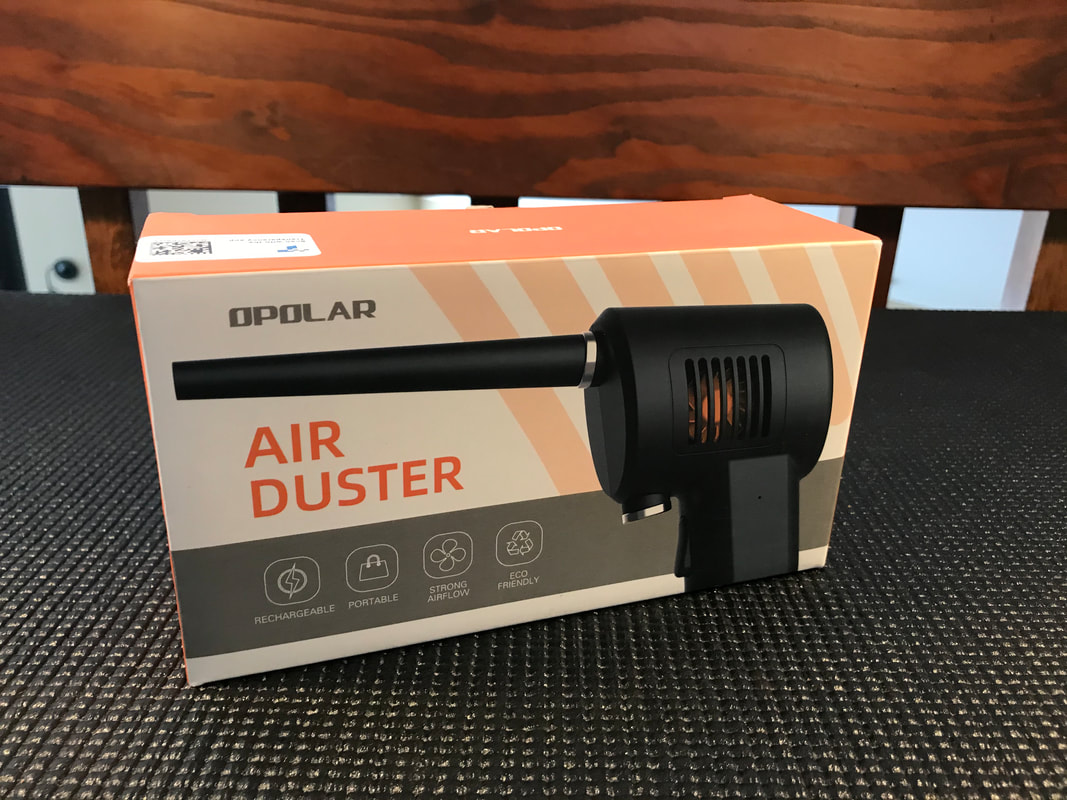 A little over a week ago, I mentioned that I had ordered an Opolar Air Duster from Amazon. It's in my hands now and I just gave it a quick test 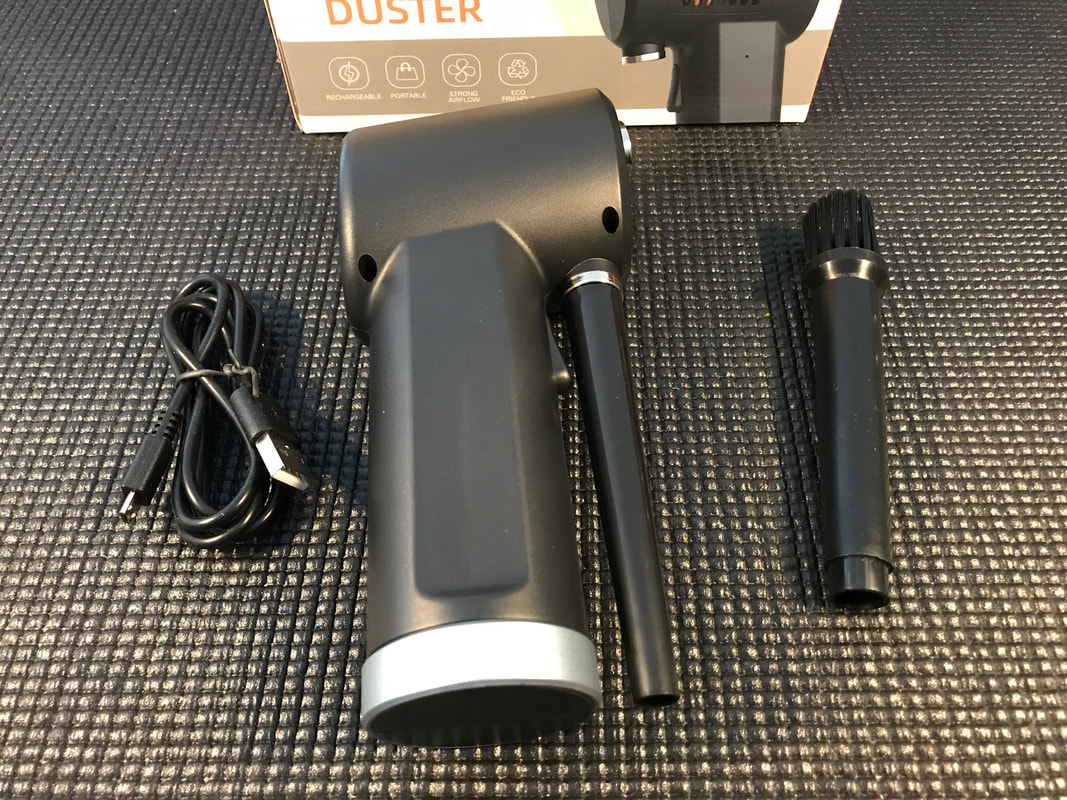 The air duster comes with the battery powered blower unit, a USB charge cable and two nozzles - one with a soft brush on the end and the other without It did not come with any instructions but using it is pretty straight forward: Charge it, attached the desired nozzle, pull the trigger It takes about 1/2 a second for the motor to activate and spool up when you push the button and it also takes a moment to slow down when you release the button I haven't tried it on any of my RC stuff yet but after a short charge I used it on a few things around my house. Here's how it did:
So, would I buy it again? Although it's not as powerful as I was expecting, it's convenient to use (I don't have to haul out the air compressor) and does a decent job around the house. I have my doubts about it's ability to clean a dirty RC car but it'll probably work reasonably well to knock off loose dirt. I think I would buy it again but wish it was either a little more powerful or a little cheaper than the $80 that I paid for it. 'till next time, have fun Rob By the way, if you found this post helpful, please help me out by using one of the links to Amazon within the post the next time you buy something (it doesn't have to be the air duster...heck, go buy some toilet paper). If you use the link, Amazon will pay me a small commission and it won't cost you anything extra and I'll be able to use that money to buy more items to review for you 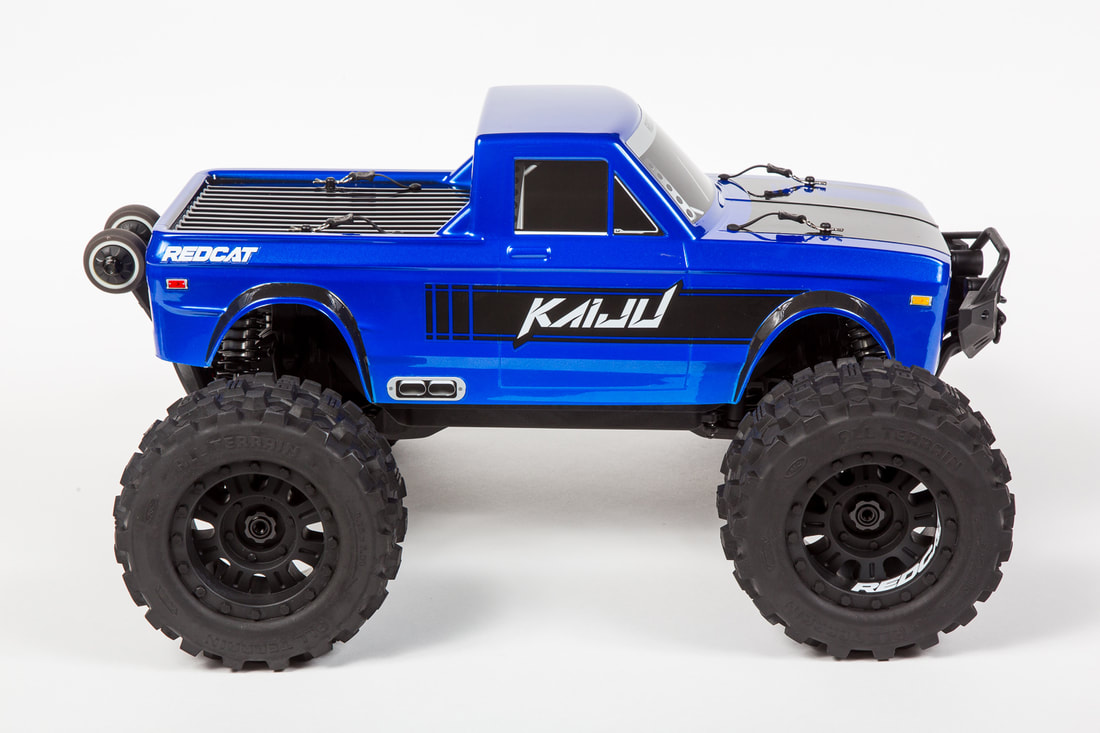 It's time to gather up some friends and add a couple of Kaiju trucks to your fleet of RC vehicles! Starting now and ending at the end of April, when you purchase two Kaiju trucks, I'll email you a gift card valued at $50 to be used on future orders
This offer is valid from April 1, 2021 through April 30, 2021 Both Kaiju trucks must be ordered at the same time, on the same order and ship to the same address The gift card will be emailed to you within 48 hours so be sure to check your spam folder if you do not receive the email. Gift cards can be used site-wide for any future orders of parts, upgrades or even vehicles and do not expire Thanks for your support, I really appreciate it Rob 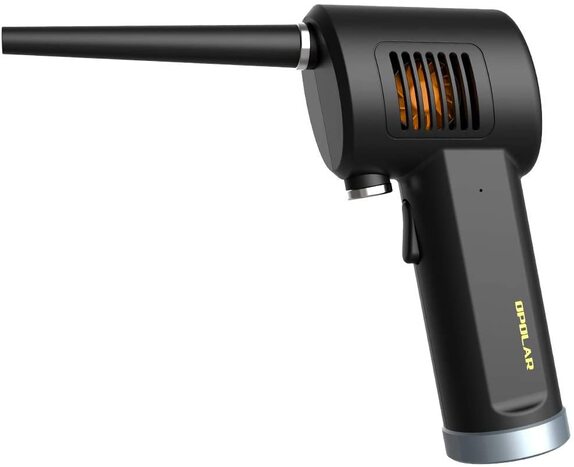 I've been saving up my Amazon gift cards for a while now to make this purchase and finally pulled the trigger on it this morning. It's called the Opolar Air Duster and I'm hoping it will work well for cleaning off my RC cars. From the reviews I've read, I think it will work well.
I was considering getting one of the Metrovac dryers as I know they are very high quality but they need to be plugged in to AC power so I decided on this Opolar battery powered unit instead. My plan is to keep it in my field bag and blow the trucks off before bringing them home. Then, I can use a little Simple Green and the blower again or my air compressor at home to do an even better job. As a bonus, I should also be able to use it around the house and in the car for light dusting and cleaning. Once I have it in hand and have used it for a while, I'll write another post and let you know how well (or not) it works but until then, here's a link to where you can check them out on Amazon if you'd like to. 'till next time Rob By the way, if you found this post helpful, please help me out by using one of the links to Amazon within the post the next time you buy something (it doesn't have to be the air duster...heck, go buy some toilet paper). If you use the link, Amazon will pay me a small commission and it won't cost you anything extra If you haven't found him online yet, check out Dad Bod RC on YouTube, he's a cool guy and makes some entertaining Gen8 videos - the fact that he's also a customer of mine and mentions TeamRedcatShop.com also scores some points with me
'till next time, have fun Rob  If you've been looking for parts or upgrades for your new Redcat Volcano 16, I have good news for you. All Volcano 16 parts and upgrades are now in stock and ready to order
To celebrate the good news, all Volcano 16 parts and upgrades are on sale. Check out all of the in-stock Volcano 16 parts here and be sure to tell your friends about the sale 'till next time, have fun Rob 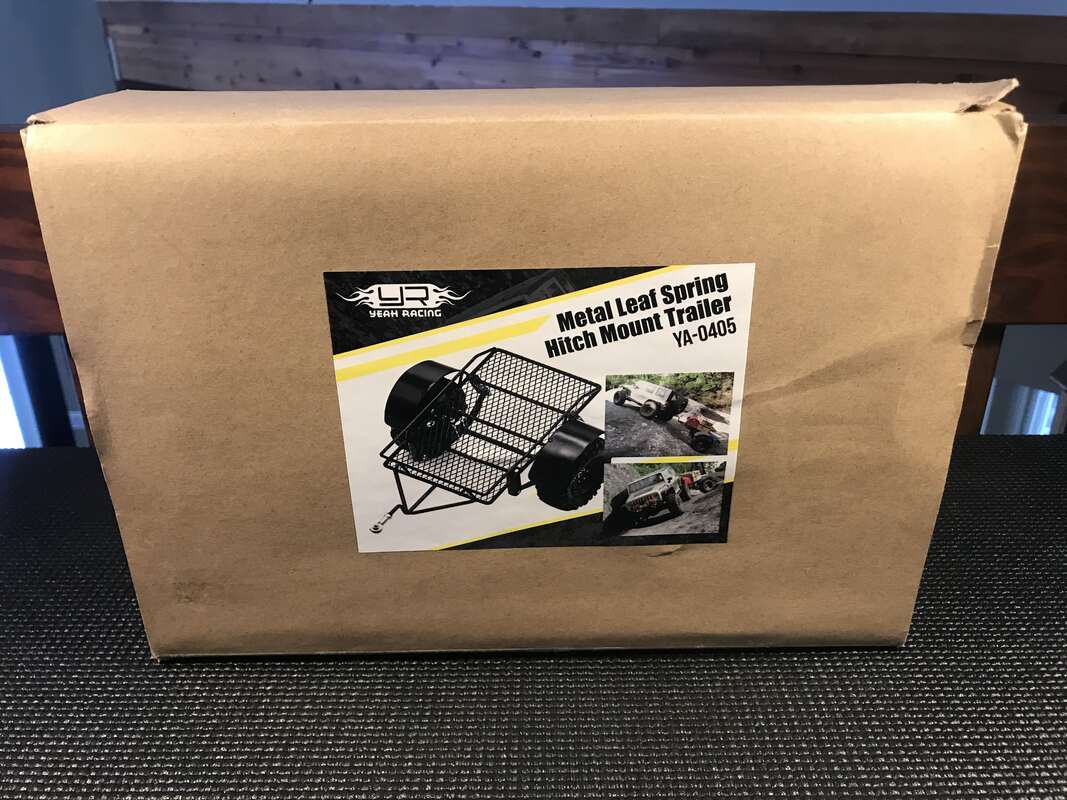 It's been almost a month since I purchased this Yeah Racing trailer for my AXE and I finally got around to putting it together and hooking it up to my truck. Here's a quick look at how the project went along with a few final thoughts on this trailer 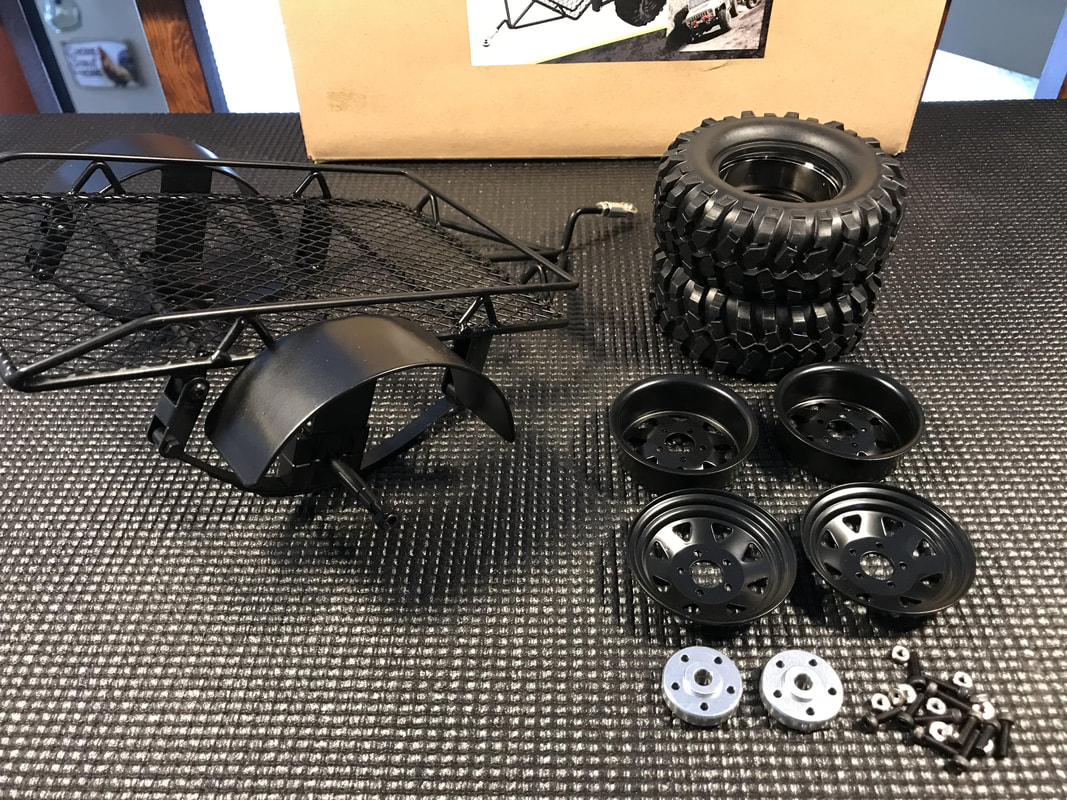 The trailer comes fully assembled but you have to build the wheels/tires. Instructions were not included with my trailer but the process was straight forward enough that they were not required 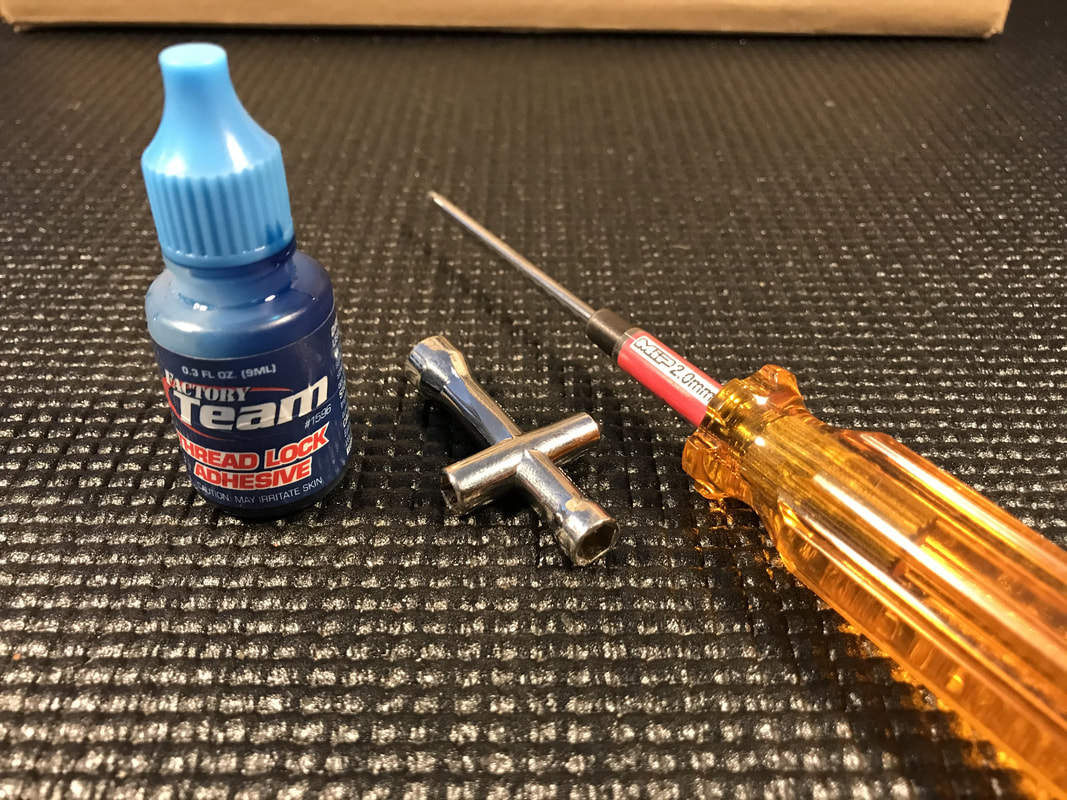 You'll need a few basic tools to assemble the wheels. A 2.0mm hex driver and a small box wrench or pliers. Medium thread lock is also a good idea so that you don't lose any of the hardware on the trail 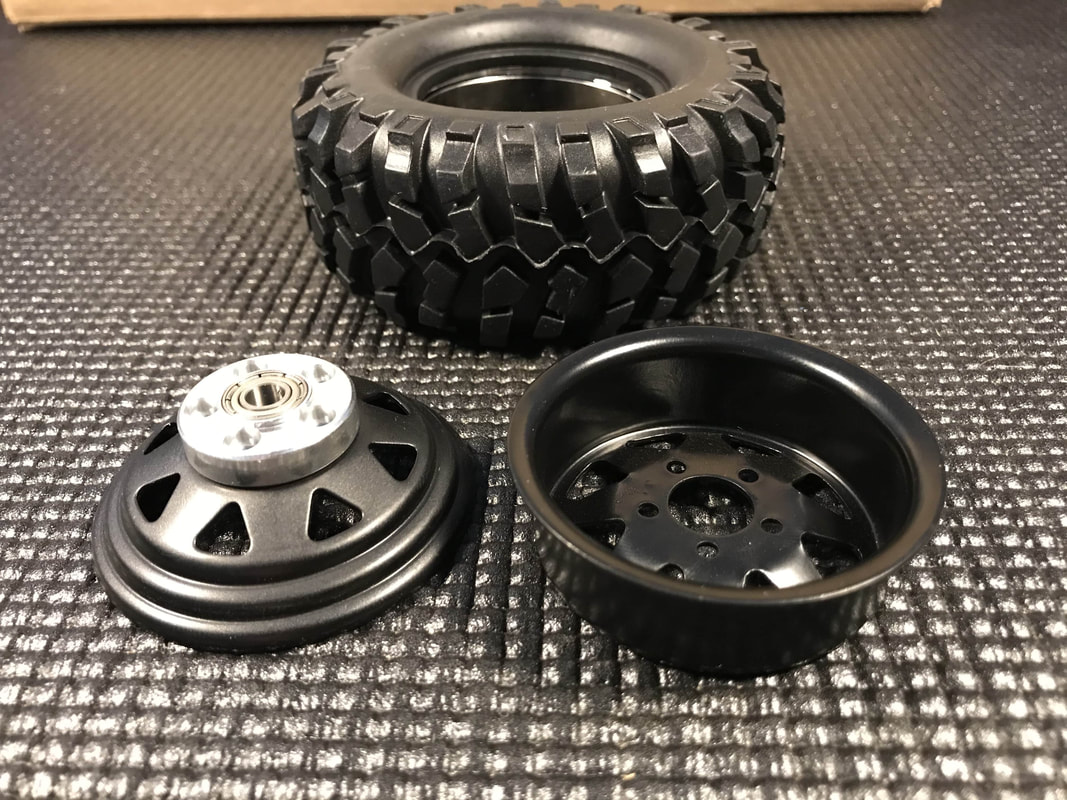 The trailer included two stamped steel beadlock wheels and some okay looking but super low quality tires with foam inserts 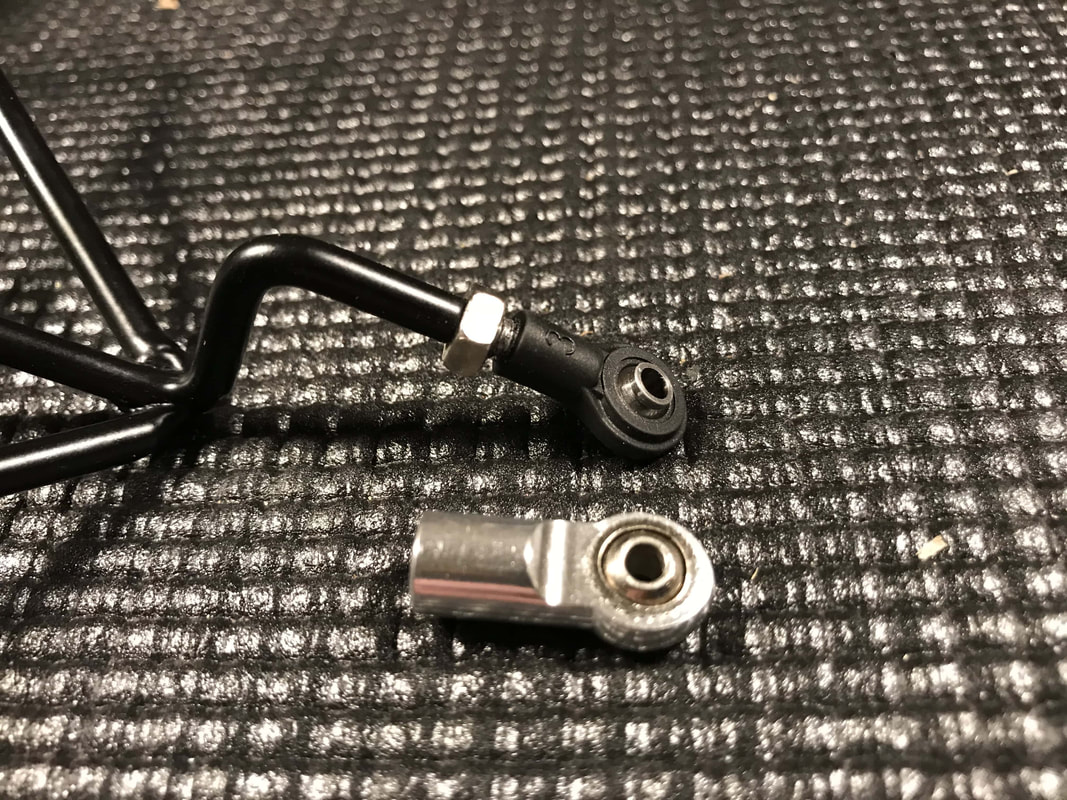 The silver metal hitch / rod end was included with the trailer. Unfortunately, mine arrived damaged (the ball was improperly installed and I couldn't get it out or fix it) Luckily, I had some rod ends (I think this is a lower shock end) from a different vehicle that fit with some minor modification 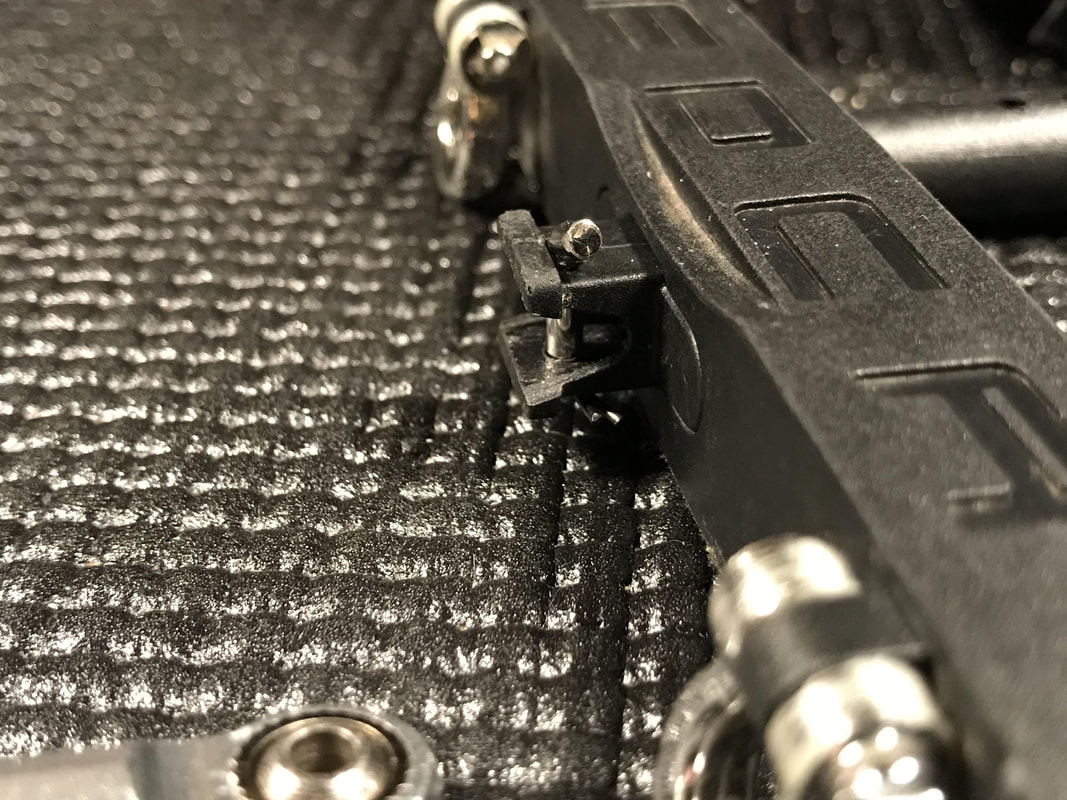 The Yeah Racing trailer is designed to use a pin style receiver (or maybe a pintle) rather than a more traditional ball type. You can find similar trailers on Amazon with a ball type hitches but I didn't realize that when I ordered this one. If you buy one for yourself, just pay attention to the hitch style on whatever one you choose. Because of this, I decided to modify the stock Gen8 bumper's receiver to work like a drop pin. I simply cut away the sides of the receiver to make room for the trailer's hitch then drilled a vertical hole through the receiver so that I could drop the factory Redcat plastic hitch pin down from the top. The stock body clip still works to secure the hitch pin in place. Only time will tell if this will be strong enough but, I like it because it was easy to do and completely free 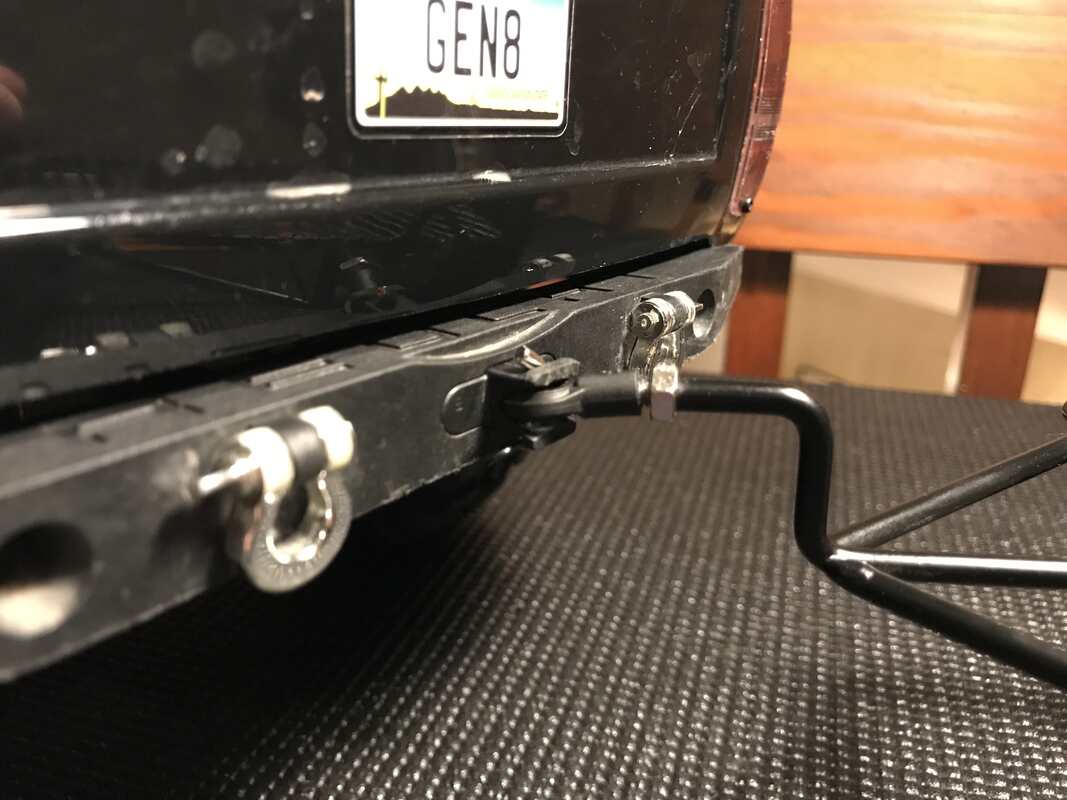 It's likely that the plastic hitch pin will break at some point. When it does, I might try replacing it with a screw and nut or, I may order the Yeah Racing hitch and use the metal pin from it, or possibly get myself something like this hitch this hitch from Injora 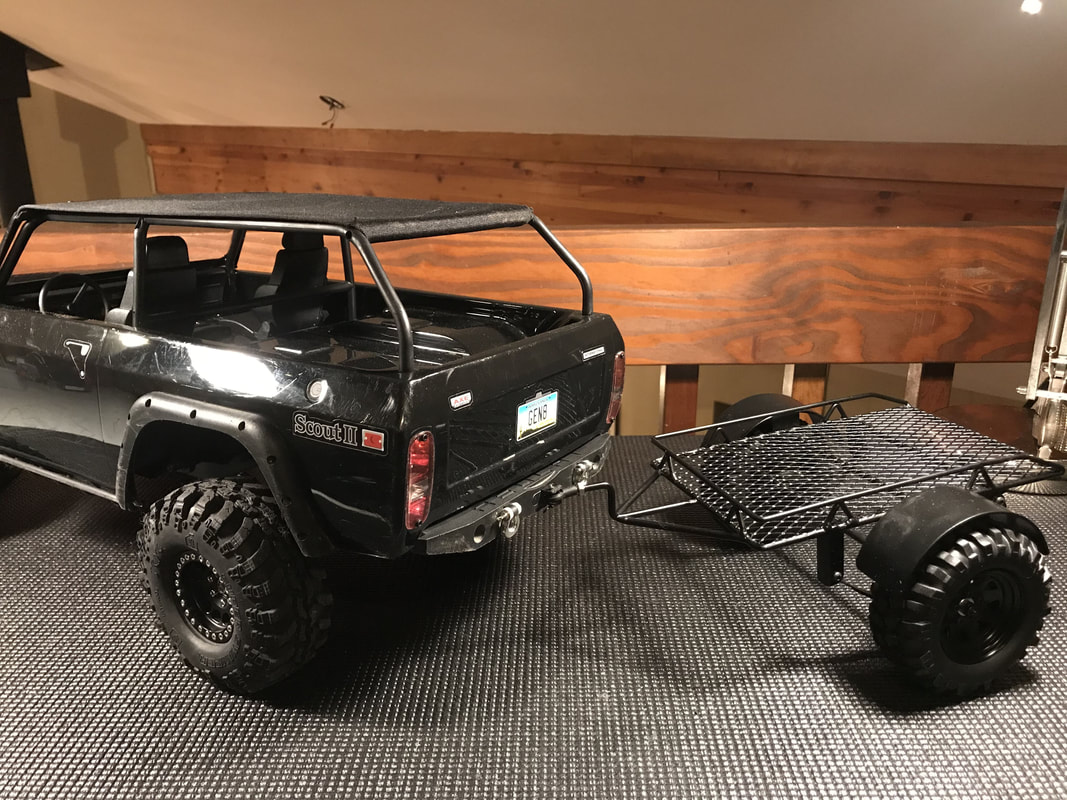 My final thoughts...
The quality of the trailer is okay. The tires and foams are junk but for a trailer, they should be good enough The hitch on my trailer was damaged and needed to be replaced. Luckily I had some parts that I was able to use but if I didn't, it would have been pretty disappointing. I'd probably give it 2 1/2 or 3 stars out of 5. It's far from perfect but, it's a fun little trailer for the low price. You can probably find one like this on Amazon for around $50. It may not be a Yeah Racing trailer but I'm pretty sure they are all the same - despite the different name on the box. Even with the minor issues I had with mine, I'd likely buy another one. All I have to do now is decide if I should load it up with firewood and a chain saw or try to find some other cool scale accessories 'till next time - stay safe and have fun Rob By the way, here are some other Gen8 posts that you may like: Gen8 V2 Project Part 1 - Wheels Gen8 V2 Project Part 2 - Magnet Body Mounts Gen8 V2 Project Part 3 - Bumpers Gen8 V2 Project Part 4 - Roof Rack Gen8 AXE Project Part 1 - Injora Aluminum Wheels Gen8 AXE Project Part 2 - Brass Wheel Hexes Gen8 AXE Project Part 3 - Brass Lower Link Mounts  Although January was a super hectic month for us, my son and I were able to get outside a few times and have some fun with our Gen8s. Both of our trucks are filthy so the first thing I need to do is just give them a both a good cleaning and check over. Once I clean them up a bit, I'll do a few modifications
First on the list will likely be my son's Gen8 V2. He wants more lights on his truck so I have one of the 11650 LED Light Kits set aside for him and hope to find the time to install that some time soon I've also set aside a couple of the 11813 Clear Bodies and one will be going on my AXE. My plan is to paint one of these bodies gunmetal grey. I haven't decided yet on all of the details but I think I'll black out the rear roof section. I'm also debating on whether or not I should apply the factory black decals or, mask the body on the inside and use paint to recreate the stripes. I don't think this project will happen for a while so I'll keep debating on that one To go along with the new body, I may order myself another set of Injora wheels from Amazon, possibly in the grey colour then give my son my black wheels. Alternatively, I may try to color match my stock Gen8 plastic wheels to match the new body color...decisions decision Last but not least, I picked up a trailer to tow behind my AXE. It was a bit of a late night Amazon impulse buy and not exactly what I was looking for but it should add a little fun to our trail adventures I'll go into a little more detail on each of these projects once I tackle them That's about all the updates I have planned for the near future, hopefully I'll have some time to check off at least a couple of these this month 'till next time, have fun and stay safe Rob 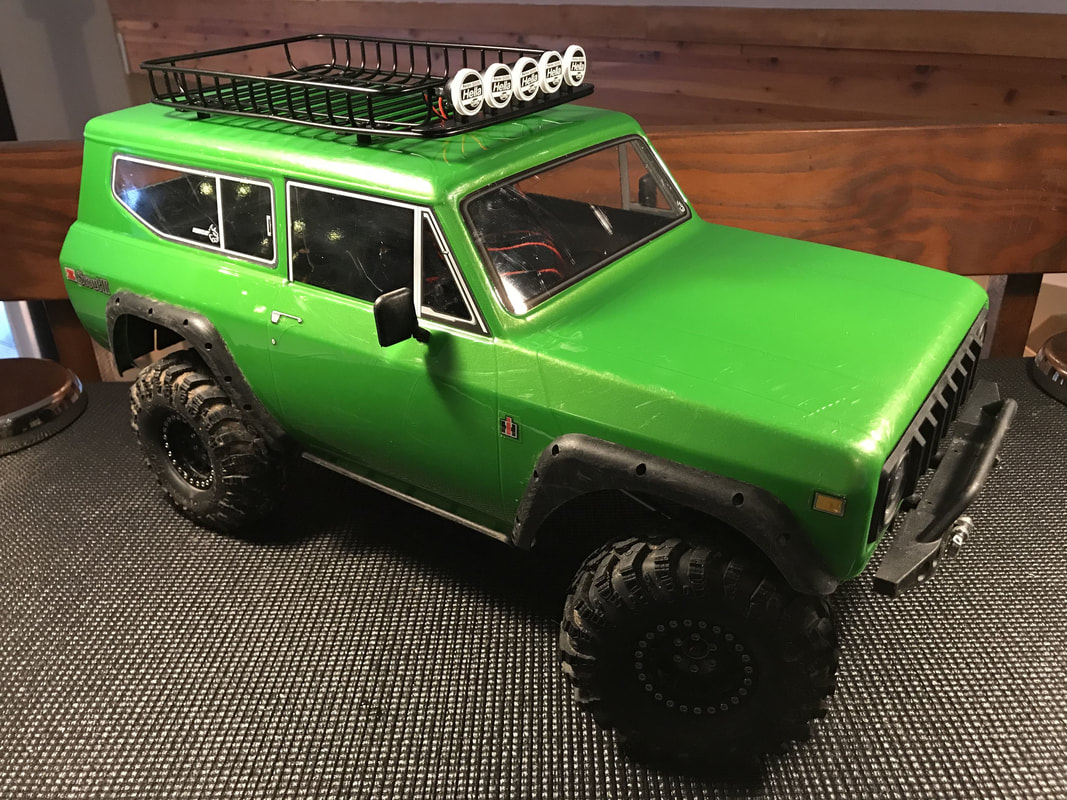 One of the things my son has been asking for lately is a roof rack for his Gen8 V2 so I decided to order this one for him from Amazon. With so many different options, it was a bit of a tough choice as to what rack to purchase. I considered going with a plastic Axial rack to keep the weight down but when I found this metal one complete with "Hella" LED lights, for cheap, I decided to pull the trigger on it. The installation was pretty easy. In fact, I let my son complete the entire install with just a little help from me. Here's how the project went... 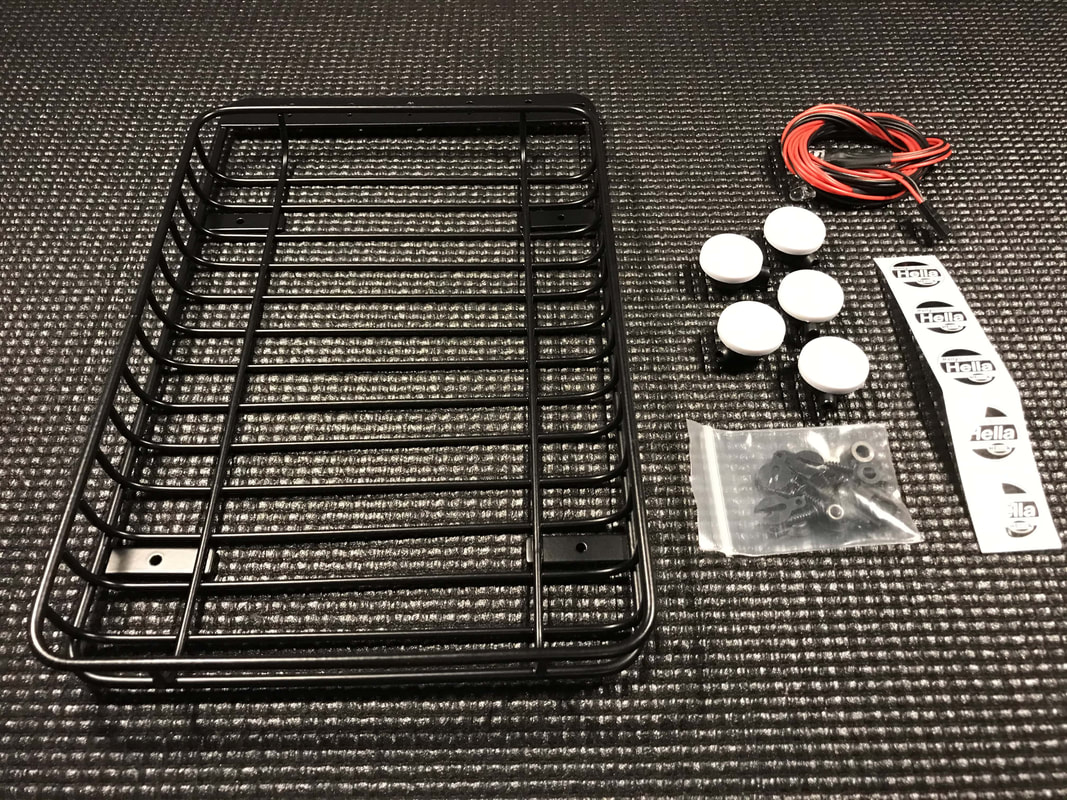 The roof rack comes with five LED lights, light covers, Hella stickers, and mounting hardware. Depending on how you want to power your LED lights, you may want to pick up a "Y" adapter from Amazon. I added a 11417 wire extension to the inside of the receiver box to tidy things up and make it quick and easy to disconnect the LED lights from the chassis 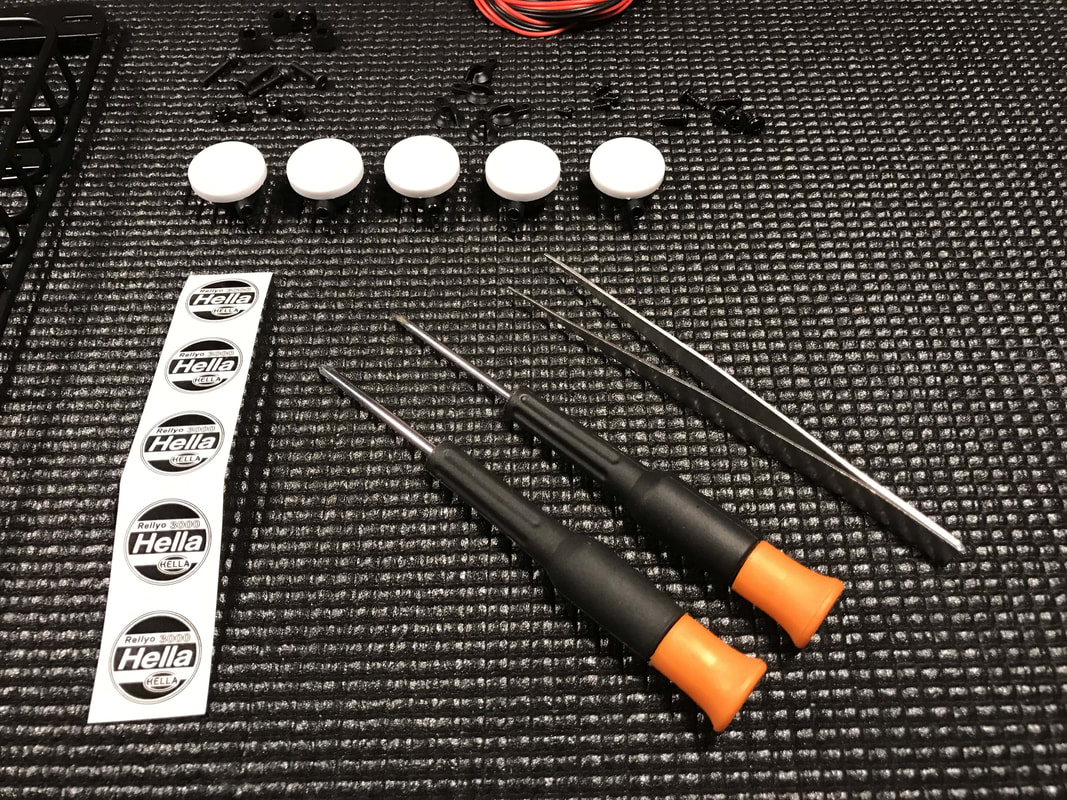 You'll need some small jeweler's screwdrivers for the LED light mounting hardware (the screws are phillips head). I offered my son some tweezers to help with the sticker installation but he just used his fingers 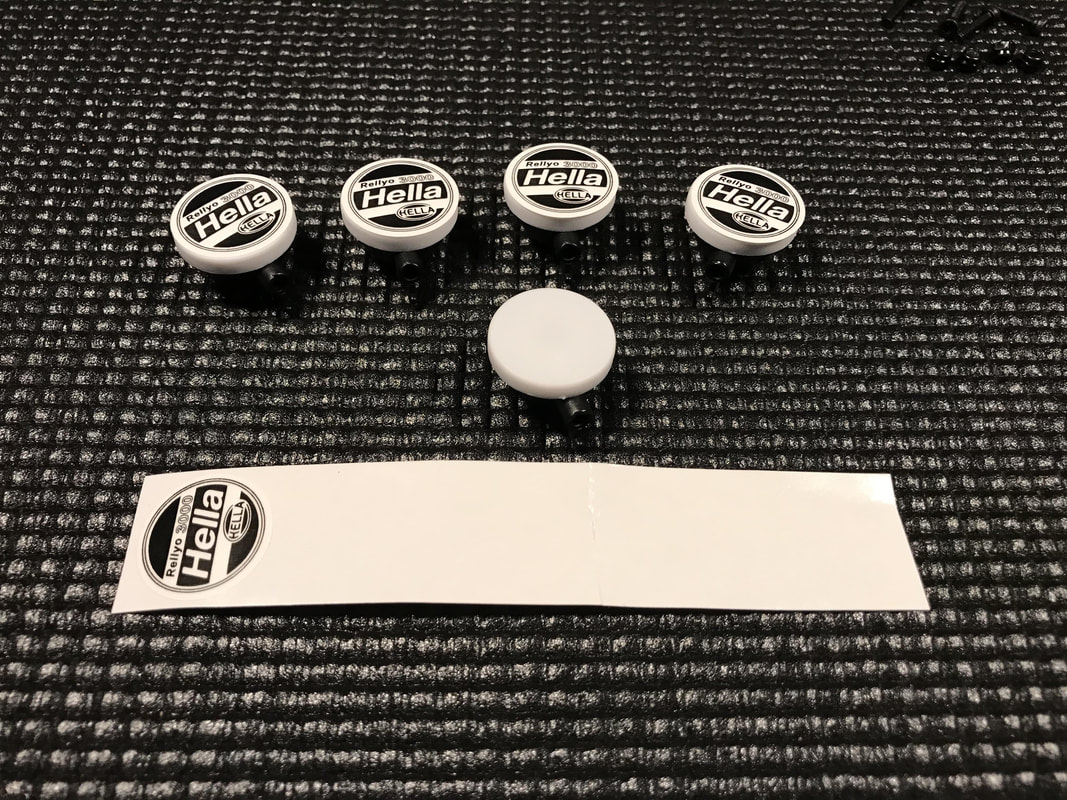 We started by adding the stickers to the light covers. Something tells me these are not licensed but I thought these looked cool so that's why I chose this rack and light bar set. These light covers are removable. You can clip them on or off depending on what look you are going for. 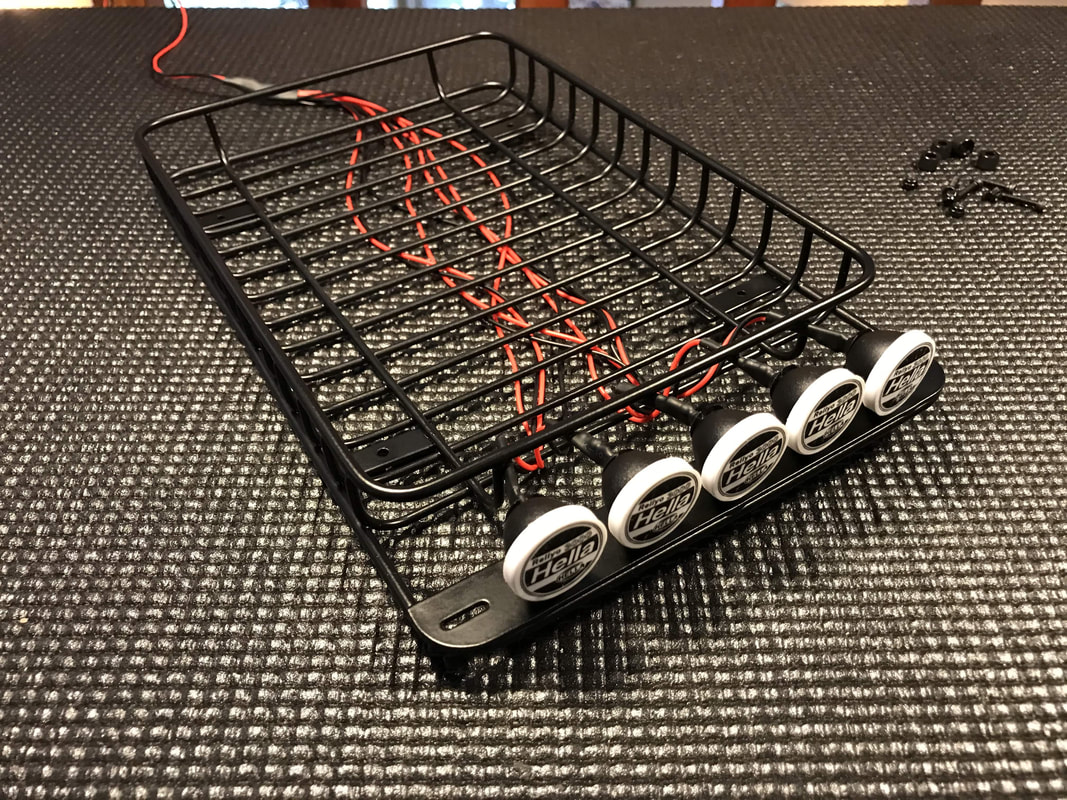 Once the stickers where installed, the next step was to add the LED lights to the light buckets using the included clips and hardware. My son then used the included screws to mount the light buckets to the roof rack. 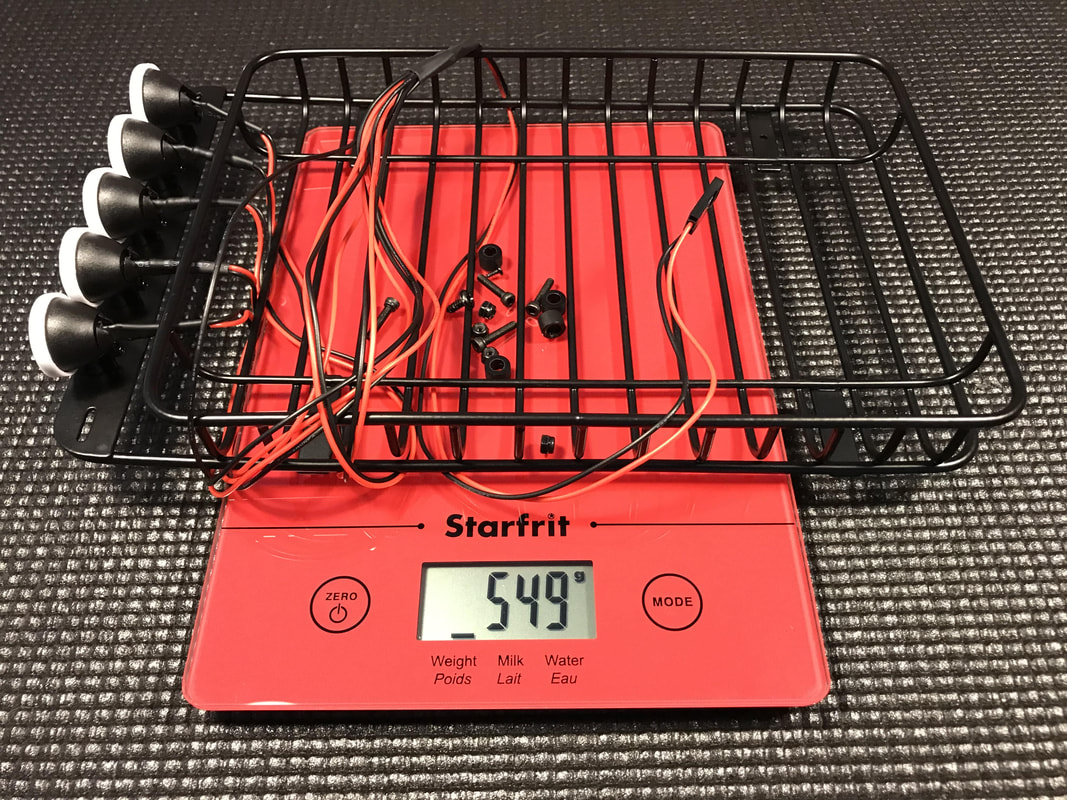 This setup is heavy - almost 550 grams!. Installing it will negatively effect how well your truck will climb and side hill but for my son, this is not important. He primarily uses his truck on trails and his crawling style is closer to bashing than technical rock crawling so having the truck look the way he'd like is more important than ultimate performance. Adding the 11417 wire extensions will make it easy to disconnect the lights whenever needed. In my opinion, this is also a cleaner installation than using a Y harness but that's another easy option if you'd prefer to go that route. 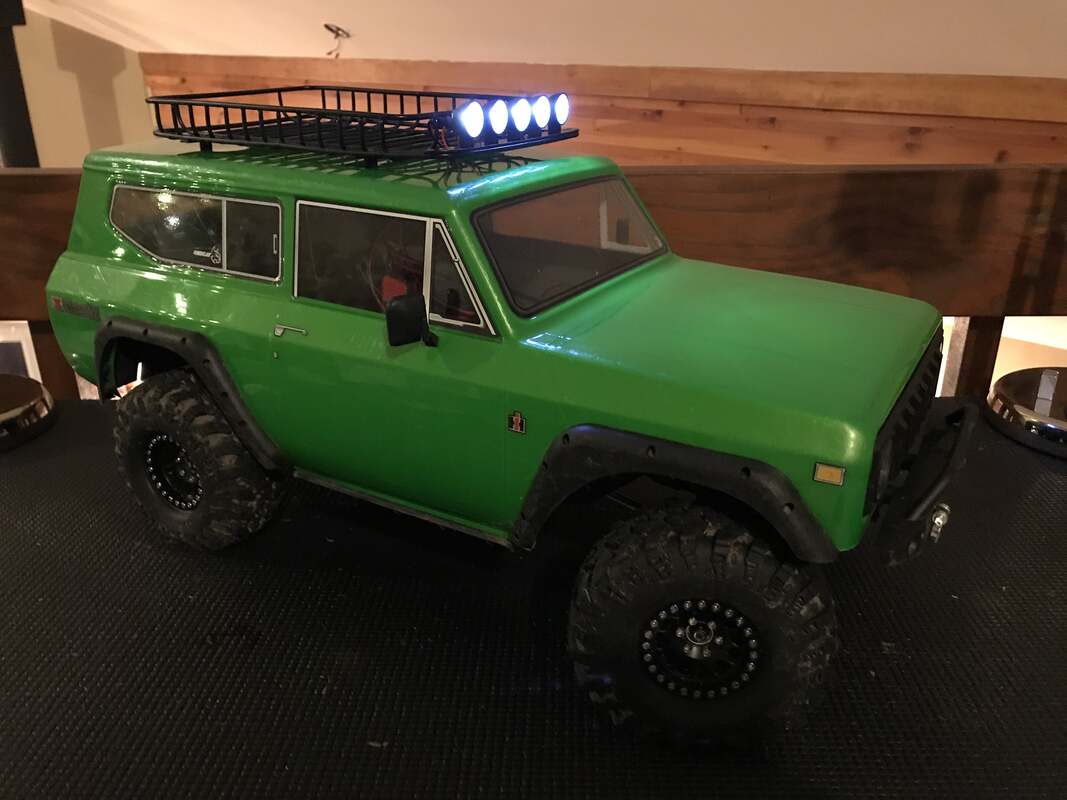 Here's how the truck looks with the power on. Pretty cool if you ask me.
We may experiment with removing the little risers under to roof rack but for now, I think this project is done. 'till next time, have fun Rob By the way, here are some other Gen8 posts that you may like: Gen8 V2 Project Part 1 - Wheels Gen8 V2 Project Part 2 - Magnet Body Mounts Gen8 V2 Project Part 3 - Bumpers Gen8 AXE Project Part 1 - Injora Aluminum Wheels Gen8 AXE Project Part 2 - Brass Wheel Hexes Gen8 AXE Project Part 3 - Brass Lower Link Mounts 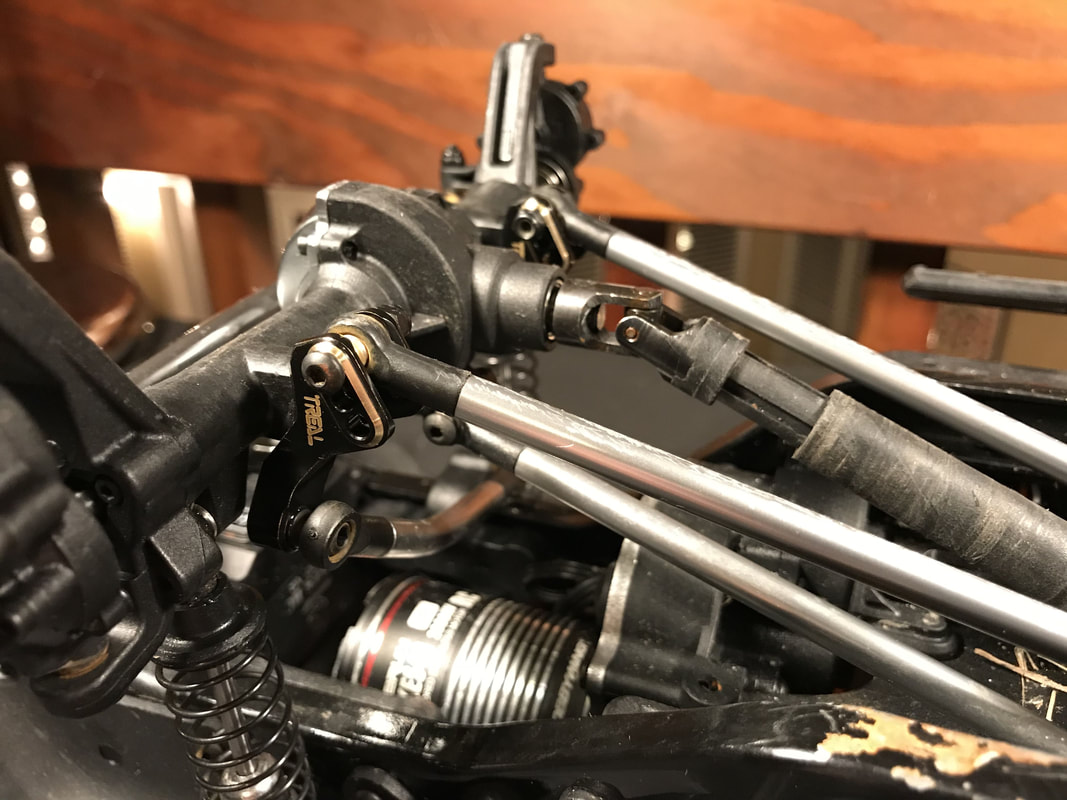 I had a little time to work on my Gen8 AXE today and decided to add some more Treal brass upgrades. This time I went with the lower link mounts. Not only will this add a small amount of weight down low (improving stability), they'll also add strength to my truck and look great too. Although I've never personally broken a lower link mount on my truck, I do sell them from time-to-time so I know other guys are breaking them. By swapping out my link mounts to these nice brass units, I've added strength to my own truck and will now have a second set of stock parts in my trail bag if my son ever breaks one of his on his V2. Here's a quick look at these brass lower link mounts vs the stock mounts:  The stock plastic mounts and hardware weigh 14 grams. 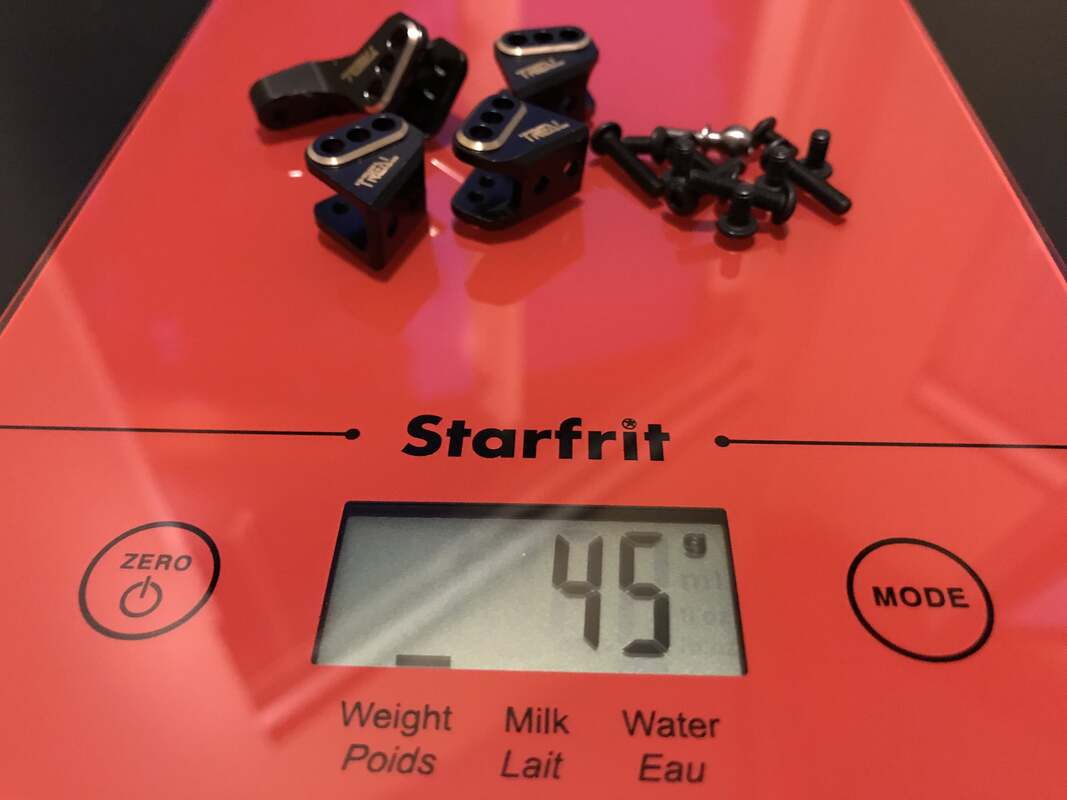 The Treal brass link mounts and hardware weigh 45 grams - an increase of 31 grams over the stock plastic pieces. This isn't a massive increase in weight but, they'll also add strength and heck, they look cool too. 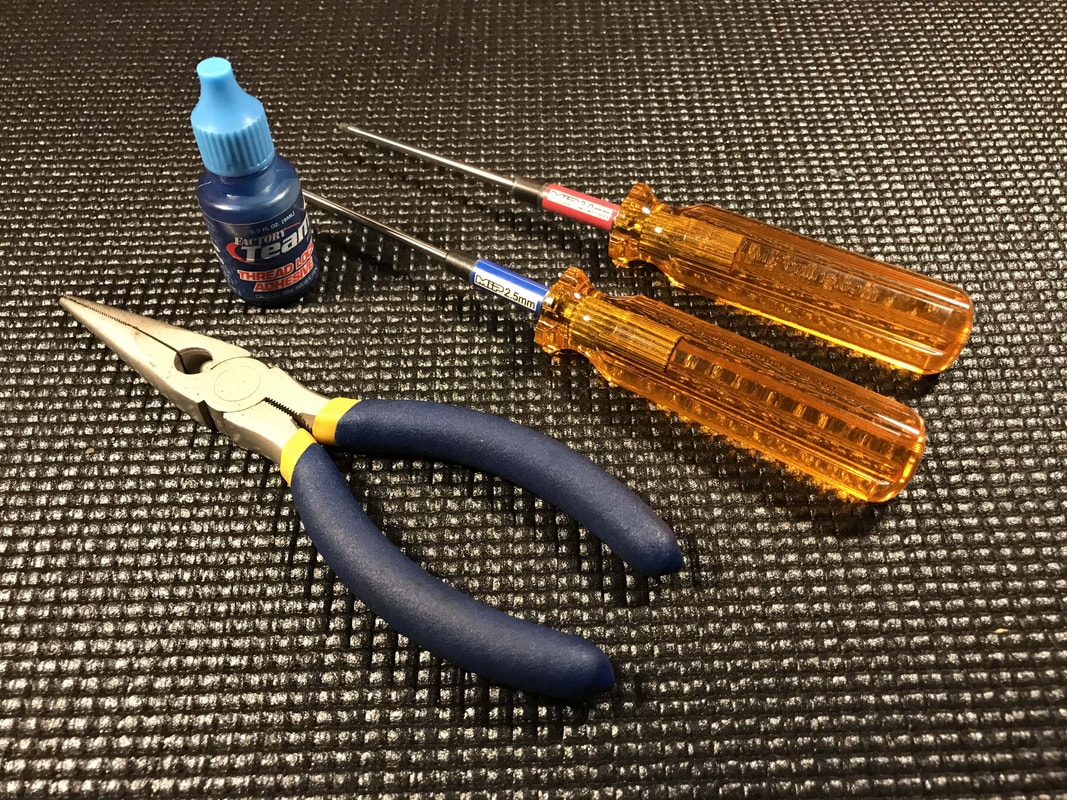 This is a super easy project but it will require a few tools. Here's what you'll need:
'till next time Rob By the way, here are some other Gen8 posts that you may like:
Gen8 V2 Project Part 1 - Wheels Gen8 V2 Project Part 2 - Magnet Body Mounts Gen8 V2 Project Part 3 - Bumpers Gen8 AXE Project Part 1 - Injora Aluminum Wheels Gen8 AXE Project Part 2 - Brass Wheel Hexes Here's a quick tip to help you improve the performance of your Gen8 that can be completed in just a few minutes and it's completely free! Push in your bumpers Pushing the rear bumper in will allow your truck to climb a steeper incline before the bumper scrapes on the ground and potentially stops your truck. Pushing in your front bumper will help when you are coming down a steep incline and reach the bottom. Your front bumper will be less likely to dig in to the ground. To complete this modification, simply take the two screws out of the bumper mounting posts, push the bumper in then secure the bumper again with the same two screws. You may also have to trim a very small bit off of your body to clear the bumper once it's pushed in. 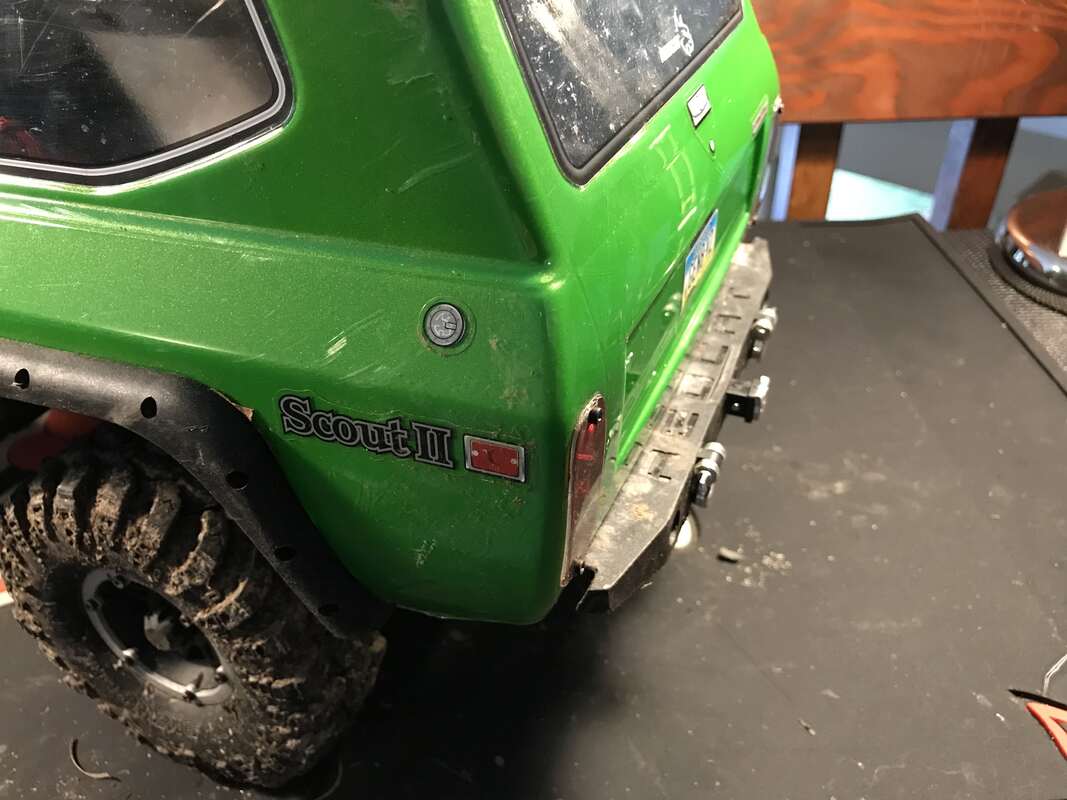 Here's a quick look at my son's Gen8 V2 with the rear bumper in the stock location 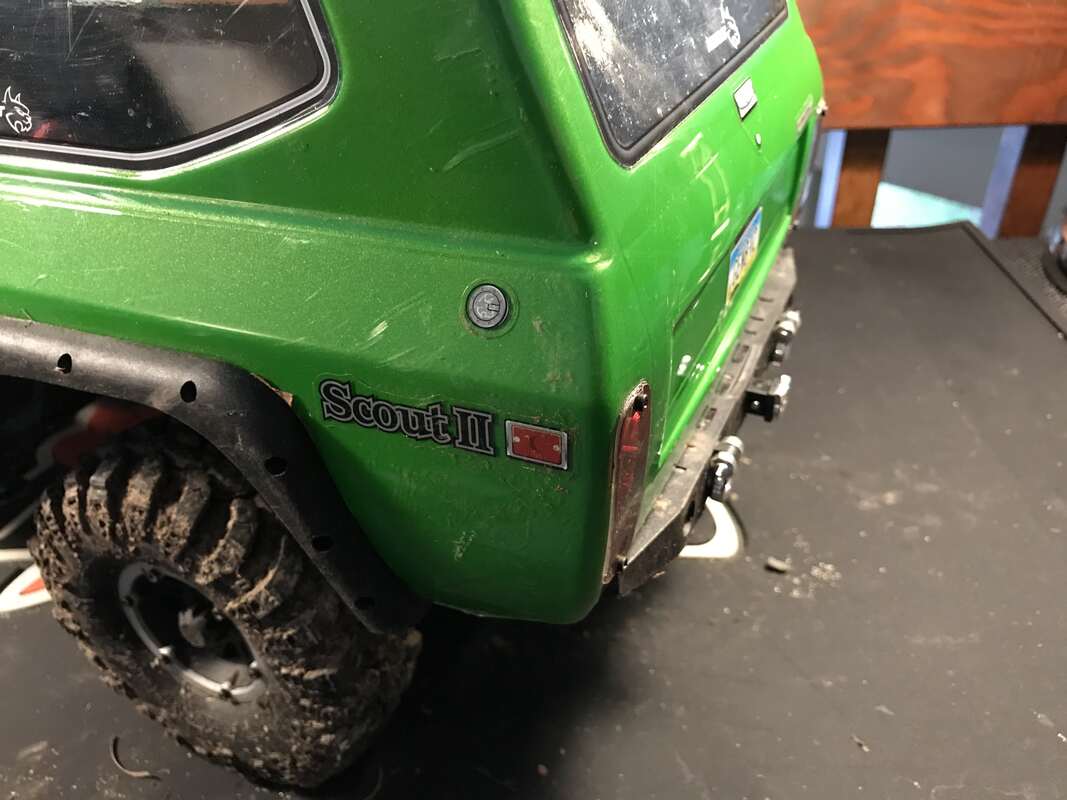 And here is his rear bumper pushed in by just one mounting hole. To improve the performance of your truck even more, you can push your bumper in further or remove it completely. You may also want to remove the receiver hitch. We like how the truck looks with the bumper still sticking out a little plus, the bumper will still protect the body so for now, we're just pushing it in by one mounting hole.
I didn't push his front bumper in because he wants to add a winch to the bumper at some point and I'll likely need the bumper to remain in the stock location for the winch to fit Hopefully this helps a little, have fun Rob By the way, here are some other Gen8 posts that you may like: Gen8 V2 Project Part 1 - Wheels Gen8 V2 Project Part 2 - Magnet Body Mounts Gen8 AXE Project Part 1 - Injora Aluminum Wheels Gen8 AXE Project Part 2 - Brass Wheel Hexes 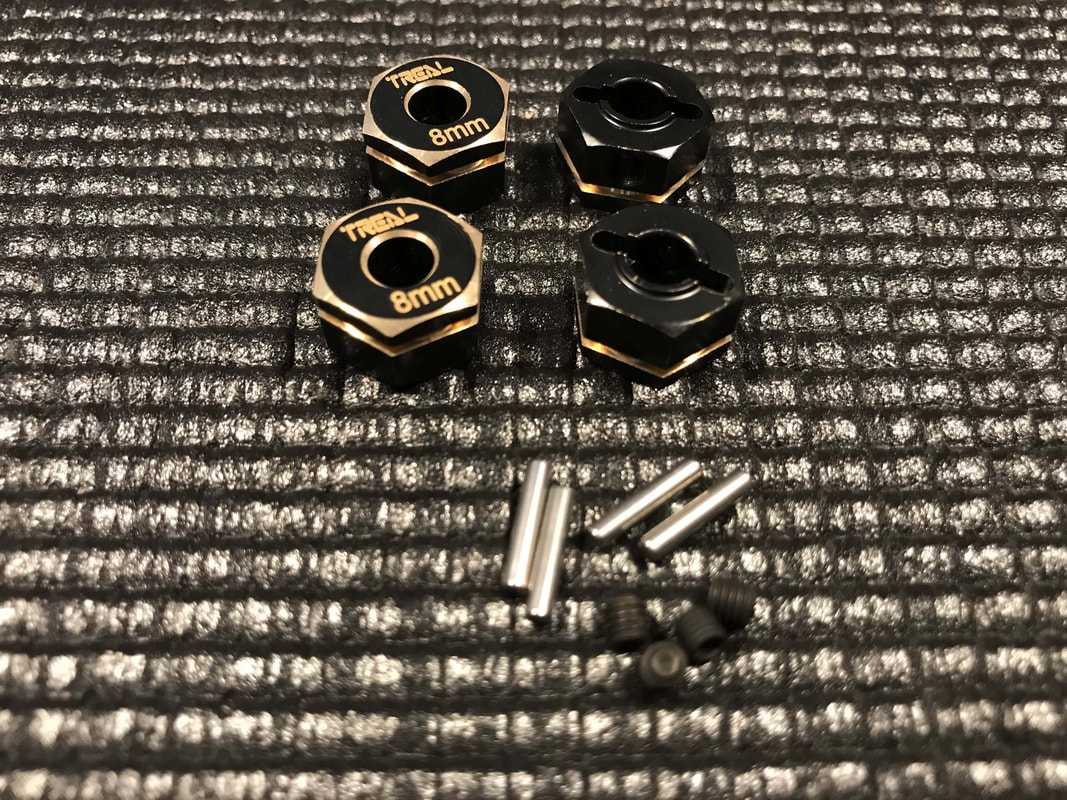 Last week, I wrote about how I added some Injora aluminum wheels to my Gen8 AXE. These wheels not only look great but added around 42 grams to each corner of my truck helping lower the center of gravity and improve the truck's climbing ability This week, I decided to add a little more stability to my truck by upgrading the wheel hexes to some Treal 8mm brass units. Here's a closer look at this fast and easy upgrade and how these parts compare to stock... 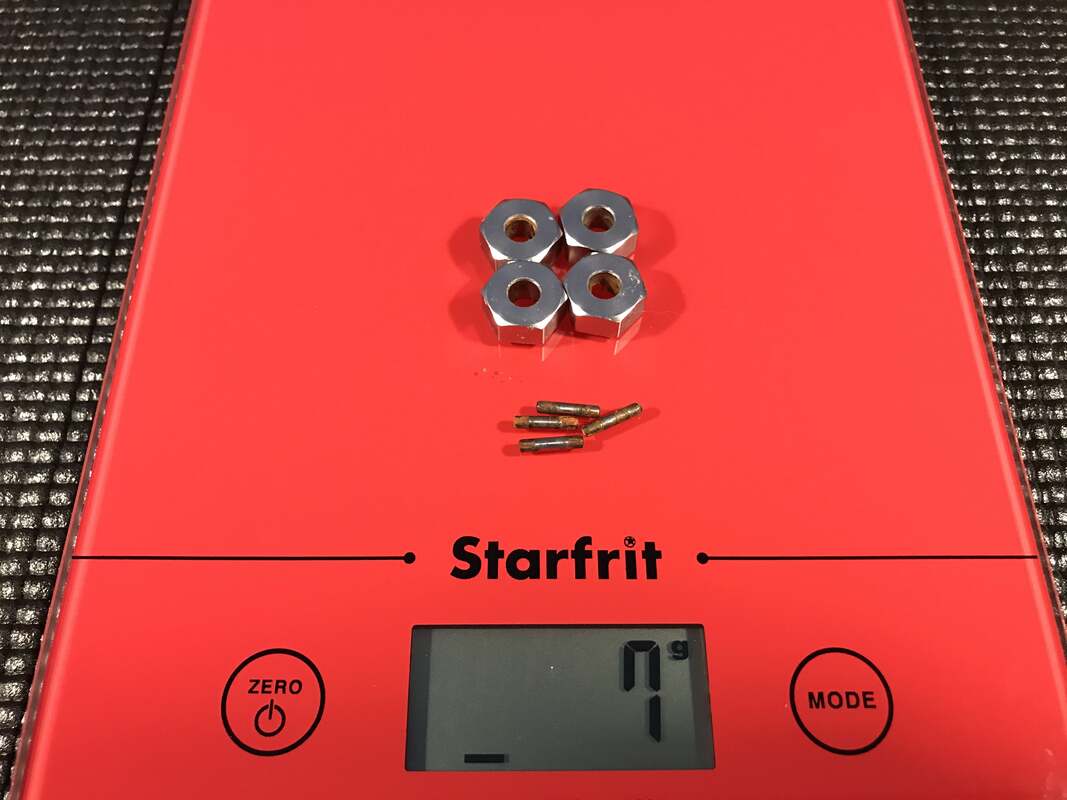 The stock Gen8 aluminum wheel hexes and pins weigh in at 7 grams 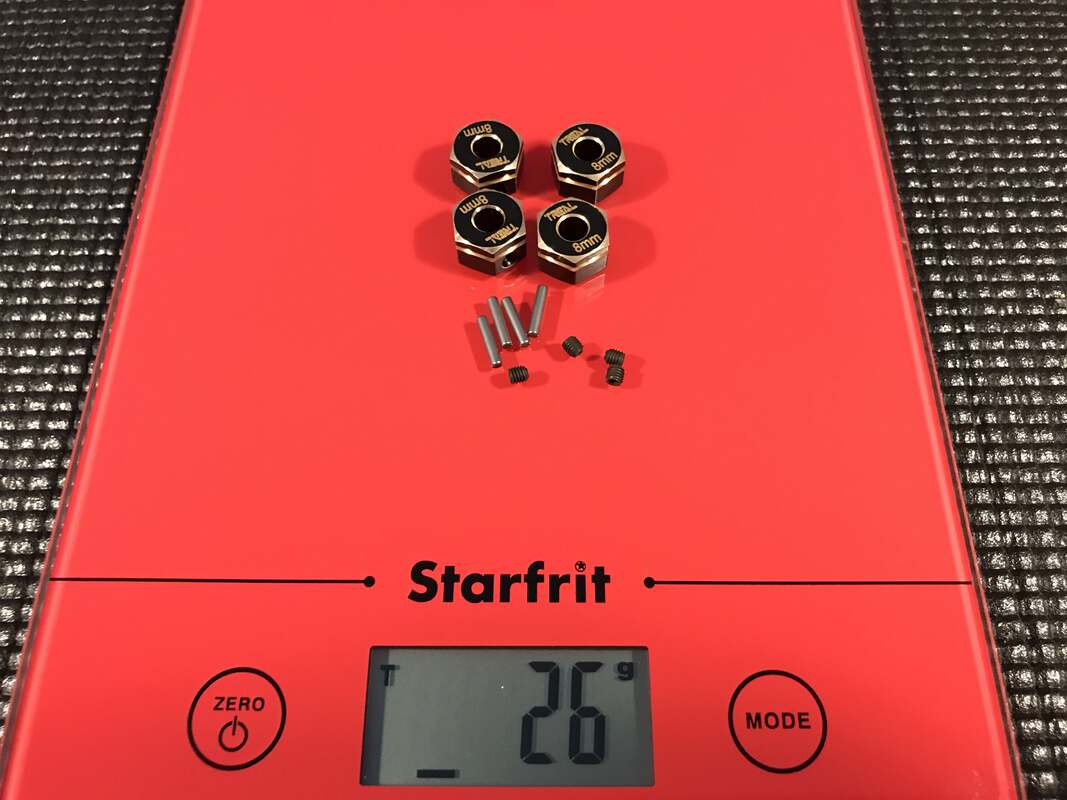 The Treal brass upgrades come in at 26 grams or just under an additional 5 grams per corner. Not a lot but, when added to the aluminum wheels, I've now added around 47 grams to each corner. 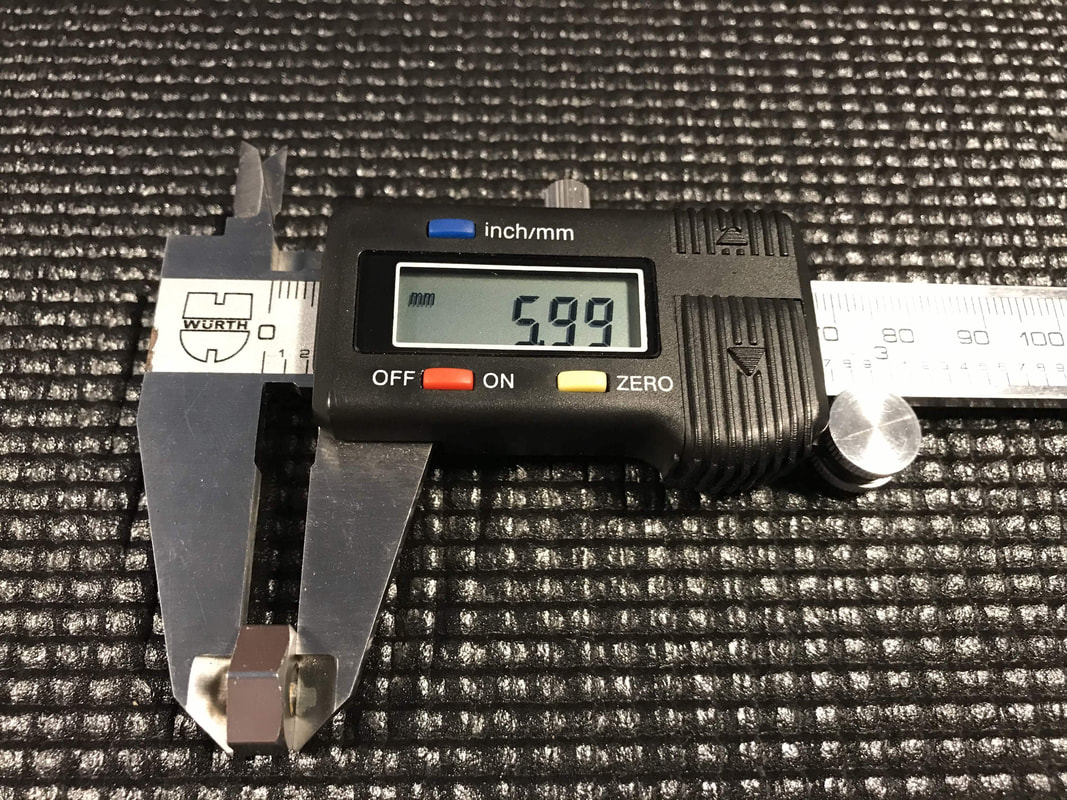 The stock Gen8 aluminum wheel hexes are 6mm wide 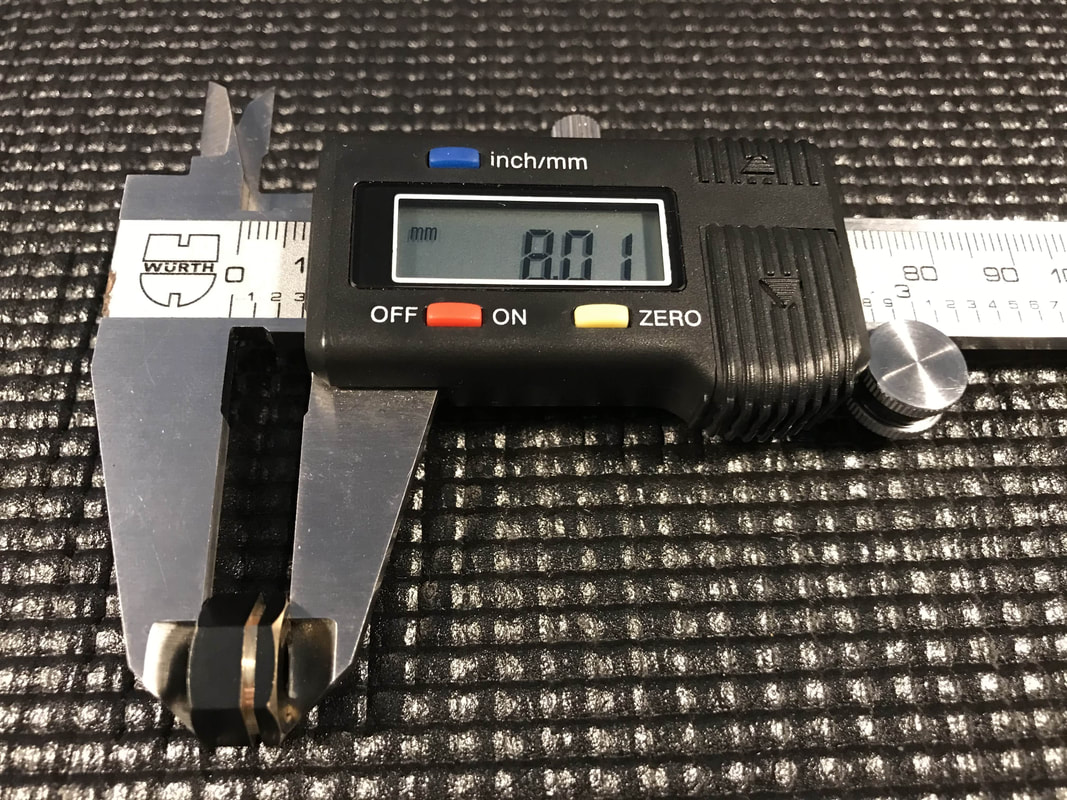 The Treal brass units measure in at 8mm wide. Again, not a huge change over stock but the additional 2mm width per side (4mm total) should help with side hilling stability 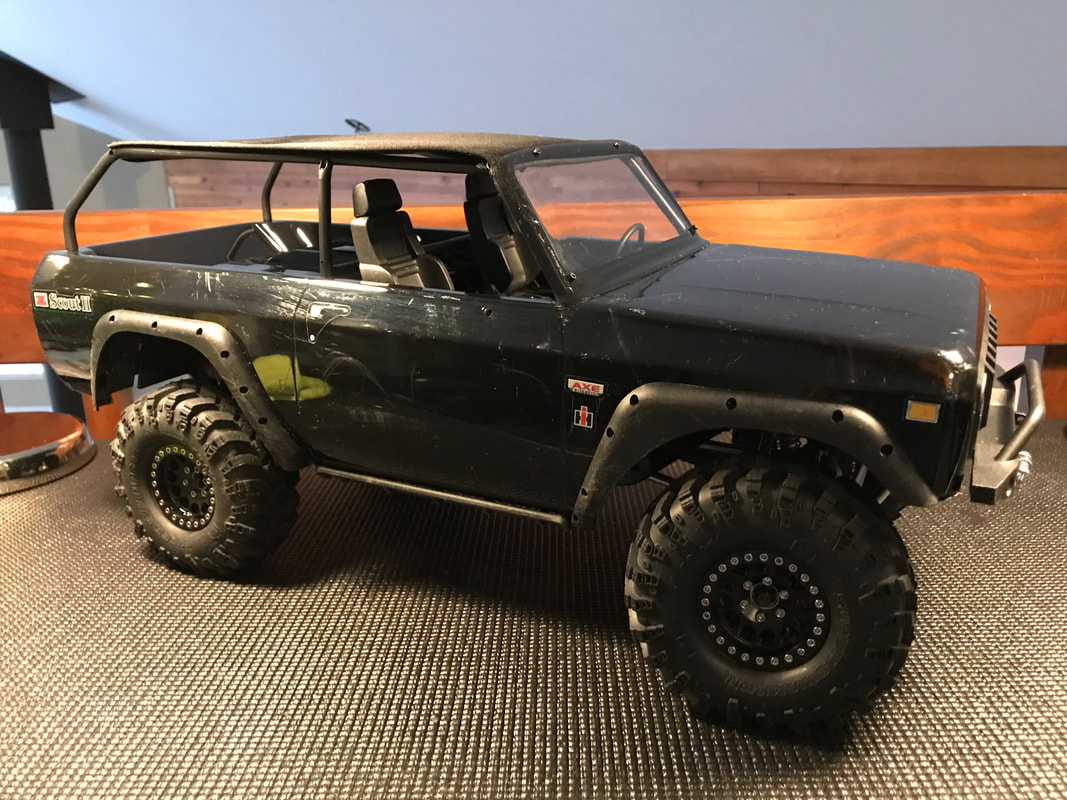 This was a super fast and easy upgrade for my AXE. I like how the small amount of additional width helps the wheels fill out the wheel well a little better. In my opinion, the stock setup is just a touch too narrow. The small amount of added weight and width should help keep the truck a little more planted when crawling.
'till next time, have fun and stay safe Rob I've been running my Gen8 AXE in stock form for quite some time now and it has been great. With that said, my son recently started running a Gen8 V2 and he's been slowly upgrading it so I figured I had better customize my AXE a bit as well. The first thing I decided to change on my AXE was the wheels. I decided to go with some black Injora 1.9 wheels that I found on Amazon and I think they look pretty good. 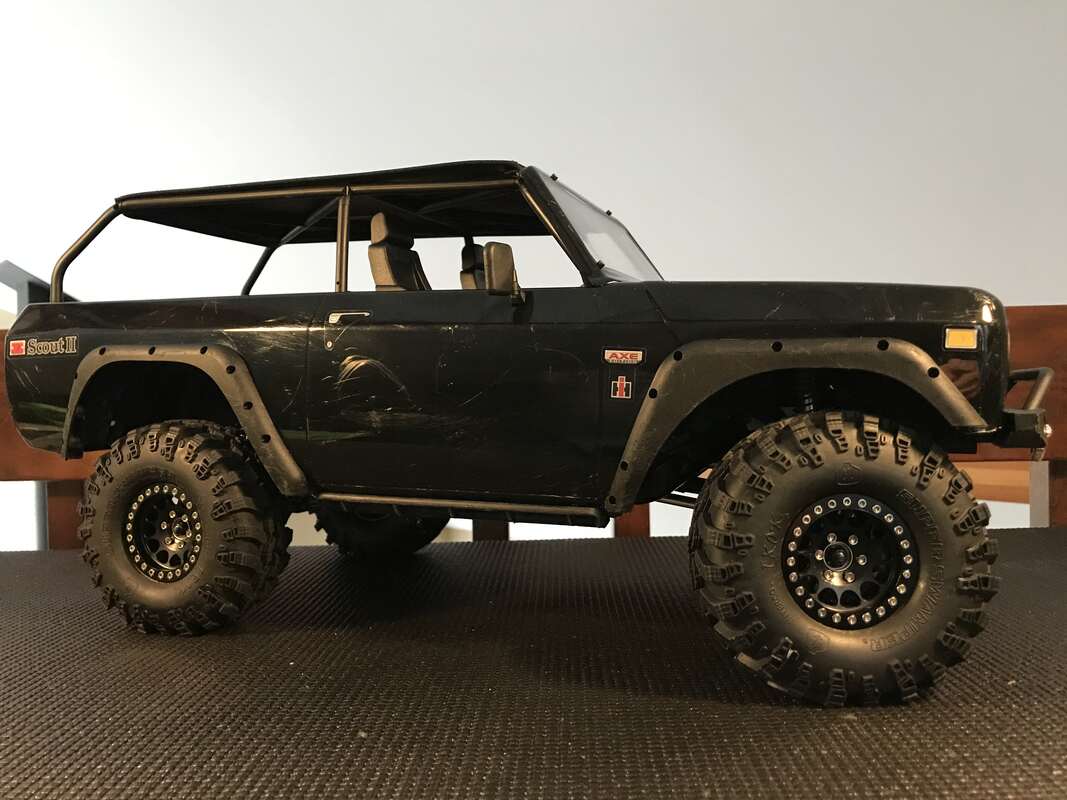 Not only do these wheels look good, they also help lower the truck's center of gravity by adding some weight down low. Each Injora wheel weighs 93 grams while the stock Gen8 AXE wheels complete with the beadlock rings and hardware weigh only 51 grams. That extra 42 grams per corner should help with the truck's stability.
One thing I wish I purchased with the wheels is new center caps/hubs. The stock Gen8 center caps don't work with these wheels so I'll likely buy myself some aluminum ones soon I have a few more upgrades coming soon including new tires, LED lights, some Treal brass bits, and possibly a body swap so be sure to check back again soon 'till next time, stay safe and have fun Rob PS, here are a link to the Injora store on Amazon where you can buy these wheels, some center caps and even some of their Hirax clone tires. If you use that link, I'll earn a small commission that I can use toward more customizing parts for my truck and it won't cost you anything extra 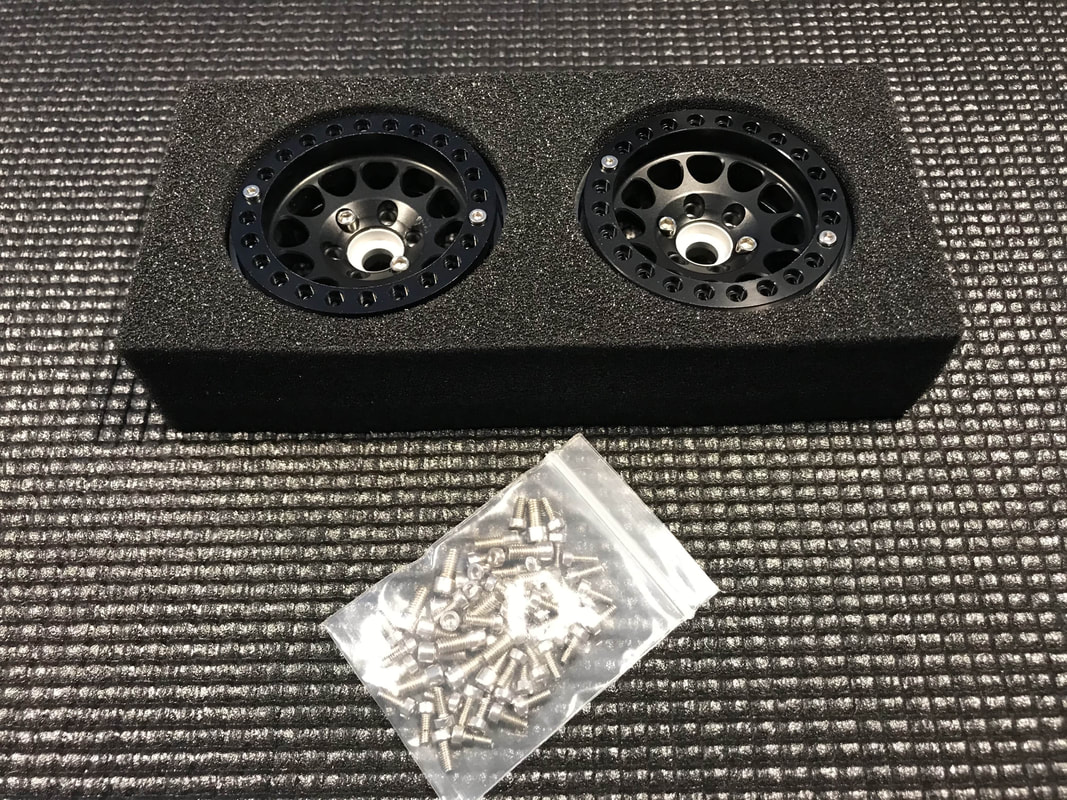 Not long ago, I wrote a post about changing the wheels on my son's Gen8 V2 and showed a quick look at my Injora 1.9 beadlocks. I'm slowly getting these wheels ready to install on my Gen8 AXE and thought I'd show you how they are assembled. This assembly / mounting process should be the same for most 1.9 beadlock wheels such as SSD, Injora, RCLion etc that you'll find on Amazon. It's easy once you know how to do it but if you've never assembled a beadlock wheel, this might help you. Here's how I do it....  Step 1: Start by cleaning and organizing your work area. Get your tools and supplies ready, throw on some music and grab something to drink...this is going to take a little while Here's what you'll need:
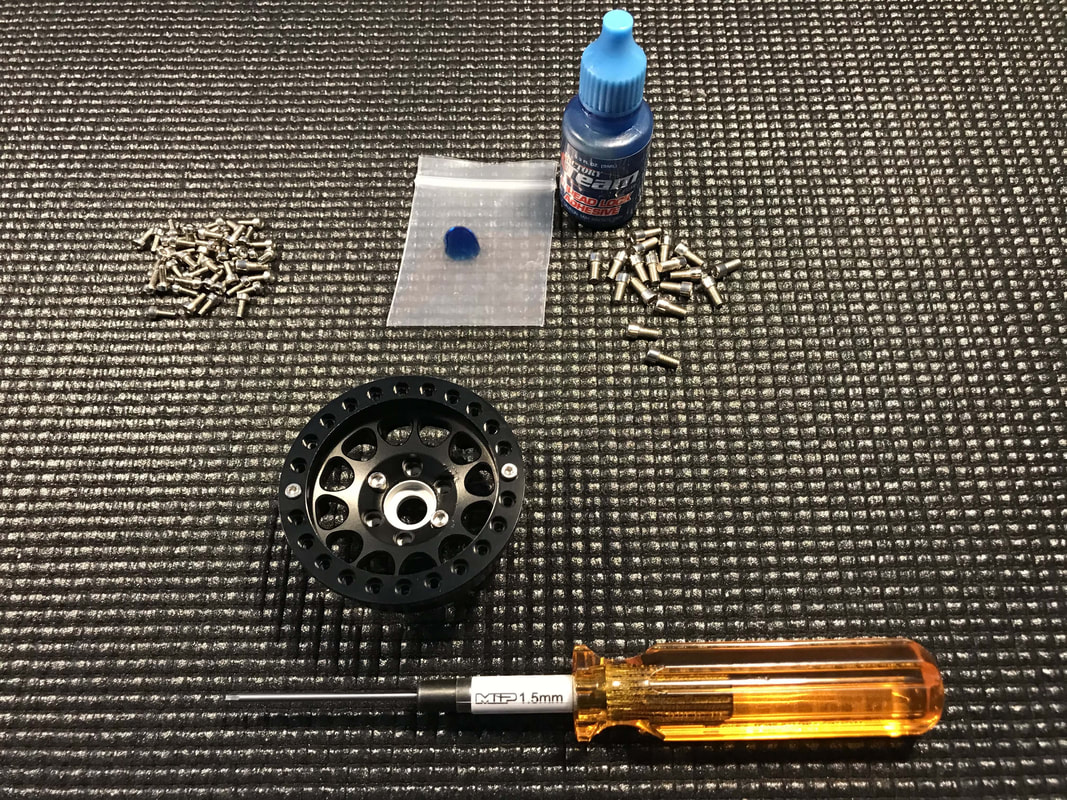 Step 2: Assembly starts with mounting the beadlock ring to the face of the wheel. There's a lot of little screws to install but don't worry, you'll likely never have to remove any of these screws again in the future 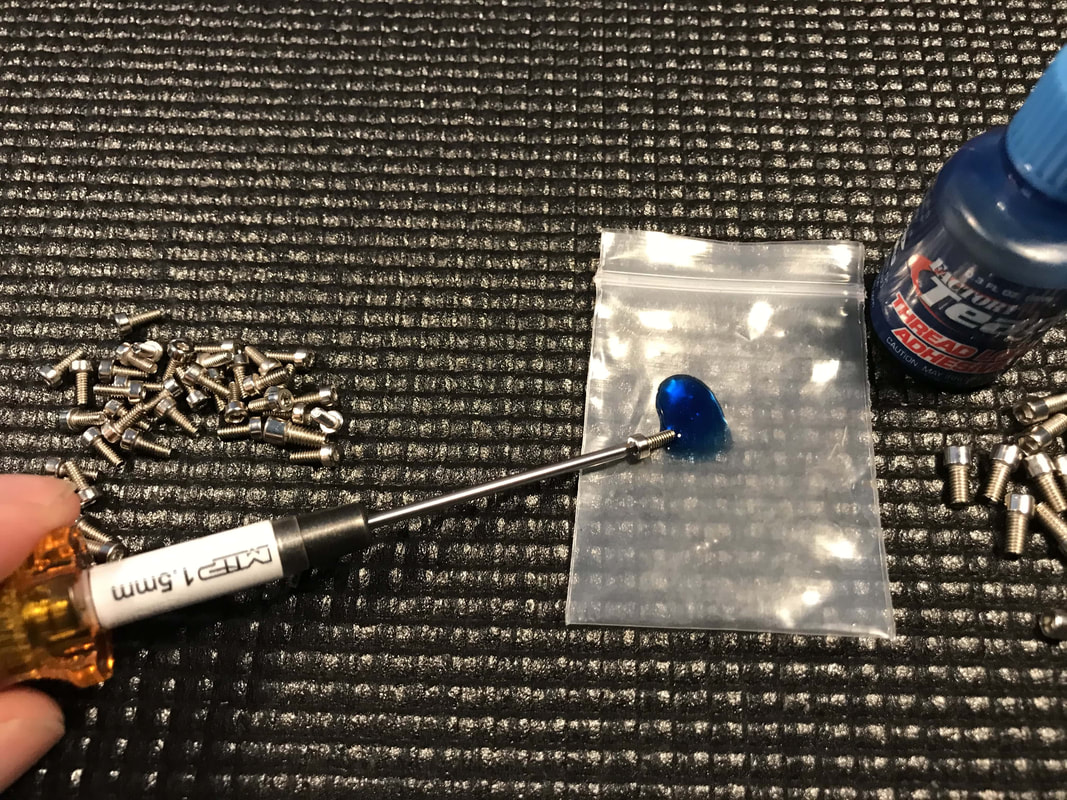 A little dab will do ya. Don't use too much threadlock. Put a small amount on a piece of plastic then dip the tip of the screw into the threadlock. Using too much threadlock or using too strong of a threadlock will just lead to stripped screws and frustration if you ever try to remove them later 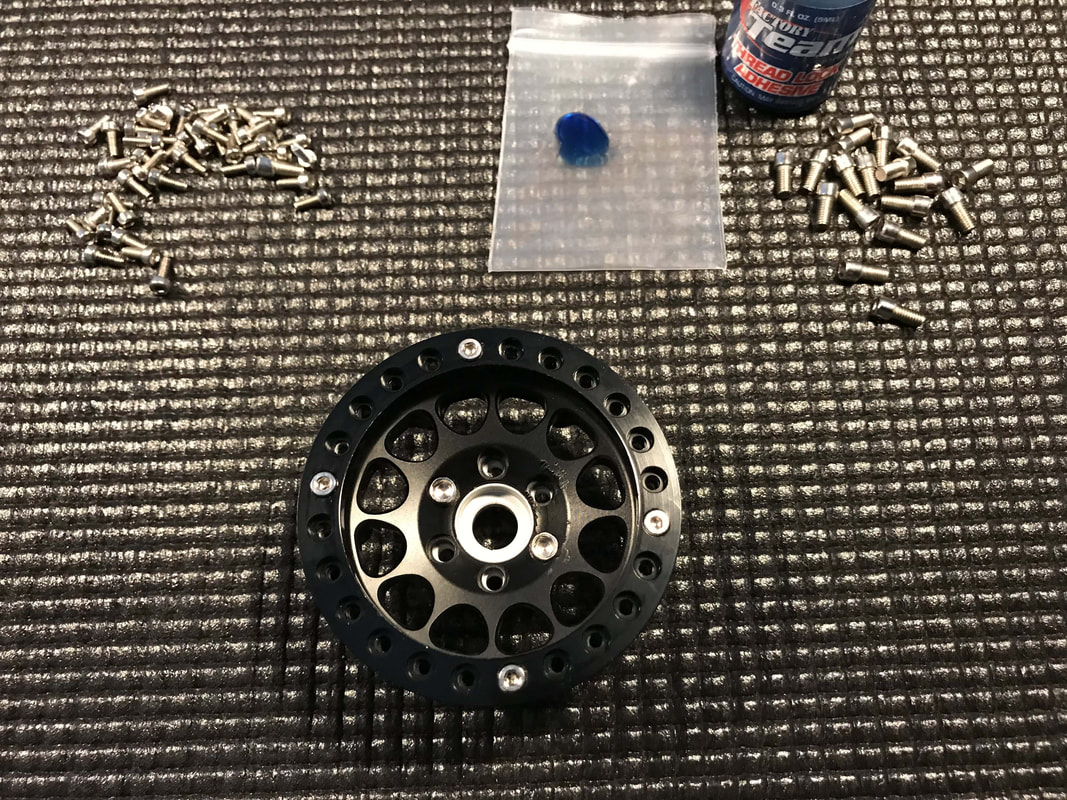 Use a star pattern to gently install the screws. Remember, you are working with small screws threading into aluminum...two fingers on the driver are enough. Work your way back and forth installing the screws in that star pattern then finish up with a couple of rounds of snugging up each screw. Go easy...the threadlock will hold them in place. Snug is good enough. 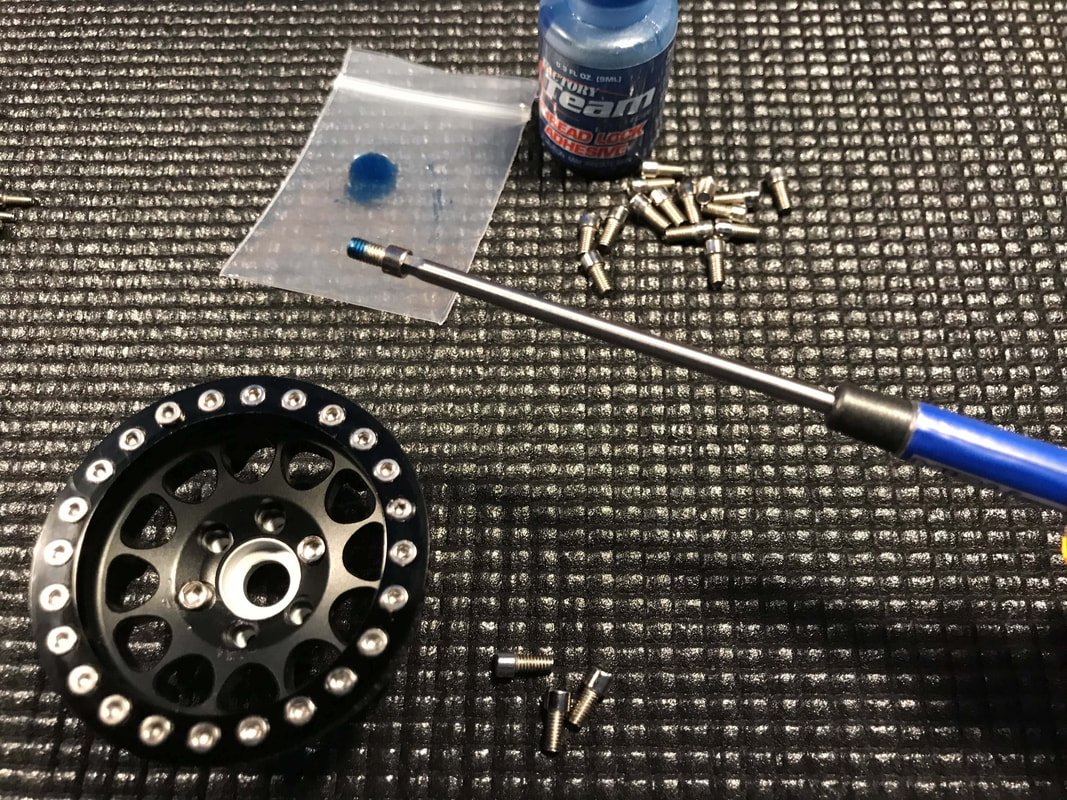 Step 3: Once you've secured the beadlock ring, grab your 2.5mm hex driver and use the same process to secure the hub to the wheel. The same tips apply, use a small amount of threadlock and go easy on the screws 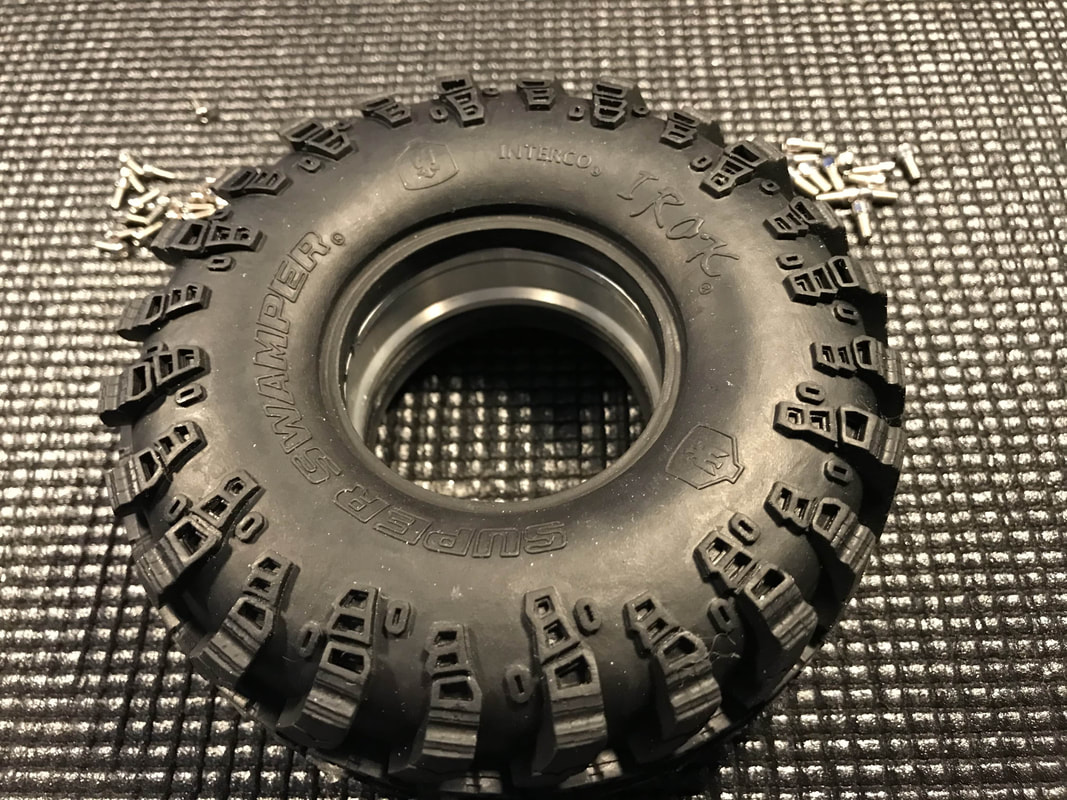 Step 4: Next, install the metal ring inside the tire. Double check that it sits evenly inside the tire and that the beads are even. Some rings may have an inside and an outside. Look closely at yours when you install them to ensure you put them in correctly. My Injora wheels don't have an inside/outside so I just stuffed them in there STOP: This is where you'll also have to decide whether or not to punch vent holes in your tires to let the air escape. If your wheels have holes in them, you do not have to punch your tires but, if you plan to run in water, you may want to in order to let the water drain out. There's lots of info/debate online about whether or not to vent crawler tires, I'll let you Google that and decide on your own. I vent mine with three holes spread equally around the center line of the tire's tread - sorry, I forgot to take a picture 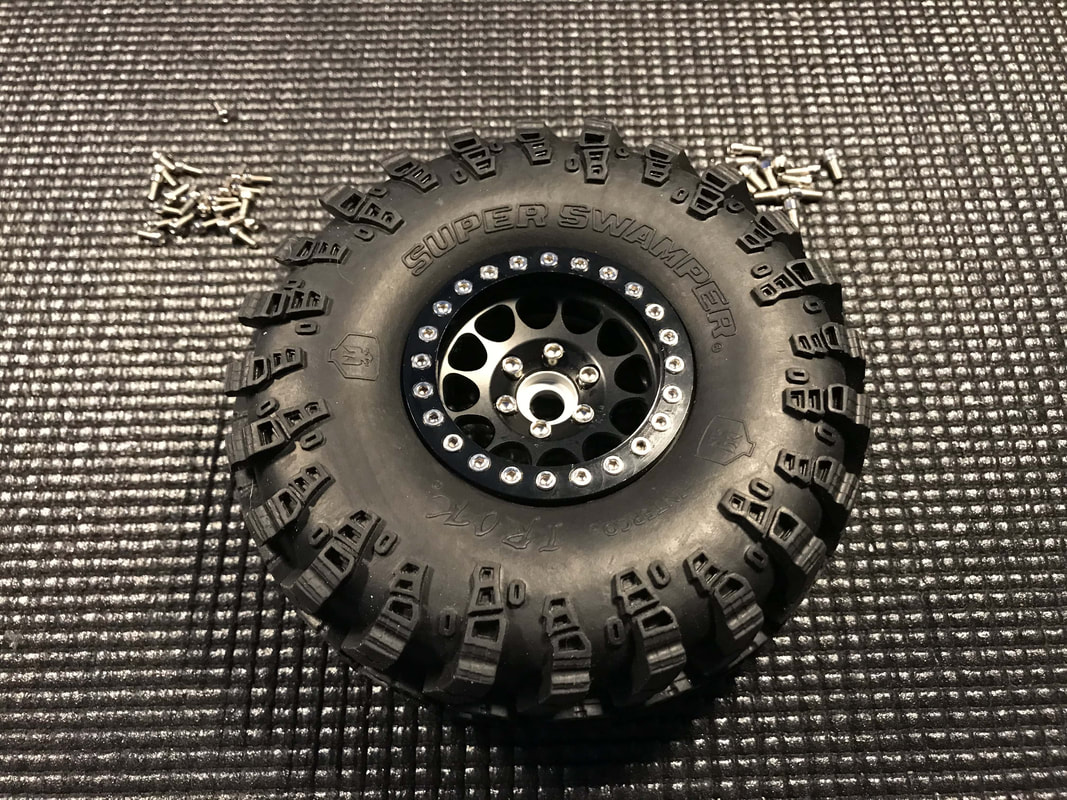 Step 5: Now it's time to drop the face of the wheel into place. Pay close attention to the bead and make sure everything is seated evenly. If you have any trouble getting the wheel face in place, a little water or saliva (if no one is looking) works well as a lubricant. I don't recommend using any oil or grease Tip: if your tires are directional, now's the time to double check that you have the face installed on the correct side of the wheel/tire 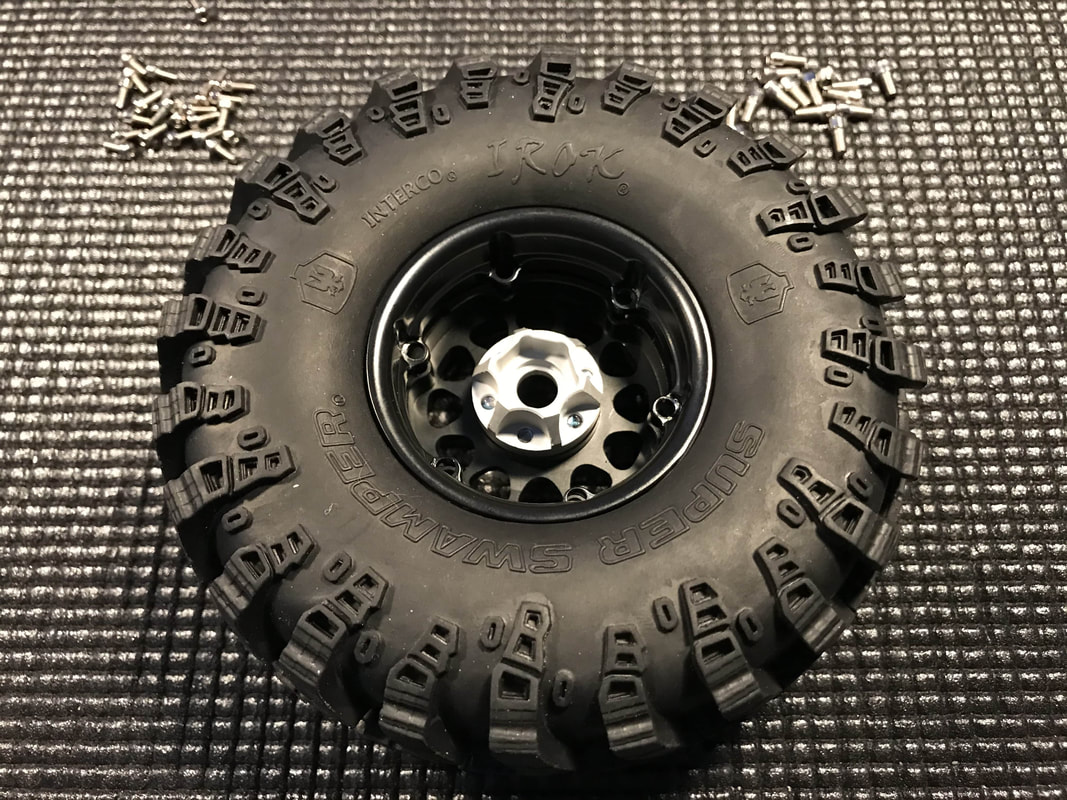 Step 6: Flip your wheel over and drop the back plate into place being careful to line up the screw holes and also to get the bead seated evenly. 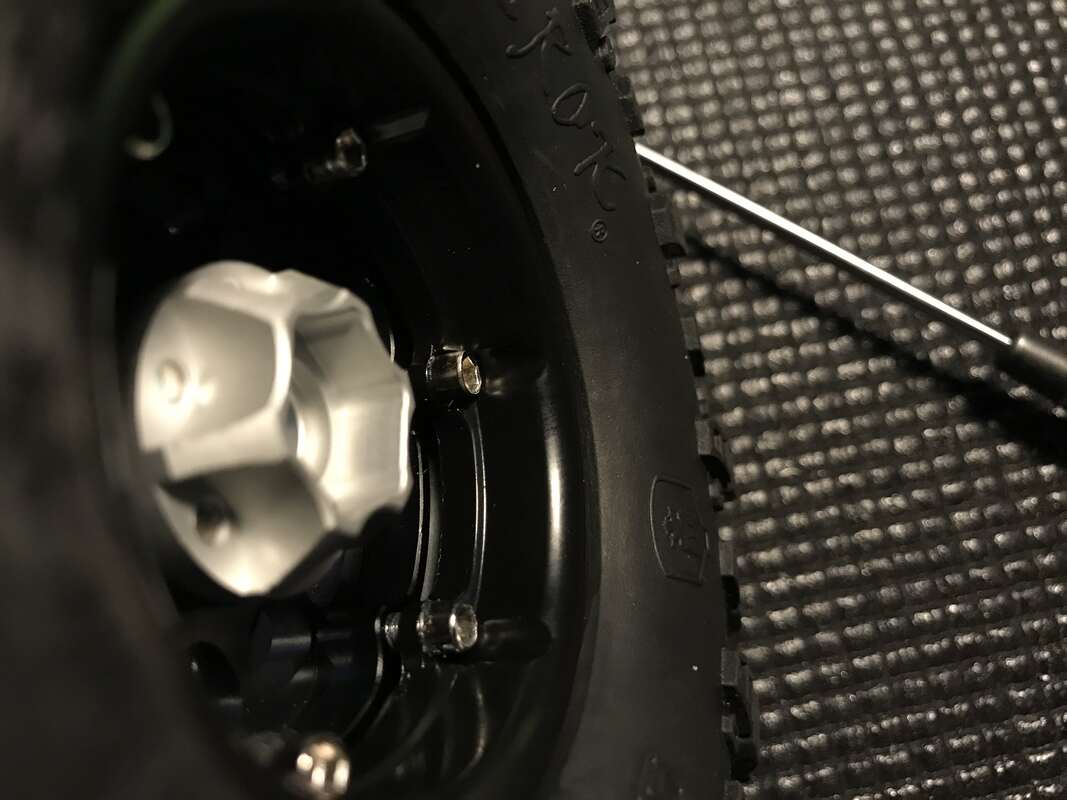 This is where it gets a little tricky. When you try to install the screws that attach the back plate, you'll likely have to use one hand to squeeze the pieces together while using the other hand to attempt to thread in the screws. It's not too difficult but it will take a little effort. Get the first screw started but don't thread it in all of the way. Use a star pattern to get all of the screws started. Note the gap between the wheel center and the back plate in the image above. 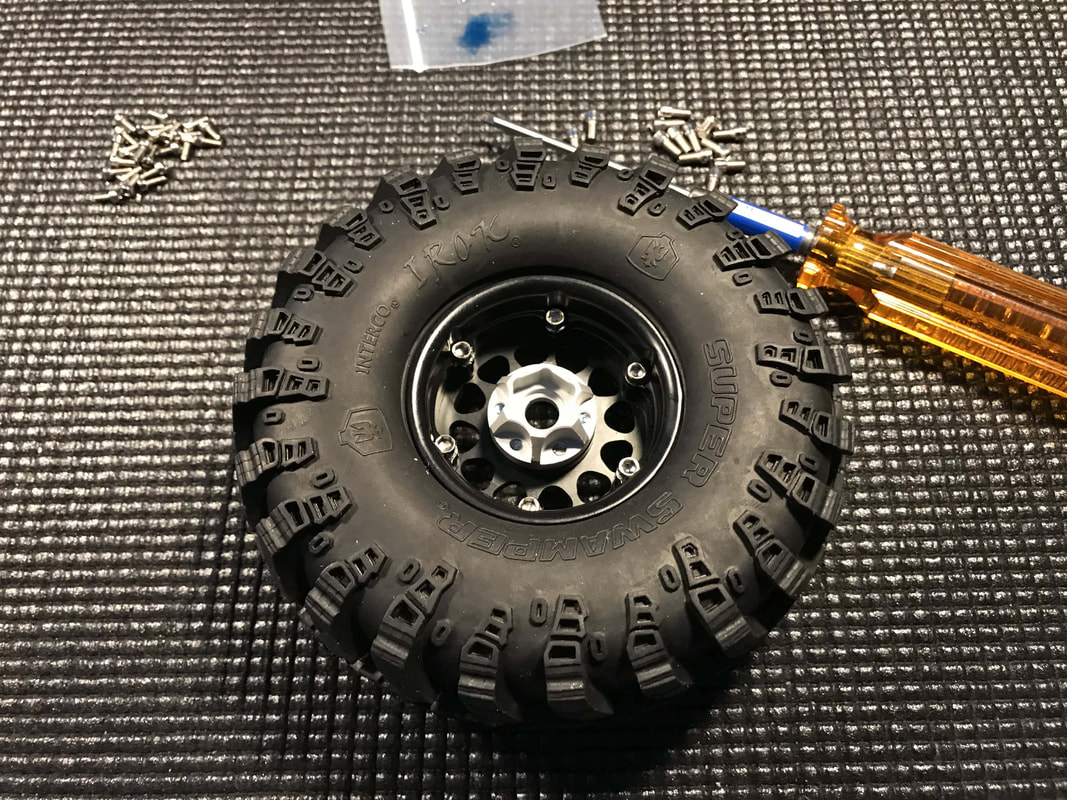 Finish up by carefully tightening these screws and you are all done with your first wheel.
I'd show you a nice picture of my wheels installed on my Gen8 AXE here but I still have three more wheels to build and I want to go crawling now so I'll create that post later 'till next time, have fun Rob By the way, if you found this post helpful, please help me out and use one of the links to Amazon within the post the next time you buy something (it doesn't have to be the item I link to...heck, go buy some toilet paper). If you use the link, Amazon will pay me a small commission and it won't cost you anything extra. Did you know your Gen8 inner fenders are designed to either use the stock velcro body mount or rare earth magnets? It's true and it's a pretty cool feature that I decided to take advantage of on my son's Gen8 V2 Although the stock velcro was working great on his truck, the magnet body mounts are a little quicker and easier to use so I decided to add them Here's how the project went... 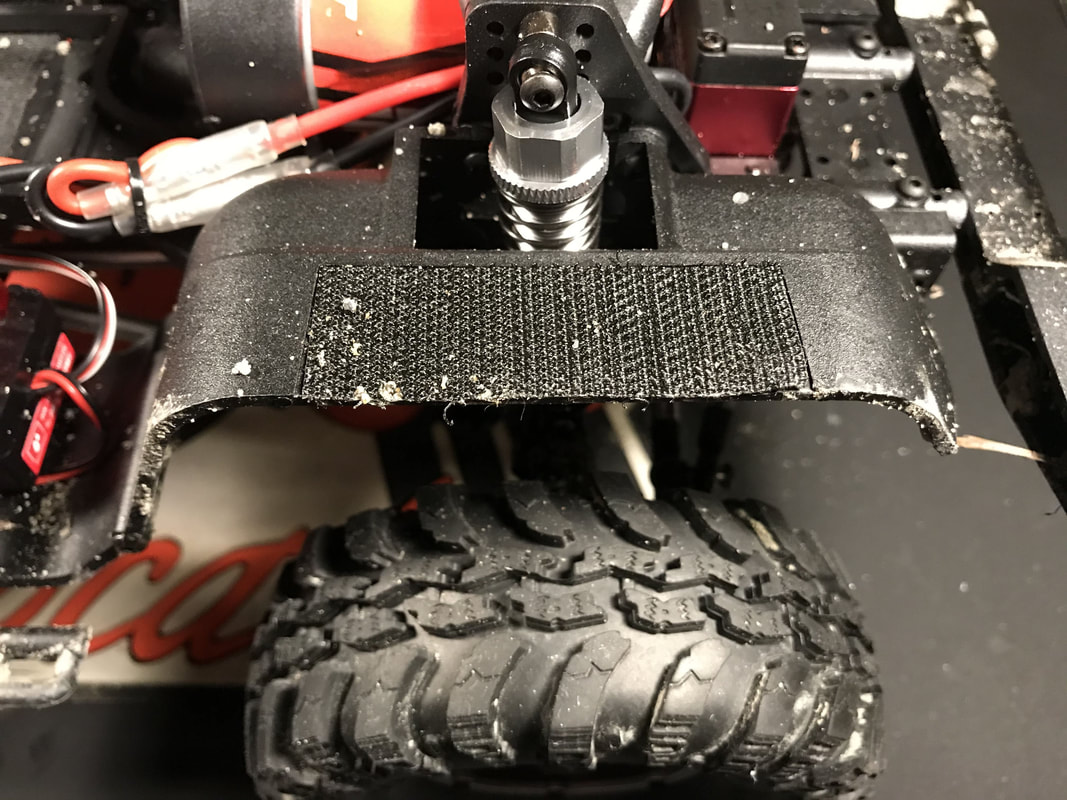 The first step was to remove the stock velcro. I've heard some folks say that the velcro on their truck was coming off but the glue holding the velcro on my son's V2 was seriously strong. I struggled to get the velcro strips off but with a little effort, I had all of the velcro pulled off in a few minutes 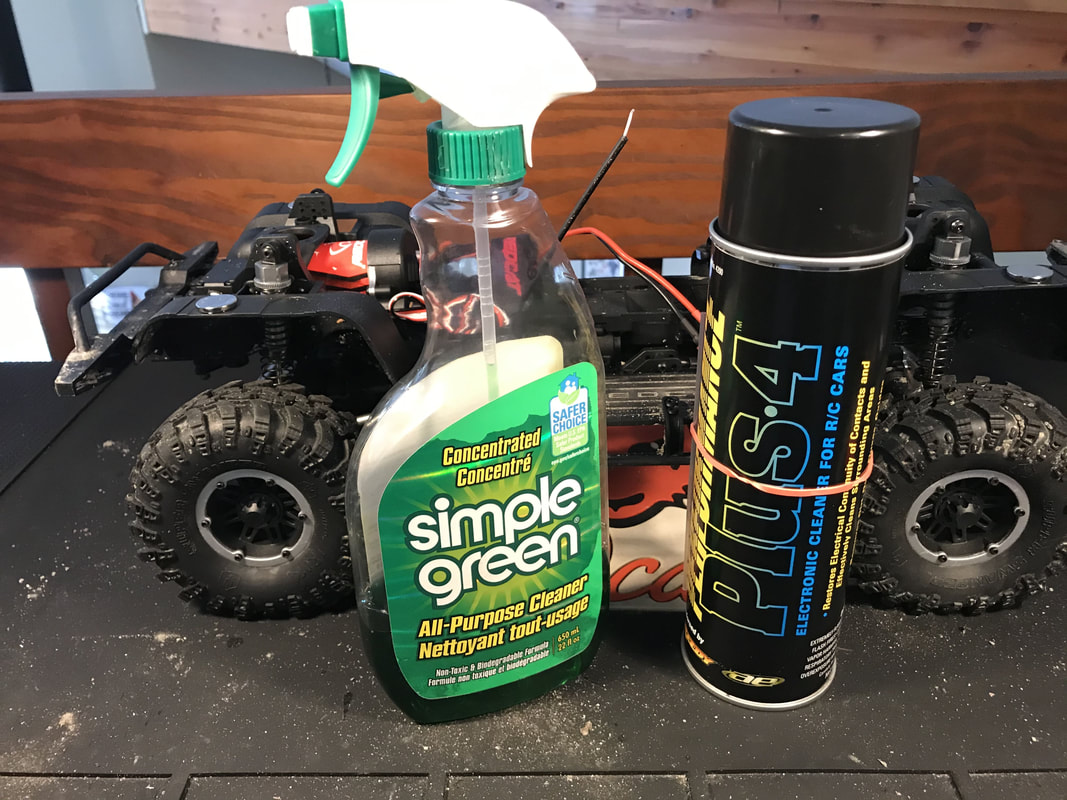 After removing the velcro, I thoroughly cleaned the inner fenders on the chassis and underside of the body. First, I used Simple Green to remove any dirt and then followed that with some motor spray to ensure all of the glue residue from the velcro and any mold release agents were removed from the plastic. Cleaning these parts well should help ensure the magnets stay in place 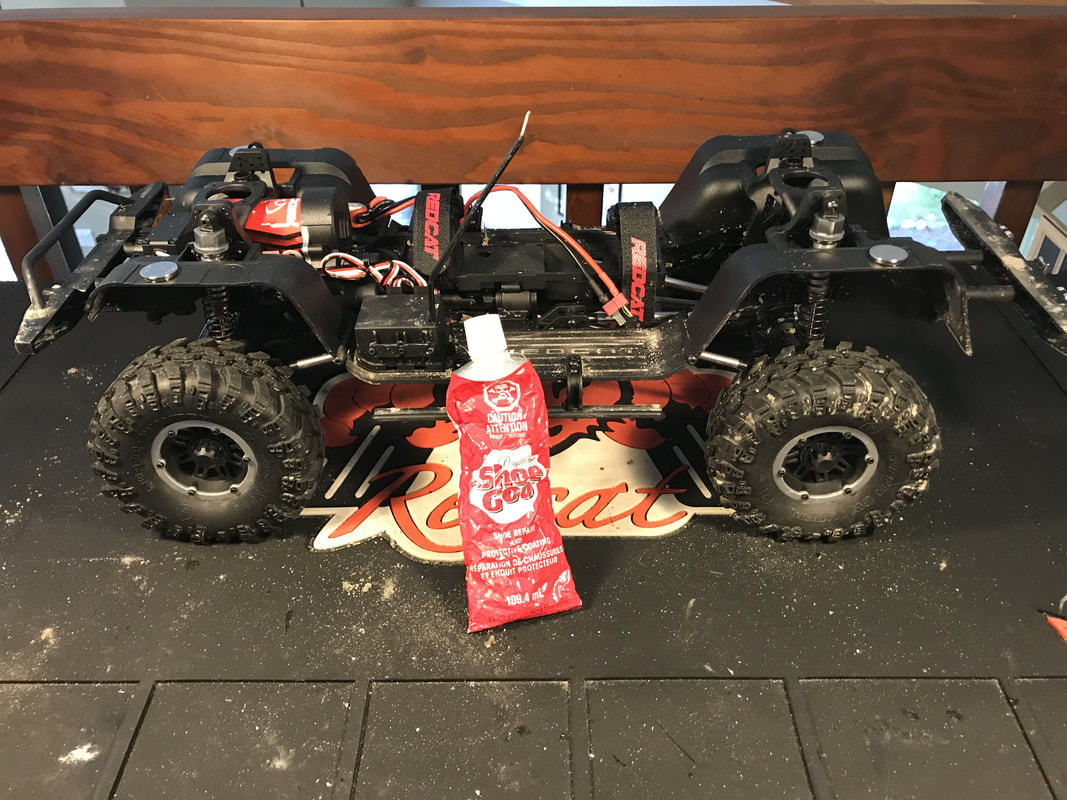 After everything was clean and dry, I used Shoe Goo to attached the magnets to the chassis then let them sit for an hour while the glue dried.  Next, I dropped a second magnet on top of each of the chassis magnets. I did this to make sure I had the magnetic poles of the body magnets in the correct direction. Once the second magnet was stacked on top of the original chassis magnet, I marked an "x" on the top to indicate where to add the glue so that these magnets could be affixed to the body. 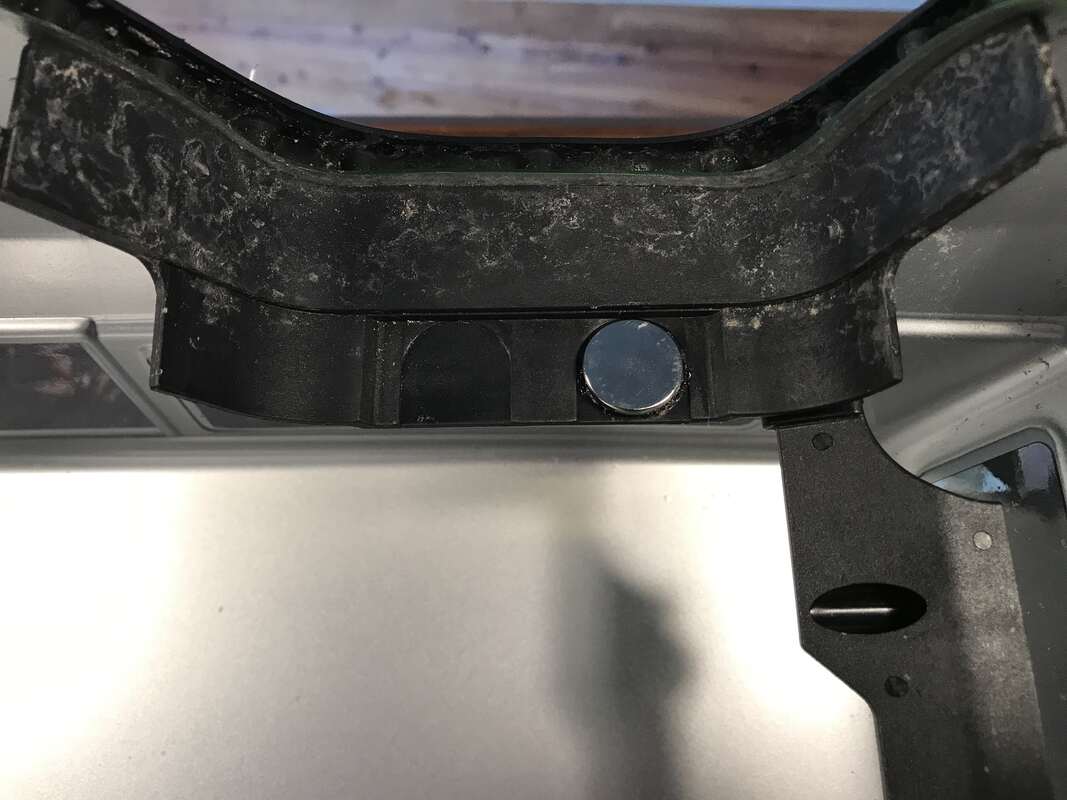 Last but not least, I followed the same process to clean and glue the magnets to the underside of the body. Even though the inner fenders are designed to accept two magnets per corner, I decided to use only one magnet per corner. These things are super strong and I think they'll be more than strong enough to hold the body on. If I discover otherwise, I'll update this post in the future. Also, the magnets do add a little weight up high and I wanted to keep the additional weight to a minimum 'till next time Rob And here are some amazon links to what you'll need to do this project yourself:
UPDATE: Shoe Goo may not be the best choice for securing the magnets. So far, two have come loose. I'll clean and prep the magnets and try again but if this continues to be an issue, I'll try something else and update this post again |